Build a watertight barrier that stands the test of time—avoiding mold, structural damage, and costly repairs with a systematic, code-aligned approach.
Water is the lifeblood of a bathroom, but when it escapes its intended path, it becomes a persistent threat to homes. Even a small leak behind a shower wall can foster mold growth, compromise structural integrity over time, and lead to significant repair expenses. Yet, effective waterproofing isn’t reserved for seasoned contractors; it’s a methodical process grounded in physics, material science, and building codes. This guide dismantles the complexity of shower and tub surround waterproofing into an actionable, layered defense system—equipping you with the knowledge to execute flawlessly or confidently oversee a professional installation. Whether you’re renovating a century-old bungalow or updating a modern condominium, the principles herein form the essential foundation of every durable, healthy bathroom.
Introduction: Why Waterproofing Is Essential
Imagine water not as a contained stream flowing down drainpipes, but as a persistent, seeking force. It moves through capillary action along microscopic cracks, migrates behind tiles via vapor diffusion, and pools silently in wall cavities where humidity condenses. In bathroom construction, moisture management isn’t an optional upgrade—it’s the core engineering challenge. The International Residential Code (IRC) Section P2709 and the Tile Council of North America (TCNA) Handbook explicitly require continuous waterproofing membranes beneath tile in all shower receptors and tub surrounds. These standards exist because industry experience consistently identifies inadequate waterproofing as a leading cause of premature bathroom failure. Beyond code compliance, consider the human impact: hidden moisture can foster mold growth, trigger respiratory sensitivities, warp framing materials, corrode fasteners, and affect property value. A properly executed waterproofing system operates invisibly for years, while a compromised one demands invasive repairs. This guide synthesizes established industry practices—from traditional methods to modern membrane systems—into a clear, actionable methodology. We begin not with products, but with philosophy: waterproofing succeeds through redundancy, attention to transitions, and respect for water’s persistent nature. Understanding why each layer matters transforms technical steps into intuitive practice.
The Three-Layer Defense System: A Framework for Comprehensive Moisture Management
Forget the myth of a “magic bullet” product. True waterproofing resilience emerges from three interdependent layers working in concert. This framework—refined through widespread industry application—addresses moisture at every phase of its potential journey. Layer 1 manages bulk water at the source. Layer 2 creates an impermeable barrier against residual moisture. Layer 3 provides fail-safe drainage and seals critical vulnerabilities. Skipping any layer creates a single point of failure. When integrated, they form a system where even if one component faces installation challenges, others provide compensating protection. This redundancy supports reliable outcomes whether executed by dedicated DIYers or professionals: the system accommodates careful human execution while demanding respect for core principles. Let’s explore each layer with precision.
Layer 1: Substrate Preparation and Slope Verification
This foundational layer determines whether water ever reaches the waterproofing membrane. Its purpose is simple: guide all liquid water efficiently toward the drain before it can linger. In showers, this means creating a pre-slope beneath the waterproofing membrane. In tub surrounds, it means ensuring the wall substrate is stable, flat, and free of contaminants that could compromise adhesion.
Why This Layer Is Crucial:
Water seeks the path of least resistance. Without positive slope toward the drain, water pools on the shower floor substrate. Even a well-installed membrane above will trap this standing water between itself and the substrate. Trapped moisture has nowhere to go—it may gradually affect wood substrates, encourage biological growth between layers, and create pressure that challenges membrane integrity over time. Industry observation indicates that inadequate pre-slope or flat substrates are frequently associated with shower leaks. For tub surrounds, an uneven wall substrate creates voids behind tile where moisture may condense and persist unseen.
How to Execute Correctly:
For Showers (Pre-Slope):
Begin with a structurally sound subfloor (minimum ¾” exterior-grade plywood over joists spaced ≤16″ OC). Install a pre-slope using a cementitious mortar bed (deck mud) mixed to a damp, packable consistency. The critical specification: a slope of ¼ inch per foot radiating outward from the drain. For a standard 36″x36″ shower, this means the perimeter should be approximately 1.5 inches higher than the drain flange. Use a laser level or long straightedge with a precision level to verify slope in multiple directions before the mortar sets. Embed a layer of wire lath into the wet mortar for reinforcement if required by local code or substrate conditions. Allow full cure time (typically 24–72 hours) before proceeding. The surface should feel uniformly firm with no soft spots.
For Tub Surrounds (Wall Substrate):
Remove existing wall materials down to studs. Inspect framing for signs of prior moisture exposure, deterioration, or damage—repair or replace compromised studs. Install cement backer board (CBU) like HardieBacker or Durock using corrosion-resistant screws spaced 6–8 inches apart. Leave a consistent 1/8-inch gap between sheets and at all perimeter edges (filled later with sealant). Tape all seams with alkali-resistant mesh tape embedded in thinset mortar. For areas above the tub flange or shower curb, ensure the CBU extends at least 3 inches beyond the wet area perimeter. Verify flatness with a 4-foot level; high spots create hollow spots behind tile where moisture may collect, while low spots cause lippage and stress points.
Common Mistakes to Avoid:
– Skipping Pre-Slope Entirely: Installing membrane directly over a flat subfloor traps water permanently beneath the shower floor assembly.
– Incorrect Slope Calculation: Using visual estimates. A slope less than ¼” per foot won’t move water effectively; steeper slopes may cause installation difficulties during tiling.
– Rushing Cure Time: Walking on or applying membrane to uncured mortar risks cracking the pre-slope, creating channels for water.
– Ignoring Substrate Flatness on Walls: Assuming tile adhesive will compensate. It won’t—voids behind tile become potential moisture reservoirs.
– Using Greenboard or Paper-Faced Drywall: These materials absorb moisture and deteriorate. Cement board or water-resistant gypsum board rated for wet areas (like DensShield) are mandatory per code.
Illustrative Example: Installing a membrane directly over an unprepared flat plywood subfloor can allow water to pool beneath the shower floor. Over time, trapped moisture may affect the subfloor and framing, potentially requiring extensive remediation. The pre-slope isn’t “extra work”; it’s the foundational step that enables the entire system to function as intended.
Layer 2: Primary Waterproofing Membrane Application
This is the heart of the system: a continuous, seamless barrier that blocks liquid water while often allowing vapor to escape (breathability). Modern membranes fall into three categories, each with distinct installation protocols. The goal is absolute continuity—no gaps, pinholes, or weak seams.
Why This Layer Is Crucial:
Tile and grout are not waterproof. Ceramic tile absorbs small amounts of water; grout (even epoxy formulations) remains somewhat porous. Water penetrates through grout lines, tile bodies, and microscopic openings daily. Without a membrane, this moisture migrates directly into wall cavities and subfloors. The membrane intercepts this water, channeling it safely to the drain. Its continuity is essential—like protective clothing with a single breach, one flaw compromises the entire barrier. Building science principles confirm that membranes with integrated drainage features (like sheet membranes with fleece backing) help manage hydrostatic pressure compared to non-drained systems.
How to Execute Correctly:
Sheet Membranes (e.g., Schluter Kerdi, Laticrete Hydro Ban Sheet):
Ideal for those seeking visual feedback during installation. Unroll membrane smoothly over the prepared substrate (pre-sloped shower floor or taped CBU walls). Overlap seams by minimum 2 inches. Seal seams, corners, and penetrations using the manufacturer’s specifically formulated sealant tape or liquid adhesive—never standard duct tape or silicone. For inside corners, make a relief cut at the apex to allow the membrane to lie flat without wrinkles. Around drains, follow the precise clamping sequence: position membrane over drain flange, insert clamping ring, tighten bolts in a star pattern to avoid warping. Membrane must extend continuously up walls at least 3 inches above the shower head rough-in or the top of the tub flange. For curbless showers, membrane must wrap seamlessly under the linear drain and up the opposing wall.
Liquid-Applied Membranes (e.g., Laticrete Hydro Ban, Custom Building Products RedGard):
Require meticulous surface prep and application thickness. Stir thoroughly (do not thin). Apply with a notched trowel or roller to achieve the exact wet-film thickness specified (typically 80–120 mils). Use a wet-film thickness gauge—a critical, low-cost tool—to verify coverage. Apply in multiple coats if needed, allowing proper flash-off time between coats (membrane should be tacky but not wet). Reinforce inside corners, seams, and penetrations with polyester mesh tape embedded into the first coat. Critical: liquid membranes must cure to a uniform color (e.g., RedGard turns from pink to red) with no tackiness before flood testing or tile installation. Humidity and temperature significantly affect cure time—follow manufacturer charts precisely.
Fabric-Reinforced Liquid Systems (e.g., Mapei AquaDefense):
Combine liquid membrane with embedded fabric mesh at stress points. Apply base coat of liquid membrane. Immediately embed alkali-resistant fabric mesh into wet membrane at all corners, seams, changes of plane, and around penetrations. Apply top coat to fully encapsulate fabric. This creates a flexible, reinforced zone at high-stress areas prone to movement.
Common Mistakes to Avoid:
– Insufficient Seam Overlap: Overlapping less than 2 inches creates potential weak points where moisture may migrate.
– Skipping Reinforcement at Corners: Inside corners experience significant movement; unreinforced liquid membranes are vulnerable here.
– Applying Liquid Membrane Too Thin: Guessing thickness risks pinholes. A wet-film gauge prevents this common oversight.
– Sealing Membrane to Drain Incorrectly: For sheet membranes, failing to clamp the membrane between the drain flange and clamping ring creates a potential leak path.
– Ignoring Temperature/Humidity During Cure: Applying liquid membrane outside recommended conditions may compromise curing.
– Cutting Membrane Too Short: Membrane must extend beyond the wet area perimeter. Stopping at edges allows potential wicking at transitions.
Analogy for Clarity: Think of the membrane as the skin of a fruit. An intact barrier (like a grape) protects the interior completely. A single puncture (like a blueberry with a tiny breach) allows moisture ingress, leading to degradation. The membrane’s integrity is everything.
Layer 3: Secondary Drainage and Sealant Integration
This layer addresses what Layers 1 and 2 may not fully manage: incidental moisture at transitions, vapor diffusion, and temporary overflow scenarios. It’s the complementary layer of defense—often overlooked but critical for long-term resilience.
Why This Layer Is Crucial:
No system is perfect. Tile grout may develop hairline cracks over years. Sealant degrades with cleaning and environmental exposure. A temporarily clogged drain causes overflow. Layer 3 provides escape routes for incidental moisture and seals the most vulnerable junctions. In showers with pre-slope and membrane, a weep hole system at the drain allows any moisture trapped between the pre-slope and membrane to escape. At wall-to-floor transitions, flexible sealant accommodates building movement without cracking. For tub surrounds, sealing the gap between the tub flange and wall substrate prevents water from migrating behind the tub—a frequently observed failure point in field assessments.
How to Execute Correctly:
Shower Drain Weep System:
When installing the drain assembly over the pre-slope and membrane, ensure the drain body has open weep holes (small slots near the base). These must remain unobstructed by mortar, sealant, or debris. During tile installation, avoid packing thinset into these holes. They allow incidental moisture between the pre-slope and membrane to drain slowly into the main drain path. Verify weep holes are clear before finalizing the drain.
Critical Sealant Applications:
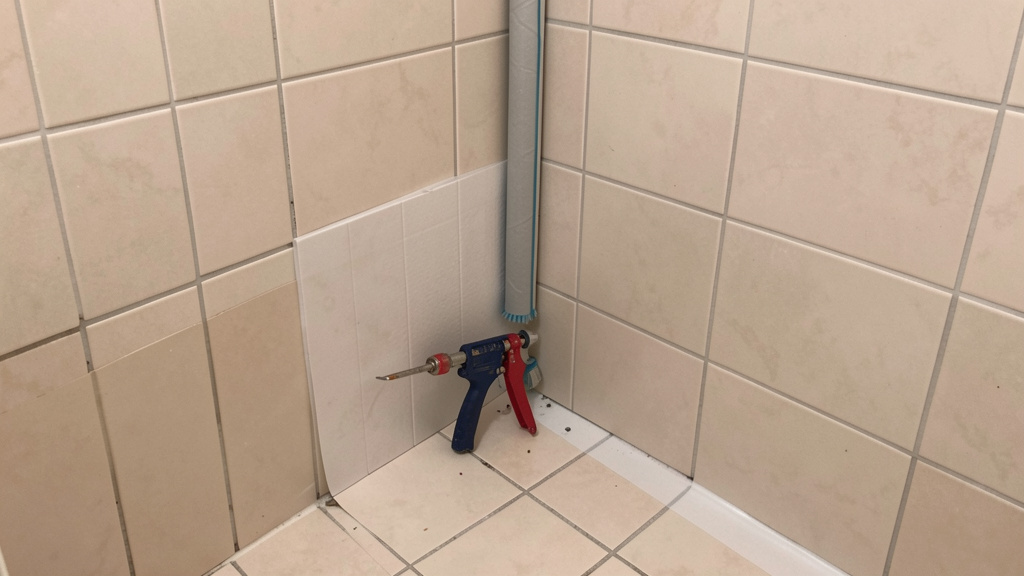
– Shower Curb/Threshold: Apply a continuous bead of 100% silicone sealant (not acrylic latex caulk) where the shower floor membrane meets the vertical wall membrane before tiling. This creates a flexible, waterproof bridge at a high-stress corner.
– Tub Flange to Wall: After setting the tub and installing wall substrate, clean the gap between tub flange and CBU thoroughly. Fill with backer rod if gap exceeds ¼ inch. Apply a continuous bead of mildew-resistant, 100% silicone sealant rated for “tub and tile.” Tool the bead smoothly for full adhesion.
– Penetrations (Valves, Handles): After membrane application but before tile, seal around valve body penetrations with membrane-compatible sealant. Post-tile, apply a thin bead of silicone around the escutcheon plate perimeter.
– Change of Plane Transitions: Where shower wall meets bathroom floor outside the wet area, use silicone sealant instead of grout. Grout cracks here due to foot traffic vibration; flexible sealant moves with the structure.
Vapor Management:
In climates with high humidity or bathrooms with limited ventilation, consider a vapor-permeable membrane (like some sheet membranes with fleece backing) that allows trapped moisture vapor to escape outward through the wall assembly, reducing condensation risk inside the cavity. Pair with proper bathroom ventilation (see FAQ).
Common Mistakes to Avoid:
– Using Acrylic Caulk Instead of Silicone: Acrylic formulations shrink, crack, and mildew more readily. Silicone maintains flexibility and waterproofing properties longer in wet areas.
– Sealing Weep Holes: Accidentally blocking drain weep holes with mortar traps moisture between layers.
– Skipping Pre-Tile Sealant at Curb: Relying solely on grout at the shower floor/wall corner significantly increases future leakage risk.
– Overfilling the Tub Flange Gap: Excess sealant may compromise adhesion. Proper tooling ensures a durable seal.
– Ignoring Movement Joints: Filling all gaps with rigid grout. Every change of plane (wall-to-floor, wall-to-wall) benefits from flexible sealant.
Illustrative Insight: Using inappropriate sealant at the tub flange interface may allow water to migrate behind the tub over time. This can lead to saturation of surrounding materials and potential biological growth within wall cavities. Using quality silicone sealant at this critical junction is a simple, high-impact step that supports long-term performance. The modest investment in proper materials prevents significantly more complex remediation later.
The Fundamental Principle: Waterproofing succeeds not through a single product, but through a coordinated system where each layer addresses specific moisture pathways—redundancy transforms vulnerability into resilience. Water will test every seam, corner, and transition; your defense must be equally thorough at every point.
Understanding Common Failure Points: Learning from Observed Patterns
To prevent issues, study recurring patterns documented in field assessments. Understanding these “vulnerable zones” shifts focus from generic steps to targeted precision.
The Inside Corner Convergence (Shower Floors):
Where two shower walls meet the floor forms a 90-degree inside corner under constant stress. Tile expands/contracts with temperature; building settles; users brace against walls. This movement concentrates at the corner. If the membrane isn’t properly reinforced (fabric tape for liquid systems, relief cuts for sheet membranes), integrity may be compromised. Water penetrates through grout, follows the path behind the membrane, and flows downward. Prevention: Double-reinforce this zone. For liquid membranes, apply mesh tape. For sheet membranes, ensure seamless wrapping. Post-installation, use silicone sealant (not grout) in this corner.
The Tub Flange Interface:
Alcove tubs have a vertical flange that interfaces with the wall substrate. If the gap between flange and substrate isn’t sealed before wallboard installation, water may travel behind the flange into the wall cavity. Even if sealed later with surface caulk, movement may separate the flange from the wall over time. Prevention: During rough-in, apply sealant along the top edge of the flange before setting the tub. After wall substrate is installed, seal the visible gap with silicone. This creates a dual-seal approach.
Drain Assembly Vulnerabilities:
Leaks often originate not at the drain pipe, but where the membrane connects to the drain body. Common concerns: membrane not clamped securely (sheet systems), liquid membrane not fully bonded to drain flange, or weep holes blocked. Water pools under the shower floor, migrating outward. Prevention: Follow manufacturer drain instructions precisely. For sheet membranes, stretch membrane taut over drain flange before clamping. Verify weep holes remain visible and clear after installation. Perform a pre-tile flood test (see Testing section).
Penetration Points (Valves, Handles, Grab Bars):
Every hole through the membrane is a potential pathway. Shower valves require precise membrane sealing around the brass body. Post-installation, if the escutcheon plate isn’t sealed, water may drip behind it during use. Grab bars installed through tile without proper backing or sealant create direct conduits. Prevention: Seal membrane penetrations during rough-in with membrane-compatible sealant. Post-tile, apply silicone around all fixture plates. For grab bars, use blocking between studs for secure mounting, and seal mounting holes before installation.
Transition Zones (Curb, Threshold, Niche Edges):
Where the shower floor meets the bathroom floor, or where a niche meets the wall plane, dissimilar materials meet. Rigid grout cracks here due to differential movement. Water wicks through the crack via capillary action. Prevention: Always use flexible sealant (silicone) at these transitions, not grout. Install movement joints per TCNA guidelines—typically every 8–12 feet in large areas, but always at changes of plane.
Material Degradation Over Time:
Even well-executed installations require maintenance. Silicone sealant degrades with UV exposure (near windows) or harsh cleaners. Grout may crack from impact or settling. Membranes can be punctured during future modifications. Prevention: Inspect sealant annually; reapply when cracking or mildew appears. Use pH-neutral cleaners. Document membrane location behind walls for future reference (take photos before closing walls).
Pattern Insight: Field assessments of compromised shower assemblies frequently identify the inside floor corner and drain assemblies as common points requiring attention. This underscores that meticulous focus on details—not just covering large surfaces—determines long-term success. Allocate effort proportionally: dedicate significant attention to corners, penetrations, and transitions.
Choosing the Right Waterproofing System for Your Project
No single system is universally “best.” The optimal choice depends on substrate condition, installer experience, budget considerations, timeline, and local code requirements. Below is a detailed comparison grounded in real-world application patterns.
| Feature | Sheet Membrane (e.g., Schluter Kerdi) | Liquid-Applied (e.g., Laticrete Hydro Ban) | Fabric-Reinforced Liquid (e.g., Mapei AquaDefense) | Traditional Hot Mop (Professional) |
|---|---|---|---|---|
| Best For | DIYers, complex shapes, faster projects | Smooth substrates, seamless appearance | High-movement areas, corners, repairs | Large commercial showers, concrete substrates |
| Skill Level | Moderate (visual feedback) | Advanced (requires thickness precision) | Moderate-High (timing critical) | Professional Only |
| Installation Speed | Relatively fast (hours) | Slower (multiple coats, cure time) | Moderate | Very Slow (requires specialized equipment) |
| Cost (36″x36″ shower) | $120–$180 | $90–$150 | $110–$170 | $300+ (labor-intensive) |
| Key Strength | Visual verification of seams; integrated drainage plane | Seamless coverage over complex shapes; bonds directly to substrate | Superior flexibility at stress points; crack-bridging capability | Proven longevity; self-healing properties |
| Key Limitation | Seams require careful taping; wrinkles problematic | Thickness critical; hard to verify coverage; sensitive to conditions | Requires precise timing for fabric embedding | Hazardous fumes; requires licensed applicator; not DIY |
| Code Acceptance | Widely accepted (ICC-ES reports) | Widely accepted (ICC-ES reports) | Widely accepted (ICC-ES reports) | Accepted but declining due to VOC regulations |
| Repairability | Patch with membrane scraps and sealant tape | Sand affected area, reapply liquid membrane | Similar to liquid-applied | Extremely difficult; often requires full replacement |
| Breathability | High (fleece backing allows vapor escape) | Low-Medium (depends on product) | Medium | Very Low (traps vapor if not drained) |
Decision Framework for Your Project:
Scenario 1: First-Time DIYer Renovating a Standard Alcove Shower
→ Recommendation: Sheet membrane system (e.g., Schluter Kerdi-Kit).
→ Why: Visual installation process builds confidence. Pre-formed corners and drain components simplify complex details. Integrated fleece creates a drainage plane, accommodating minor substrate variations. Kits include all necessary components (membrane, drain, corners, sealant tape), reducing purchasing errors. Cure time is minimal—you can tile immediately after installation.
→ Budget Path: If kit cost is prohibitive, use liquid-applied membrane only if you invest in a wet-film thickness gauge and commit to meticulous reinforcement at corners. Never skip the gauge.
→ Avoid: Hot mop or fabric-reinforced systems requiring precise timing.
Scenario 2: Repairing a Leaking Existing Shower (Membrane Accessible)
→ Recommendation: Liquid-applied membrane for spot repair.
→ Why: Can be brushed precisely over cracked areas, seams, or punctures. Bonds well to existing cured membranes (test compatibility first). Reinforce with mesh tape at repair sites. Ideal for addressing isolated concerns without full tear-out.
→ Critical Step: Clean and dry the repair area thoroughly. Sand glossy surfaces lightly for adhesion. Apply membrane extending 6 inches beyond the affected zone.
→ Avoid: Attempting to patch sheet membranes with incompatible tapes—full section replacement is often more reliable.
Scenario 3: Curbless Shower with Linear Drain
→ Recommendation: Sheet membrane system designed for linear drains (e.g., Schluter Kerdi-Drain-L).
→ Why: Pre-formed linear drain components ensure proper membrane clamping and slope integration. Sheet membranes wrap seamlessly under the drain channel and up the opposing wall. Visual verification of the long seam along the drain is critical.
→ Key Detail: Pre-slope must be meticulously crafted to direct water evenly across the entire linear drain length. Use a laser level for precision.
→ Avoid: Liquid membranes on large linear drain installations—achieving consistent thickness over long distances is challenging without professional experience.
Scenario 4: Historic Home with Irregular Walls/Floors
→ Recommendation: High-build liquid membrane (e.g., Laticrete 9235) with fabric reinforcement.
→ Why: Conforms perfectly to uneven surfaces where sheet membranes would wrinkle or bridge voids. Fabric reinforcement adds strength over substrate irregularities.
→ Critical Step: Fill major voids (>1/4″) with patching compound before membrane application. Multiple thin coats are better than one thick coat.
→ Avoid: Sheet membranes—they require relatively flat substrates to lie smoothly without stress points.
Material Compatibility Checklist:
Before purchasing, verify:
– Membrane is rated for continuous immersion (showers/tubs), not just “water-resistant.”
– Drain assembly is specifically designed to work with your chosen membrane system (e.g., Schluter drain for Kerdi membrane). Mixing systems may void warranties and compromise performance.
– Sealants and tapes are manufacturer-approved for your membrane. Generic products may not bond properly.
– Local building department accepts the system. Request the ICC-ES evaluation report number from the manufacturer—this supports code compliance verification.
– Substrate compatibility: Some liquid membranes require priming on certain backer boards. Sheet membranes need a stable, flat surface.
Budget-Conscious Strategy Without Compromising Safety:
1. Prioritize the Membrane: Allocate budget here first. A compromised membrane leads to significantly higher future costs.
2. DIY Labor: Install the membrane yourself using a proven system (sheet membranes often save time). Hire a pro only for complex plumbing or structural work.
3. Source Kits: Manufacturer kits often cost less than buying components individually and ensure compatibility.
4. Borrow Tools: Rent a laser level or borrow a wet-film gauge from a tool library.
5. Avoid Unverified Products: Unknown brands on discount sites often lack proper certifications. Stick with TCNA-recognized brands.
Consideration: If budget is extremely tight and shower use is infrequent (e.g., guest bathroom), a meticulously applied two-coat liquid membrane with full fabric reinforcement at all corners and seams may be acceptable. But never skip the flood test.
Step-by-Step: Waterproofing a Curbless Shower
Curbless showers offer universal accessibility and modern aesthetics but demand precision in slope and drainage. Water must flow seamlessly across the threshold without pooling. This walkthrough integrates the Three-Layer Defense System into actionable steps.
Phase 1: Substrate and Drain Preparation (Layer 1)
1. Verify Structural Integrity: Ensure subfloor is sound ¾” plywood or OSB. Sister joists if needed for rigidity. Install cement backer board on walls per manufacturer specs.
2. Position Linear Drain: Place drain channel along the shower exit wall. Mark outline. Cut opening precisely—drain must sit level with finished floor height. Secure drain body to subfloor with screws through mounting flanges. Critical: The drain channel must be perfectly level along its entire length; use shims under mounting flanges if subfloor is uneven.
3. Create Pre-Slope: Mix deck mud (5 parts sand : 1 part Portland cement). Starting at the drain channel, build slope outward at ¼” per foot. For a 60″ long shower, the far wall should be approximately 1.25″ higher than the drain lip. Use straightedges and laser level to verify slope in multiple directions. Embed wire lath if substrate is wood. Cure 48 hours. Pro Tip: Place temporary spacers (e.g., 1/8″ wedges) at the shower entrance to ensure the slope transitions smoothly to the bathroom floor level—no trip hazard.
4. Install Weep System: Confirm drain body has open weep holes facing the pre-slope cavity. Keep clear of debris.
Phase 2: Membrane Application (Layer 2)
1. Prepare Substrate: Clean pre-slope and walls thoroughly. Dampen (do not soak) cement board walls to improve adhesion for sheet membranes.
2. Install Sheet Membrane (Recommended):
– Start at the drain. Unroll membrane over pre-slope, centering it over the drain channel.
– Make relief cuts at corners to allow membrane to lie flat without wrinkles.
– Position membrane over drain flange. Insert clamping ring. Tighten bolts in a star pattern to specified torque (use torque screwdriver if required). Membrane must be taut but not stretched.
– Extend membrane up walls continuously. Overlap seams by 2+ inches. Seal all seams, corners, and penetrations with manufacturer’s sealant tape.
– At the shower entrance (threshold), wrap membrane seamlessly under the drain channel and up the opposing wall 3+ inches. This creates a continuous “tray.”
– Verify no wrinkles, bubbles, or gaps. Membrane should feel drum-tight.
3. Alternative: Liquid Membrane:
– Apply first coat with notched trowel. Immediately embed polyester mesh tape at all corners, seams, and around drain flange.
– Apply second coat to fully encapsulate fabric. Use wet-film gauge to confirm adequate thickness.
– Pay special attention to the drain flange interface—brush membrane meticulously into the gap between flange and pre-slope.
– Cure per manufacturer (typically 24 hours). Verify uniform color and non-tackiness.
Phase 3: Secondary Defense Integration (Layer 3)
1. Seal Critical Transitions: Apply a continuous bead of membrane-compatible sealant where the membrane meets the drain channel before tiling. This seals the mechanical clamp joint.
2. Threshold Detail: At the shower entrance, ensure membrane extends under the threshold area. After tile installation, use 100% silicone sealant (not grout) where the shower floor tile meets the bathroom floor tile. This accommodates movement and prevents water tracking.
3. Wall-to-Floor Corner: Apply silicone sealant in the inside corner where shower walls meet the floor before tiling. This creates a flexible, waterproof bridge beneath the tile.
Verification Before Tiling:
– Perform a brief “splash test”: Pour water along the threshold edge. It should flow immediately toward the drain with no pooling.
– Inspect all seams and drain clamp with a bright light—no pinholes or gaps visible.
– Confirm weep holes at drain are unobstructed.
Why This Sequence Works: The pre-slope ensures bulk water moves instantly to the drain. The membrane blocks residual moisture. The threshold sealant and weep system handle incidental overflow and trapped vapor. Redundancy at every stage supports reliable performance.
Step-by-Step: Waterproofing a Standard Shower Pan with Curb
The classic shower with a raised curb remains popular for its simplicity and water containment. The curb itself is a critical waterproofing element—not just a tile backing.
Phase 1: Substrate and Curb Construction (Layer 1)
1. Build the Curb:
– Wood Frame Method (Common): Stack two 2x4s on edge atop the shower threshold framing. Secure with screws. Cover entire curb (top and sides) with cement backer board. Critical: The curb must be perfectly level on top and plumb on sides. Slope the top surface of the curb inward toward the shower at 1/8″ per foot to prevent water pooling on the curb top.
– Mortar Curb Method (More Durable): Build a wood frame curb. Apply metal lath. Pack with deck mud to form a solid, sloped curb. Cure 48 hours. Cover with membrane later.
2. Create Pre-Slope: Same as curbless shower—¼” per foot slope from perimeter to drain. Ensure slope extends up the inside face of the curb slightly, so water contacting the curb flows back into the shower pan. Cure fully.
3. Install Drain: Position standard 2″ shower drain at lowest point. Secure to subfloor. Verify weep holes are oriented correctly (typically facing the pre-slope cavity).
Phase 2: Membrane Application (Layer 2)
1. Start at the Drain: Position membrane over pre-slope. Clamp securely to drain flange per manufacturer instructions.
2. Wrap the Curb: This is the most critical detail. Membrane must wrap continuously over the pre-slope, up the inside face of the curb, over the top, and down the outside face at least 3 inches. Do not cut and seam at the curb top—that creates a vulnerability precisely where water pools and movement occurs. For sheet membranes, make relief cuts at the top outside corner to allow smooth wrapping without wrinkles. Seal all seams meticulously.
3. Walls and Corners: Extend membrane up walls 3+ inches above shower head rough-in. Reinforce inside corners with pre-formed corners (sheet systems) or mesh tape (liquid systems). Seal all penetrations.
4. Curb Top Seal: Before tiling, apply a bead of sealant along the inside edge where the curb top meets the vertical wall membrane. This seals the high-stress corner beneath the tile.
Phase 3: Secondary Defense (Layer 3)
1. Curb Transition: After tile installation, apply 100% silicone sealant where the shower floor tile meets the inside vertical face of the curb tile. Do not grout this joint.
2. Outside Curb Detail: Where the curb’s outside face meets the bathroom floor, use silicone sealant instead of grout. This joint experiences foot traffic vibration.
3. Threshold Seal: If the shower has a door track, seal beneath the track with silicone before installation to prevent water tracking under the threshold.
Common Curb Considerations:
– Flat Curb Top: Water pools on the curb, eventually challenging seals. Always slope inward.
– Membrane Seam at Curb Top: Cutting membrane to end at the curb top creates a seam where water pools and movement occurs. Continuous wrap is essential.
– Ignoring Outside Curb Face: Moisture from splashing or cleaning can wick up the outside curb face if not sealed. Membrane must extend down the outside face.
Illustrative Fix: Dampness observed on the bathroom floor outside a shower led to discovery that the membrane stopped at the top of the curb. Water tracked under the curb tile, through the grout line at the outside base, and onto the floor. Solution required removing curb tile, extending membrane down the outside face, and resealing—a repair that would have taken minutes during initial install.
Step-by-Step: Waterproofing a Tub Surround
Tub surrounds present unique challenges: the tub flange interface, potential for water pooling on the tub deck, and transitions to non-wet areas. Alcove tubs (three-wall) are most common; freestanding tubs require different strategies.
Phase 1: Tub Installation and Substrate (Layer 1)
1. Set the Tub Correctly:
– Place tub in position. Shim legs/base until tub is perfectly level front-to-back and side-to-side. Critical: The tub must not rock. Uneven support stresses the tub and creates gaps at the flange.
– Seal the Flange During Rough-In: Before installing wall substrate, run a continuous bead of polyurethane sealant (e.g., OSI Quad Max) along the top edge of the tub’s vertical flange. This creates the first line of defense behind the wall.
2. Install Wall Substrate:
– Slide cement backer board (CBU) behind the tub flange. The flange should be sandwiched between the tub and the CBU.
– Secure CBU to studs with corrosion-resistant screws. Leave 1/8″ gap at tub flange and all edges.
– Tape and mud all CBU seams with alkali-resistant mesh tape and thinset. Extend CBU at least 3 inches beyond the tub perimeter on all sides.
– Critical Check: Run your finger along the gap between tub deck and CBU. It should be a consistent 1/8″–1/4″ gap. Wider gaps require backer rod before sealant.
Phase 2: Membrane Application (Layer 2)
1. Membrane Coverage: Apply membrane to all wall areas that will receive tile—typically from tub deck up to at least 72″ height, and 3+ inches beyond tub edges.
2. Flange Interface Detail:
– For sheet membranes: Extend membrane down the wall to overlap the tub flange by 1–2 inches. Do not adhere membrane directly to the tub surface (acrylic/fiberglass expands differently than walls). Instead, stop membrane 1/8″ above the tub deck. Seal the gap later with silicone.
– For liquid membranes: Brush membrane carefully to the edge of the CBU, stopping 1/8″ above tub deck. Reinforce the edge with mesh tape embedded into the membrane.
3. Penetrations: Seal around faucet handles and spout penetrations with membrane-compatible sealant before tiling.
4. Niche Waterproofing (If Applicable): Install prefabricated waterproof niche. Seal all seams to wall membrane with sealant tape or liquid membrane. Extend membrane continuously into the niche interior.
Phase 3: Secondary Defense (Layer 3)
1. Primary Flange Seal: After membrane cures but before tiling, clean the gap between tub deck and CBU thoroughly. Insert backer rod if gap >1/4″. Apply a continuous, tooled bead of 100% silicone sealant rated for “tub and tile.” This is your main defense. Tooling (smoothing with a wet finger) ensures full adhesion to both surfaces.
2. Post-Tile Sealant: After tile installation and grouting, apply a second bead of silicone over the original sealant line where tile meets tub. This creates a dual-seal system and hides any minor imperfections.
3. Deck Drainage: Ensure the tub deck slopes slightly toward the tub interior (not the wall). Water pooling on the deck against the wall will challenge even the best sealant over time.
4. Transition Joints: Use silicone sealant (not grout) where tiled walls meet the bathroom floor outside the tub area.
Freestanding Tub Consideration:
For freestanding tubs with deck-mounted faucets:
– Waterproof the entire floor area where the tub sits using shower pan methodology (pre-slope, membrane).
– Create a “moat” detail: Install a continuous bead of silicone sealant on the floor around the tub’s base perimeter before setting the tub. This seals the gap between tub base and floor.
– Waterproof walls behind faucet controls per standard surround methods.
– Critical: Ensure faucet supply lines have flexible connectors to accommodate tub movement without stressing pipes.
Why the Dual-Seal Flange Method Supports Longevity:
Industry observation indicates that a single sealant bead may degrade over several years due to cleaning chemicals, temperature fluctuations, and tub flexing. The dual-seal approach (rough-in sealant + finish sealant) provides redundancy. If the visible sealant degrades, the hidden rough-in sealant continues to block moisture pathways. This simple addition significantly enhances system resilience with minimal cost or effort.
Critical Details: Sealing Penetrations, Corners, and Transitions
Water exploits the smallest vulnerabilities. Mastery lies in meticulous execution at these high-risk zones. This section provides detailed guidance for each critical detail.
Inside Corners (Shower Floors and Walls):
Why Critical: Concentrates stress from movement, temperature changes, and user contact. Most frequently observed leak origin in field assessments.
Sheet Membrane Method:
– Make a vertical relief cut from the corner apex down 2–3 inches on the membrane.
– Fold membrane smoothly into the corner. Overlap the cut edges.
– Seal the overlapped seam and entire corner with sealant tape. For extra security, apply a bead of sealant adhesive along the apex before taping.
Liquid Membrane Method:
– Apply first coat of membrane into the corner.
– Immediately embed 4″ wide polyester mesh tape centered on the corner. Press firmly to eliminate air bubbles.
– Apply second coat to fully encapsulate tape, extending 3+ inches onto each wall.
– Pro Enhancement: For high-traffic showers, apply a third coat with additional fabric reinforcement.
Post-Tile: Always use 100% silicone sealant in the inside corner where floor meets walls—never grout. Grout cracks inevitably here.
Outside Corners:
Why Critical: Prone to impact damage (elbows, cleaning tools). Membrane can tear if not protected.
Method:
– For sheet membranes: Fold membrane smoothly around the corner. Seal the edge with sealant tape. Install metal or plastic corner bead over the membrane before tiling for physical protection.
– For liquid membranes: Apply membrane around the corner. Embed mesh tape centered on the corner edge.
– Tile Tip: Use bullnose tile or prefabricated corner trim to protect the vulnerable edge. Seal the corner joint with silicone after grouting.
Drain Penetrations:
Why Critical: The membrane-to-drain interface is a mechanical connection under constant water exposure.
Sheet Membrane Protocol:
1. Position membrane over drain flange.
2. Insert clamping ring.
3. Tighten bolts in a star pattern (like lug nuts on a car wheel) to ensure even pressure.
4. Verify membrane is clamped between the flange and ring—not folded over the top.
5. Seal the outer perimeter of the clamping ring to the membrane with sealant tape.
Liquid Membrane Protocol:
1. Apply membrane generously around the drain flange.
2. Embed mesh tape radially around the flange (like spokes on a wheel).
3. Apply additional membrane to create a thick, reinforced “collar” around the flange.
4. Critical Check: After cure, run a fingernail around the flange—no gaps or thin spots should be detectable.
Universal Rule: Never seal the drain weep holes. Verify they remain open before proceeding.
Shower Valve and Handle Penetrations:
Why Critical: Water drips directly onto these penetrations during use. Movement from handle operation stresses the seal.
During Rough-In (Before Membrane):
– Seal the gap between the valve body and the substrate with fire-rated sealant or membrane-compatible sealant. This prevents air/moisture movement behind the wall.
During Membrane Application:
– Cut membrane precisely around the valve body.
– Seal the membrane edge to the valve body with sealant tape (sheet) or liquid sealant (liquid systems). Create a “gasket” effect.
Post-Tile:
– Apply a thin bead of silicone sealant around the perimeter of the escutcheon plate before snapping it into place. This seals the microscopic gap between plate and tile.
– Pro Tip: Use escutcheon plates with integrated gaskets for added security.
Shower Niche Edges:
Why Critical: Niche corners are inside corners multiplied. Water pools on niche shelves.
Method:
– Install prefabricated waterproof niche. Seal all seams to wall membrane with sealant tape.
– Extend membrane continuously into the niche interior—do not stop at the opening edge.
– Reinforce all four inside corners of the niche with mesh tape (liquid) or pre-formed corners (sheet).
– Slope the niche shelf slightly toward the shower interior (1/16″ per foot) during installation to prevent water pooling.
– Post-Tile: Seal all niche corners and the opening perimeter with silicone.
Transition to Non-Wet Areas (Shower Curb/Threshold):
Why Critical: Dissimilar materials (shower floor vs. bathroom floor) move independently. Grout cracks here consistently.
Method:
– Extend membrane under the threshold area and up the opposing wall.
– Install a movement joint: Place a flexible foam backer rod in the joint between shower floor tile and bathroom floor tile.
– Fill the joint with 100% silicone sealant rated for “high movement.” Tool smoothly.
– Color Tip: Use silicone that matches your grout color for a seamless appearance.
– Verification: After cure, press firmly on the sealant—it should flex without cracking or detaching.
Tub Spout and Diverter Penetrations:
Why Critical: Constant water exposure during use. Spout movement stresses seals.
Method:
– During rough-in, seal around pipe penetrations in the substrate.
– During membrane application, seal membrane tightly around the pipe.
– After tile installation, apply silicone sealant around the spout base where it meets the tile. For slip-fit spouts, ensure the set screw is tight to minimize movement.
– Critical Check: Turn on water and check for drips behind the spout before finalizing sealant.
The “Finger Test” for Seal Integrity:
After completing all seals but before flood testing, run a gloved finger firmly along every seam, corner, and penetration. You should feel:
– No gaps, ridges, or thin spots
– Consistent adhesion (no lifting at edges)
– Smooth transitions at corners
If your finger catches on a flaw, address it immediately. This tactile verification catches most potential concerns before they’re hidden by tile.
Common Challenges That Compromise Waterproofing (and How to Address Them)
Even experienced installers encounter these recurring issues. Awareness transforms prevention from guesswork into habit.
Challenge 1: Skipping the Pre-Slope
The Issue: Installing membrane directly over a flat subfloor or plywood.
Why It Matters: Water that penetrates tile/grout has nowhere to go. It pools permanently between membrane and substrate, potentially affecting materials over time.
The Solution: Always build a pre-slope of ¼” per foot to the drain. Verify with laser level. For existing showers being retiled without pre-slope, consult a professional about options designed for zero-slope applications, understanding this is less ideal than proper pre-slope.
Illustrative Consequence: Skipping pre-slope in a humid environment may allow trapped moisture to affect structural elements over time, requiring extensive remediation later.
Challenge 2: Using the Wrong Sealant at Critical Joints
The Issue: Applying acrylic latex caulk or standard “tub & tile” caulk at tub flanges, shower curbs, or movement joints.
Why It Matters: Acrylic caulks shrink, crack, and mildew more readily. They lack the flexibility to handle building movement. Water may track behind the failed sealant.
The Solution: Use 100% silicone sealant rated for “plumbing” or “marine” use at all wet-area transitions. Look for “mildew-resistant” and “flexible” on the label. For areas requiring paintability (outside wet zone), use polyurethane sealant.
Pro Tip: Keep two sealant guns: one dedicated to 100% silicone (for wet areas), one for paintable sealants. Label them clearly to avoid mix-ups.
Challenge 3: Inadequate Membrane Thickness (Liquid Systems)
The Issue: Guessing application thickness or applying a single thin coat of liquid membrane.
Why It Matters: Thin spots may cure unevenly, creating vulnerabilities. Membrane below minimum thickness lacks durability.
The Solution: Purchase a wet-film thickness gauge ($8–$15). Apply membrane with a notched trowel. Immediately check thickness in multiple spots. Apply second coat if needed. Follow manufacturer’s recoat window.
Verification: Cure to uniform color with no tackiness. Perform a “thumbnail test”—press firmly; no dent should remain.
Challenge 4: Blocking Drain Weep Holes
The Issue: Packing thinset mortar or sealant into the small slots (weep holes) around the drain body during tile installation.
Why It Matters: Weep holes allow incidental moisture between pre-slope and membrane to escape. Blocking them traps moisture between layers.
The Solution: Before tiling, mark weep holes with bright tape. During tile setting, use a small brush to keep holes clear. After tile installation, verify holes are open with a toothpick.
Critical Insight: Weep holes handle minimal moisture escape, not bulk water drainage. Their purpose is vapor/moisture management.
Challenge 5: Seaming Membrane at High-Stress Points
The Issue: Placing a seam at the shower curb top, inside floor corner, or tub flange edge.
Why It Matters: Seams are inherently more vulnerable than field membrane. High-stress zones experience movement, pooling water, and physical contact—increasing failure risk over time.
The Solution: Plan membrane layout to avoid seams in critical zones. Wrap membrane continuously over curbs. Use relief cuts for corners. If a seam is unavoidable near a stress point, reinforce it with extra sealant tape or fabric mesh.
Guiding Principle: “Avoid seams where water pools or movement occurs.”
Challenge 6: Rushing Cure Times
The Issue: Installing tile before liquid membrane is fully cured, or walking on uncured pre-slope.
Why It Matters: Uncured membrane lacks strength and adhesion. Tile installation stresses can compromise it. Moisture trapped during cure creates issues.
The Solution: Follow manufacturer cure times exactly, adjusting for temperature and humidity. Use a moisture meter if uncertain. When in doubt, wait longer.
Environmental Factor: Cure times vary with conditions. At lower temperatures or higher humidity, cure time may increase significantly. Check technical data sheets.
Challenge 7: Ignoring Substrate Flatness
The Issue: Installing membrane over uneven cement board with visible dips or humps.
Why It Matters: Creates voids behind tile where moisture may collect. Causes tile lippage and stress cracks. Membrane may bridge voids, creating air pockets.
The Solution: Check wall flatness with a 4-foot level before membrane application. Fill dips with thinset; sand high spots. For floors, ensure pre-slope is smooth with no trowel marks deeper than 1/8″.
Professional Standard: No gap greater than 1/8″ under a 10-inch straightedge.
Challenge 8: Skipping the Flood Test
The Issue: Assuming “it looks good” and proceeding directly to tile installation.
Why It Matters: Hidden vulnerabilities remain undetected until after tile is installed—requiring full demolition to repair.
The Solution: Always perform a 24-hour flood test (detailed in next section). It’s the only objective verification of integrity.
Mindset Shift: “The 24-hour test prevents many hours of future demolition and repair. It’s the most valuable step in the process.”
Challenge 9: Using Greenboard or Standard Drywall
The Issue: Installing paper-faced drywall or “water-resistant” greenboard in wet areas.
Why It Matters: These materials absorb moisture, swell, and deteriorate. Biological growth may occur within the paper facing.
The Solution: Use cement backer board (HardieBacker, Durock), fiber-cement board, or water-resistant gypsum board specifically rated for continuous wet areas (e.g., DensShield with integrated membrane). Verify product labeling.
Code Note: IRC explicitly prohibits paper-faced drywall in shower/tub areas. Using it may affect insurance coverage for water damage.
Challenge 10: Overlooking Real-World Use Patterns
The Issue: Designing a system that’s perfect on paper but ignores how people actually use the shower.
Why It Matters: Users brace against walls, drop items on corners, clean with tools, and leave items pooling water on ledges.
The Solution:
– Reinforce corners where users typically brace hands.
– Slope all horizontal surfaces (niches, benches) toward the shower interior.
– Specify durable, chemical-resistant sealants.
– Install grab bars during waterproofing phase (seal penetrations properly) rather than retrofitting later.
Design Wisdom: Waterproofing must accommodate real-world use, not just theoretical perfection.
Testing Your Waterproofing: The 24-Hour Flood Test Protocol
This step is essential. No exceptions. The flood test is the only objective verification that your system is watertight. Skipping it is like building a boat without launching it. This protocol, aligned with TCNA and manufacturer requirements, transforms uncertainty into confidence.
Why the 24-Hour Duration Matters:
Short tests (1–2 hours) may miss slow-developing issues. Water needs time to:
– Find potential pathways through capillary action
– Build pressure against vulnerable points
– Reveal concerns that only appear after membrane saturation
Industry observation indicates that a significant portion of issues detected in 24-hour tests were not visible at the 4-hour mark. The extra time provides critical assurance.
Step-by-Step Flood Test Procedure:
1. Pre-Test Verification (Critical):
– Confirm all membrane seams, corners, and penetrations are fully cured and sealed.
– Verify drain weep holes are unobstructed.
– Place a temporary plug in the drain (use a test plug designed for this purpose—not a rag or makeshift object).
– Mark the target water level on the shower wall with tape: 2 inches above the drain flange (or highest point of pre-slope). For curbless showers, mark 1 inch above the linear drain channel.
- Initial Fill and Inspection:
- Slowly fill the shower pan with clean water to the marked level.
- Immediately inspect underneath the shower (from basement or adjacent room) with a bright flashlight. Check:
- Around the drain pipe penetration
- Along the perimeter where shower meets subfloor
- At any plumbing penetrations
-
Wipe all surfaces dry before filling to distinguish new moisture from residual dampness.
-
The 24-Hour Wait:
- Leave water undisturbed for exactly 24 hours.
- Mark the exact water level on the tape with a pen.
- Place barriers to prevent accidental draining or disturbance.
-
Do not use the bathroom during this period.
-
Post-Test Evaluation:
- After 24 hours, check the water level mark. A drop of less than 1/8 inch is generally acceptable (due to evaporation and minor absorption). A drop greater than 1/8 inch warrants investigation.
- Thoroughly inspect all areas checked in Step 2. Look for new moisture, drips, or discoloration.
- Check the outside of the shower curb or threshold for moisture tracking.
-
Inspect the drain clamp area from inside the shower—no water should be visible around the clamping ring.
-
If a Concern Is Detected:
- Drain the water completely.
- Dry the area thoroughly with fans.
- Identify the source:
- Water under shower: Likely drain clamp concern or membrane issue near drain.
- Water at perimeter: Potential seam issue at wall/floor transition or curb wrap.
- Water at specific penetration: Valve or handle seal concern.
- Repair meticulously: Clean area, apply membrane patch per manufacturer instructions, reinforce seams.
-
Repeat the full 24-hour flood test. Never assume a small repair resolved the issue.
-
Passing the Test:
- Drain water.
- Remove plug.
- Allow membrane to dry completely (typically 4–12 hours) before proceeding to tile installation.
- Document the success: Take timestamped photos of the filled shower and dry underside. Keep for your records.
Flood Test Variations:
– For Tub Surrounds: Since you can’t flood the tub deck, perform a “hose test”: Seal the gap between tub and wall substrate with temporary tape. Slowly run water from a hose along the top edge of the tub flange for 15 minutes while inspecting behind the tub (if accessible) or on the floor below. Less reliable than a full flood test but necessary for tubs.
– For Existing Showers (Retrofit): If membrane is under tile and inaccessible, flood test is impossible. This underscores why proper initial installation is critical.
Professional Practice Insight:
Industry professionals consistently emphasize the flood test as non-negotiable. Even experienced installers report instances where testing revealed hidden concerns—preventing future damage and ensuring client satisfaction. It’s not optional; it’s the verification step that validates the entire process.
Mindset Reframe:
View the flood test not as a delay, but as the moment you confirm your work’s integrity. The peace of mind it provides—knowing your installation is verified—is worth the wait. It transforms uncertainty into assurance.
When to Consult a Professional: Guidance for Complex Situations
DIY empowerment is valuable, but discernment is wisdom. Some situations benefit from licensed expertise. Recognizing these boundaries protects your safety, investment, and home.
Situations Where Professional Consultation Is Strongly Recommended:
– Structural Concerns Discovered: During demolition, you find deteriorated floor joists, compromised studs, or sagging subfloors. Structural repairs require engineering assessment and framing expertise.
– Plumbing Modifications Needed: Moving the drain location, relocating shower valves, or altering water supply lines. Plumbing codes govern slope, venting, and connections—errors cause backups, leaks, or health hazards. Licensed plumbers carry insurance for mistakes.
– Electrical Work Involved: Installing heated floors, adding GFCI outlets near the shower, or relocating lights. Electrical work without proper licensing violates code and creates fire/shock risks.
– Historic Home Complications: Plaster walls with horsehair lath, uneven framing, or potential hazardous materials. Specialized techniques and safety protocols are essential.
– Recurring Moisture Issues in Existing Shower: If a shower has leaked before, hidden damage (mold, rot) likely exists. Professionals use moisture meters and inspection tools to assess fully.
– Insurance or Warranty Requirements: Some homeowner policies or product warranties require licensed installer certification for coverage. Verify before proceeding.
Scenarios Where Professional Input Adds Value:
– Curbless Showers with Multiple Drains: Slope calculations and drain coordination become highly technical. A layout error causes pooling.
– Steam Showers: Require fully sealed ceilings, specialized membranes, and vapor barriers. Steam penetrates where water cannot.
– Large Format Tile or Complex Patterns: Tile installation stresses the membrane. Professionals ensure proper thinset coverage to avoid voids.
– Radiant Floor Heating Integration: Heating mats/cables must be installed over the waterproofing membrane but under the tile. Incorrect placement damages the system.
– Accessibility Modifications (ADA Compliance): Grab bar blocking, slope requirements, and fixture placement have strict dimensional standards.
How to Evaluate a Waterproofing Professional:
1. Verify Licenses and Insurance: Request copies of contractor’s license, liability insurance, and workers’ comp. Confirm validity with issuing agency.
2. Ask Specific Technical Questions:
– “Will you install a pre-slope under the membrane?” (Should be yes)
– “What membrane system do you recommend and why?” (Should explain options)
– “Do you perform a 24-hour flood test?” (Essential)
– “How do you handle the tub flange seal?” (Should describe dual-seal method)
3. Request References and Photos: Ask for recent projects with similar scope. Contact references specifically about waterproofing details.
4. Review the Contract: Must specify:
– Exact membrane product and ICC-ES report number
– Pre-slope inclusion
– Flood test protocol
– Warranty terms
5. Note Potential Concerns:
– Cash-only deals
– Pressure to sign immediately
– Vague descriptions like “we waterproof it” without technical details
– Unwillingness to provide references
Collaborative Approach for Confident DIYers:
You don’t need to choose between full DIY or full pro. Hybrid models work well:
– Consultation Hire: Pay a pro for a brief inspection of your substrate preparation and membrane layout before you proceed.
– Critical Phase Hire: DIY the demolition and substrate prep, then hire a pro only for membrane installation and flood test. You handle tile installation.
– Verification Hire: Complete the entire install yourself, then hire a pro solely to perform and document the flood test.
Perspective on Value:
Investing in professional expertise for critical phases prevents costly remediation later. True economy considers long-term performance and peace of mind. Your home’s integrity and your family’s health warrant careful consideration of when to seek expert support.
Guiding Principle:
If a task causes persistent uncertainty, requires specialized tools you don’t own, or involves systems (structural, plumbing, electrical) you don’t fully understand—consult a professional. Prudence supports lasting results. Your home’s protection is worth thoughtful investment.
Your Questions, Answered
Q: Can I waterproof over existing tile?
A: Generally, no. Tile and grout are porous and uneven, preventing proper membrane adhesion. Moisture trapped between old tile and new membrane may cause failure. Exceptions exist for some liquid membranes specifically rated for “over existing tile” (e.g., certain epoxy systems), but substrate must be perfectly sound, clean, and profiled. Success rates are variable. Full removal to substrate is strongly recommended for lasting results. If preservation is critical (historic tile), consult a specialist—this is not a standard DIY scenario.
Q: How long does waterproofing membrane need to cure before tiling?
A: It depends entirely on the product, temperature, and humidity. Sheet membranes (e.g., Kerdi) can be tiled immediately after installation—no cure time needed. Liquid membranes require strict adherence to manufacturer specs: typically 2–24 hours at 70°F (21°C) and 50% humidity. Always verify cure by: 1) Uniform color change (e.g., RedGard turns from pink to red), 2) Non-tacky surface, 3) Passing the “thumbnail test” (no dent when pressed firmly). When in doubt, wait longer. Rushing may compromise membrane performance.
Q: Is RedGard or similar liquid membrane sufficient alone, or do I need a sheet membrane too?
A: A properly applied liquid membrane meeting thickness specifications (verified with a wet-film gauge) is fully sufficient as the primary waterproofing layer. You do not need to combine liquid and sheet membranes—that creates unnecessary complexity and potential adhesion issues. Choose one system and execute it flawlessly. Liquid membranes excel on smooth substrates; sheet membranes offer visual verification for DIYers. Both are code-compliant when installed correctly per manufacturer instructions.
Q: What’s the difference between waterproofing and water-resistant?
A: Critical distinction. Waterproofing (required for showers/tubs) means zero liquid water penetration under hydrostatic pressure—achieved via continuous membranes (sheet, liquid, fabric-reinforced). Water-resistant materials (greenboard, some backer boards) resist moisture absorption but are not barriers—they slow water but won’t stop it. Using water-resistant materials alone in wet areas is insufficient. Always use a dedicated waterproofing membrane system behind tile in showers and tub surrounds.
Q: Can I use silicone caulk instead of a full membrane system?
A: This approach is not recommended. Silicone sealant is designed for sealing joints and transitions (Layer 3), not for creating a continuous barrier over large areas. It lacks structural integrity for this purpose and may crack under movement. Relying solely on caulk is highly likely to result in leaks and structural concerns. Membranes are engineered specifically for this application; sealants are supplementary. Never substitute one for the other.
Q: How do I waterproof around a shower bench or niche?
A: Benches and niches are high-risk zones requiring meticulous detail:
– Benches: Build with cement board over plywood frame. Slope the top surface 1/8″ per foot toward the shower interior. Wrap membrane continuously over the entire bench—top, front, sides—sealing all seams. Reinforce corners with mesh tape (liquid) or pre-formed corners (sheet).
– Niches: Install prefabricated waterproof niche. Seal all seams to wall membrane with sealant tape. Extend membrane continuously into the niche interior. Reinforce all four inside corners. Slope the niche shelf slightly toward the shower.
Always treat these features as integral parts of the membrane system, not afterthoughts.
Q: Does bathroom ventilation affect waterproofing?
A: Indirectly, yes. Proper ventilation (exhaust fan) reduces ambient humidity, minimizing condensation on walls and ceilings. While the membrane handles liquid water from showers, high humidity can cause moisture buildup outside the wet area (e.g., on non-waterproofed bathroom walls), leading to surface mold on paint or drywall. Ventilation is part of holistic moisture management: run the fan during and 20–30 minutes after showering. Size the fan correctly (1 CFM per square foot of bathroom area minimum). However, ventilation does not replace proper shower/tub waterproofing—it complements it.
Q: What if my flood test shows a concern? How do I find the source?
A: Stay calm—this is why you tested! Drain and dry completely. Methods to locate concerns:
1. Visual Inspection: With bright light, check drain clamp, seams, corners for gaps or inconsistencies.
2. Dye Test: Add food coloring to water during a short retest. Colored water may trace the path visibly.
3. Sectional Testing: Plug drain. Fill only the area near suspected concern (e.g., one corner). Isolate the zone.
4. Paper Towel Test: Place dry paper towels under suspected areas during a brief fill. Moisture shows as dark spots.
Common areas to check: drain clamp seal, seams at inside corners, punctures near drain. Repair meticulously and retest fully for 24 hours.
Q: Are there eco-friendly waterproofing options?
A: Yes, with considerations. Look for:
– Low-VOC or VOC-free liquid membranes (check technical data sheets)
– Membranes with recycled content (some sheet membranes use recycled polymers)
– Water-based sealants instead of solvent-based
However, “eco-friendly” must not compromise performance. Verify the product has ICC-ES certification for waterproofing. Never choose sustainability over proven effectiveness in critical moisture barriers. Properly installed conventional membranes last many years, reducing waste from repairs—durability is itself eco-friendly.
Q: How often should I reseal grout and caulk in a shower?
A: Grout doesn’t need “resealing” if epoxy grout was used (highly recommended for showers). For cementitious grout, a penetrating sealer applied after installation reduces staining but doesn’t make it waterproof—water still penetrates to the membrane below. The critical maintenance item is silicone sealant at transitions (curb, tub flange, corners). Inspect annually. Replace when you see: cracking, mildew growth under the bead, separation from surfaces, or discoloration. Typically lasts 3–7 years depending on use and cleaning products. Use 100% silicone rated for wet areas.
Q: Can waterproofing prevent mold entirely?
A: Proper waterproofing prevents structural mold growth behind walls and under floors by blocking liquid water intrusion—the primary cause of hidden mold. However, surface mold on grout, caulk, or soap scum can still occur due to poor ventilation, infrequent cleaning, or high humidity. Waterproofing addresses the hidden threat; good habits address surface issues: squeegee walls after use, run exhaust fan, clean regularly with pH-neutral cleaners. Think of waterproofing as protecting the building structure, while maintenance protects visible surfaces.
Q: What’s the single most important step I can’t skip?
A: The 24-hour flood test. Every other step can be executed well, but without objective verification, hidden vulnerabilities remain undetected until failure occurs. The flood test is the only way to confirm your entire system—substrate, membrane, drain, seals—works as an integrated whole. It transforms hope into verified confidence. No professional skips this; no DIYer should either. Protect your investment with proof.
Conclusion and Next Step
Waterproofing a shower or tub surround is more than a technical task—it’s an act of stewardship. You’re building a defense that will silently protect your home’s structure, your family’s health, and your peace of mind for years to come. The Three-Layer Defense System—substrate preparation, primary membrane, and secondary drainage—provides a resilient framework where redundancy supports longevity. Mastery lies not in complexity, but in disciplined attention to transitions, corners, and penetrations where water seeks entry. You now hold the knowledge to execute with confidence or collaborate effectively with professionals.
Recap: The Three Essential Practices
1. Slope Before Seal: Never install membrane over a flat surface. A pre-slope of ¼” per foot guides water to the drain, preventing trapped moisture.
2. Continuity Over Coverage: A seamless, reinforced membrane matters more than the brand. Seal every seam, corner, and penetration meticulously—water exploits the smallest vulnerability.
3. Verify Before You Cover: The 24-hour flood test is your proof of integrity. Skipping it risks hidden failure; completing it delivers irreplaceable confidence.
The 24-Hour Rule:
Within the next 24 hours, take one concrete step toward your project:
– If planning: Sketch your shower layout, noting drain location and curb dimensions.
– If shopping: Order a wet-film thickness gauge (for liquid membranes) or verify your chosen membrane kit includes all components.
– If mid-project: Schedule uninterrupted time for your flood test—block it on your calendar now.
Action builds momentum. Progress begins with a single, specific step.
The Big Picture:
Every drop of water contained within its intended path is a victory. Every sealed corner is a barrier against decay. This work echoes beyond the bathroom—it’s a testament to thoughtful craftsmanship. When you run your hand over a perfectly tiled shower wall years from now, knowing the invisible system beneath remains sound, you’ll feel the quiet pride of work done right. You’ve not just built a shower; you’ve fortified a sanctuary. Share this knowledge. Teach a friend the finger test for seal integrity. Recommend the flood test to a neighbor. Elevate standards one bathroom at a time. The ripple effect of meticulous care transforms homes and communities.
Explore Our Complete System:
The Pre-Slope Primer: Mastering Shower Floor Geometry | Membrane Matchmaker: Choosing Your Perfect Waterproofing System | Tile Installation Mastery: From Thinset to Grout | Bathroom Ventilation Decoded: Sizing Fans and Ducting Right | Mold Prevention Protocol: Beyond Bleach and Wishful Thinking | Curbless Shower Design: Accessibility Meets Elegance | The Homeowner’s Guide to Reading Building Codes | Repairing Water Damage: Assessment, Remediation, Prevention