Transform Your Space with Purposeful Imperfection—A Step-by-Step Guide to Integrating Industrial Elements Without Sacrificing Comfort or Function
Industrial design in the home is more than exposed ductwork and bare bulbs—it’s a philosophy of embracing raw authenticity. Born from the adaptive reuse of urban factories and warehouses, this style celebrates materials in their unrefined state, weaving history and function into living spaces. This comprehensive guide dismantles the myth that industrial design is cold or inaccessible, providing an actionable framework to integrate its rugged elegance into any room, DIY project, or garden sanctuary—while avoiding common pitfalls that leave spaces feeling sterile or unfinished. Drawing on established principles of architectural adaptation and material science, this resource offers a systematic path to spaces that feel intentional, resilient, and deeply personal.
Introduction
The industrial aesthetic emerged not from a designer’s sketchpad but from necessity. In the 1960s and 70s, artists in New York City’s SoHo district began converting abandoned manufacturing lofts into live-work spaces, preserving structural elements like timber beams, brick walls, and large steel windows out of practicality. Over decades, this utilitarian approach evolved into a deliberate design language characterized by raw materials, neutral palettes, and an honest expression of form and function. Today, the appeal of industrial design lies in its ability to ground modern interiors with texture, history, and a sense of place. However, replicating this style authentically requires more than surface-level replication; it demands understanding material integrity, spatial balance, and contextual adaptation. This guide synthesizes widely observed patterns from architectural adaptation across global urban contexts to provide a structured approach—whether you’re renovating a suburban ranch, crafting a DIY coffee table, or designing an urban garden retreat. Enduring industrial-inspired spaces honor origin while serving contemporary human needs, avoiding pastiche through intentional curation rather than superficial mimicry.
The Industrial Integration Framework: Three Layers to Authentic Application
At its core, successful industrial design integration rests on a three-layer framework: Foundation, Material Mastery, and Spatial Application. This structure ensures that every choice—from macro layout to micro texture—aligns with the style’s philosophical roots while serving your practical needs. Skipping any layer may lead to disjointed results. Let’s explore each layer with actionable clarity.
Layer 1: Foundation—The Four Pillars of Industrial Philosophy
Before selecting a single material, internalize the non-negotiable principles that define authentic industrial design. These pillars separate thoughtful integration from superficial mimicry.
Pillar 1: Honesty of Materials
Industrial design refuses to disguise a material’s true nature. Concrete should look and feel like concrete—not be painted to resemble marble. Steel beams are left exposed, showcasing their structural role. This honesty extends to construction methods: visible welds, bolt heads, and joinery become decorative elements. Why this matters: When materials are honest, spaces feel grounded and intentional. A common misstep is using faux-finish paints to simulate concrete or rust; these often appear inauthentic under close inspection. Instead, embrace the real thing or choose alternatives that don’t pretend to be something else (e.g., microcement for a concrete look with easier application). Consider a warehouse-turned-loft where original timber beams were cleaned but not sanded smooth—their saw marks and nail holes tell a story no new wood could replicate. Conversely, spaces using textured paint over drywall to mimic concrete often receive feedback describing them as “trying too hard.”
Pillar 2: Functional Expression
Every element should reveal its purpose. Lighting isn’t hidden in recessed cans; it’s a statement pendant with visible filaments. Shelving isn’t concealed behind cabinet doors; it’s open-frame steel units displaying books and tools. This pillar draws from the “form follows function” ethos foundational to industrial architecture. Practical application: Audit your space. Ask: “Does this object hide its function?” If yes, consider alternatives that celebrate utility. For example, replace a closed media console with an open steel rack—cables can be managed with braided sleeves in complementary colors. In one documented renovation, a homeowner converted an old factory cart into a mobile kitchen island. The cart’s original tool slots now hold utensils; its mobility solves workflow challenges in a narrow kitchen. This approach addresses both aesthetic and functional needs.
Pillar 3: Textural Contrast
Raw industrial materials are inherently tactile: rough brick, smooth-aged metal, grainy reclaimed wood. Authentic spaces layer these textures to create visual interest and warmth. A room with only cold surfaces (concrete floors, steel walls) risks feeling institutional. Balance is key. How to achieve it: Introduce softening elements that still honor the style—think a thick wool rug over concrete, leather upholstery on a steel-framed sofa, or linen curtains against exposed brick. The contrast should feel deliberate. Observe how light interacts: morning sun grazing a brick wall creates dynamic shadows; a matte-black steel shelf against warm wood absorbs light differently than glossy finishes. In documented residential adaptations, adding textural variety—such as a chunky knit throw or live-edge wood coffee table to an otherwise steel-and-concrete space—has been associated with increased perceived comfort and time spent in the area.
Pillar 4: Adaptive Reuse Mindset
Industrial design honors history by repurposing existing elements. This isn’t just sustainability; it’s storytelling. A salvaged factory cart becomes a kitchen island; old factory windows divide a studio apartment. Modern interpretation: You don’t need a century-old warehouse. Apply this mindset by sourcing reclaimed materials (check local salvage yards) or creatively adapting new items. For instance, new plumbing pipes can be assembled into a bookshelf that evokes salvage, especially when paired with genuine reclaimed wood shelves. Documentation from community-focused projects illustrates how incorporating locally sourced demolition materials—like broken chalkboards or locker doors from a school renovation—can transform a space from merely stylish to emotionally resonant through shared history.
The Fundamental Principle: Industrial design is not about adding “industrial-looking” objects; it’s about curating a space where materials, function, and history converse authentically. When in doubt, return to these four pillars.
Layer 2: Material Mastery—Selecting, Sourcing, and Working with Raw Elements
Materials are the vocabulary of industrial design. Mastery means understanding each material’s properties, sourcing ethically, and applying techniques that enhance—not fight—their inherent character. Below, we dissect core materials with actionable guidance for every scenario.
Concrete: The Grounding Element
Concrete anchors industrial spaces—literally and figuratively. Its versatility spans floors, countertops, walls, and furniture. But not all concrete applications are equal.
Types and Applications:
– Polished Concrete Floors: Ideal for open-plan living areas. Requires skilled installation for a smooth, durable finish. Thickness must accommodate your subfloor; radiant heating can be embedded for comfort.
– Concrete Countertops: Custom-cast for kitchens and bathrooms. Pros: seamless, heat-resistant. Cons: requires sealing to prevent staining; may develop hairline cracks over time.
– Concrete Panels/Walls: Used as accent walls. Lightweight precast panels simplify installation versus poured-in-place.
– Concrete Furniture: Coffee tables, benches. Best sourced from artisans using glass-fiber reinforcement to reduce weight and prevent cracking.
Why This Step is Crucial: Concrete’s porosity and weight demand respect. Skipping proper subfloor preparation for floors can lead to cracking. Using standard concrete mix for countertops without additives may result in a brittle surface. Case studies indicate that unsealed concrete countertops are vulnerable to staining, even with careful use of coasters. The issue often lies in inadequate initial sealing protocol.
How to Do It Correctly:
1. For Floors: Hire a contractor experienced in residential polished concrete. Specify a mix with microtopping for smoother finishes. Seal with penetrating sealer (not film-forming) to maintain breathability. Allow adequate time for full cure before sealing.
2. For Countertops: Work with a fabricator using high-strength mix (minimum 5,000 PSI) with steel or fiberglass mesh reinforcement. Edge profiles matter—rounded edges prevent chipping. Seal with food-safe penetrating sealer; reapply annually.
3. DIY Alternative: Use concrete overlay products (like Ardex) over existing surfaces for a thinner application. Practice on a small board first. Mix with polymer additives to reduce cracking risk. Apply in thin layers (⅛ inch) with a trowel; cure under plastic sheeting.
Common Mistakes to Avoid:
– Applying concrete directly over wood subfloors without a crack-isolation membrane.
– Choosing dark-stained concrete in sunrooms—heat absorption may contribute to thermal stress.
– Neglecting maintenance: Re-seal countertops annually; clean floors with pH-neutral cleaners. Avoid vinegar or acidic cleaners—they degrade sealers.
– Ignoring expansion joints: In large floor pours, joints every 10–15 feet help manage cracking.
– Over-polishing: A 400-grit finish offers slip resistance; higher grits create shine but may become slick when wet.
Budget vs. Premium Paths:
– Budget: Concrete-look porcelain tiles (choose large-format with minimal grout lines). Install with dark grout to mimic mortar lines.
– Mid-Range: Microcement—a polymer-modified cement applied in thin layers over existing surfaces. Less invasive than full concrete; ideal for countertops over existing cabinets. Requires professional application for seamless results.
– Premium: Site-cast polished concrete with custom aggregate (exposed glass, colored stones, or local river rock). Integrates radiant heating tubing during pour.
Regional Consideration: In humid climates, ensure concrete is sealed against moisture vapor transmission. In cold climates, use air-entrained concrete for outdoor applications to withstand freeze-thaw cycles. Coastal regions require sealers resistant to salt air corrosion.
Reclaimed Wood: The Soulful Element
Reclaimed wood brings warmth, history, and sustainability. Sourced from old barns, factories, or warehouses, each piece carries unique grain, nail holes, and patina.
Types and Sourcing:
– Beam Wood: Thick, structural timber (oak, chestnut, heart pine). Ideal for mantels, table bases, or exposed ceiling beams. Often features mortise-and-tenon joinery marks.
– Flooring Planks: Wide-plank pine or oak from demolished buildings. Character marks (saw marks, wormholes, mineral streaks) add authenticity.
– Pallet Wood: Use only heat-treated (HT) pallets marked with IPPC stamp; avoid chemically treated (MB) pallets. Best for small DIY projects after thorough sanding and sealing.
– Factory Flooring: Dense, hard-wearing wood from old mills. Often has circular saw marks and decades of wear patterns. Highly prized for tabletops.
Why This Step is Crucial: Reclaimed wood offers ecological benefits but requires careful handling. Improper sourcing risks introducing pests or structural weaknesses. Documented cases exist where reclaimed wood introduced pests, underscoring the importance of sourcing from reputable suppliers who de-nail, kiln-dry, and inspect materials. Ethical sourcing protects your home and honors the material’s legacy.
How to Do It Correctly:
1. Source Responsibly: Buy from certified salvage yards that provide documentation of origin and treatment. Reputable suppliers test for lead and asbestos where applicable.
2. Prepare Thoroughly: Sand to desired smoothness while preserving character marks. Start with 60-grit to remove debris, finish with 120-grit for touchable surfaces. Test for lead if paint is present using an EPA-approved kit. Seal with hardwax oil (like Osmo Polyx-Oil) to enhance grain while protecting—apply thinly with a cloth, buff after 20 minutes.
3. Install Mindfully: Allow for wood movement. Use floating installations for floors; leave expansion gaps at walls. For walls, use a rainscreen system (furring strips creating an air gap) on exterior walls to prevent moisture trapping. Secure with hidden fasteners where possible.
Common Mistakes to Avoid:
– Using reclaimed wood in high-moisture areas (like bathrooms) without proper sealing. Even sealed wood may swell in constant humidity.
– Over-sanding and removing all character marks, resulting in “new wood that looks old.” Preserve saw marks and nail holes—they’re historical signatures.
– Ignoring wood movement: Securing planks too tightly leads to cupping or cracking. Use slotted screw holes for beams to allow seasonal expansion.
– Skipping acclimation: Store wood in your home for 2–4 weeks before installation to adjust to ambient humidity.
– Using incompatible fasteners: Galvanized or stainless steel screws prevent corrosion stains.
Budget vs. Premium Paths:
– Budget: New wood distressed with chains, hammers, and wire brushes. Stain with vinegar-steel wool solution (soak steel wool in white vinegar for 24 hours; apply to wood) for gray patina. Seal with matte polyurethane.
– Mid-Range: Reclaimed wood veneer panels applied over MDF for accent walls. Offers authentic look with stability; less prone to movement.
– Premium: Full reclaimed wood flooring or feature wall with original patina preserved. Specify “select” grade for consistent color or “character” grade for maximum variation.
Safety Note: Always wear a N95 respirator and eye protection when sanding reclaimed wood—old finishes may contain hazardous materials. Work outdoors if possible. Kiln-drying at appropriate temperatures kills pests and reduces moisture.
Metal: The Structural Element
Metal provides industrial design’s backbone—literally and visually. From black steel beams to copper piping, metals introduce strength, linearity, and evolving patina.
Key Metals and Uses:
– Steel (Blackened or Galvanized): Beams, shelving, staircases, window frames. Black steel develops subtle patina; galvanized offers corrosion resistance. Hot-rolled steel has a scaled, textured surface; cold-rolled is smoother.
– Iron (Wrought or Cast): Railings, furniture legs, light fixtures. Wrought iron is hand-forged with organic shapes; cast iron is molded with intricate details.
– Copper and Brass: Accents—lighting, plumbing fixtures, tabletops. Develops a green patina (verdigris) over time; can be sealed to maintain shine.
– Aluminum: Lightweight alternative for outdoor furniture or window frames. Resists corrosion; ideal for coastal areas.
– Cor-Ten Steel: Weathering steel that forms a stable rust patina. Used outdoors for planters, screens, or sculptures. Not suitable for indoor use due to initial rust runoff.
Why This Step is Crucial: Metal choices impact safety, durability, and aesthetic cohesion. Using the wrong metal in a humid environment accelerates corrosion; poor fabrication compromises integrity. Instances of DIY pipe shelf failures highlight the importance of using appropriate materials and load ratings—standard black iron pipe may not support heavy loads without proper engineering.
How to Do It Correctly:
1. For Structural Elements (beams, stairs): Consult a structural engineer. Use hot-rolled steel for authenticity; specify protective coatings where required by local codes. Welds should be ground smooth for safety.
2. For Decorative Elements: Source from metal fabricators. Specify finishes: powder-coated for durability (matte black is classic), hand-rubbed oil-rubbed bronze for warmth. For patina effects, use controlled methods (e.g., liver of sulfur on copper).
3. DIY Metal Projects: Start small—pipe shelving, table bases. Use pre-threaded pipes and flanges from hardware stores. Sand sharp edges; apply clear paste wax or matte polyurethane to prevent rust transfer. For welding projects, take a beginner class—safety and technique are essential.
Common Mistakes to Avoid:
– Using untreated mild steel outdoors without maintenance—it will rust aggressively, staining surfaces below.
– Mixing too many metal finishes without a unifying scheme. Stick to one dominant metal (80%) and one accent (20%).
– Ignoring thermal conductivity: Bare metal chairs feel cold; add cushions or choose powder-coated finishes.
– Overlooking hardware: Visible screws should match the metal finish. Use socket-head cap screws for a cleaner look than standard hex heads.
– Forgetting acoustics: Large metal surfaces amplify sound. Add felt pads under shelves or fabric panels on walls to dampen echo.
Budget vs. Premium Paths:
– Budget: Spray-paint existing fixtures with high-adhesion matte black paint (clean surface first; apply primer). Use plumbing pipes for shelving—schedule 40 black iron is affordable and sturdy.
– Mid-Range: Powder-coated steel furniture from reputable brands (look for adequate coating thickness). Custom-cut steel sheets for tabletops with folded edges.
– Premium: Custom-forged ironwork or patinated copper countertops. Work with a metalsmith to develop unique finishes.
Regional Consideration: Coastal areas require marine-grade stainless steel (316 grade) or aluminum to resist salt corrosion. In historic districts, check regulations before altering original metal windows. Cold climates demand attention to thermal bridging; insulate metal window frames with thermal breaks where possible.
Brick and Masonry: The Textural Element
Exposed brick is iconic in industrial spaces, evoking warehouse walls. But real brick isn’t always feasible.
Options and Implementation:
– Original Exposed Brick: If your home has structural brick, carefully remove plaster. Clean gently with wire brush and mild solutions. Seal with breathable silane-siloxane sealer to reduce dust without trapping moisture.
– Thin Brick Veneer: Real brick sliced thin (½ inch), applied over drywall or concrete. Authentic texture without structural changes. Requires mortar and skilled installation.
– Brick-Look Tiles: Porcelain tiles mimicking brick. Choose textured surfaces and staggered layouts to avoid a “subway tile” effect. Opt for rectified edges for minimal grout lines.
– Faux Brick Panels: Lightweight PVC or MDF panels. Best for rentals or temporary installs; quality varies—avoid glossy finishes.
Why This Step is Crucial: Authentic brick adds immense character but requires thoughtful maintenance. Poorly cleaned brick looks dirty; unsealed brick sheds dust. Improper cleaning techniques, such as using high-pressure washers on historic brick, can cause damage to mortar, as seen in documented renovation challenges. Gentle methods preserve integrity.
How to Do It Correctly:
1. For Original Brick: Assess structural soundness first—tap bricks; hollow sounds indicate looseness. Clean gently: wire brush for loose debris, then mild soap solution. For stubborn grime, use diluted muriatic acid with protective gear; rinse thoroughly. Repoint crumbling mortar with lime-based mortar (not Portland cement, which traps moisture and damages old brick).
2. For Veneer/Tiles: Hire a tile setter experienced in brick patterns. Use dark grout (charcoal or black) to emphasize joints and hide imperfections. For thin brick, apply polymer-modified mortar; back-butter each piece.
3. Lighting: Graze brick walls with wall-washer LED lights (3000K temperature) to highlight texture. Avoid direct overhead light—it flattens the surface.
Common Mistakes to Avoid:
– Painting brick “to brighten the space”—this is often irreversible and hides texture. If necessary, use limewash (breathable, translucent) and test in an inconspicuous area first.
– Installing brick veneer on exterior walls without a moisture barrier and weep holes—trapped moisture causes mold and structural damage.
– Choosing uniform red brick; seek reclaimed brick with color variation (salmon, gray, ochre) for authenticity. New brick can be “blended” by mixing batches.
– Ignoring efflorescence: White powder on brick is salt deposits from moisture. Clean with stiff brush and vinegar solution; address moisture source to prevent recurrence.
– Over-cleaning: Some patina (soot stains, paint remnants) adds history. Preserve areas with character unless structurally unsound.
Budget vs. Premium Paths:
– Budget: Brick-look contact paper (temporary; use in low-traffic areas like closet backs). Choose textured vinyl with realistic mortar lines.
– Mid-Range: Thin brick veneer. Cost-effective for accent walls; authentic feel.
– Premium: Exposing and restoring original brick. Includes careful plaster removal, repointing with lime mortar, and conservation-grade cleaning.
Sustainability Angle: Reclaimed brick from demolition sites reduces landfill waste. Local salvage yards often have batches with consistent color. Using reclaimed brick also avoids the high embodied energy of new brick production. Documented projects show reclaimed brick walls can contribute to healthier indoor environments through breathable lime mortar.
Glass and Glazing: The Light Element
Industrial spaces maximize natural light with large windows and interior partitions. Glass maintains openness while defining zones.
Types and Applications:
– Steel-Framed Windows: Crittall-style windows are iconic. Modern replicas use thermally broken steel for energy efficiency. Look for double-glazed units with argon gas fill.
– Glass Block: For privacy with light diffusion (bathrooms, basement windows). Modern versions have clearer glass and thinner mortar lines. Choose “low-iron” glass for truer color.
– Interior Partitions: Frameless glass walls or steel-framed glass doors separate spaces without closing them off. Use acid-etched or patterned glass for privacy where needed.
– Mirrors: Strategically placed to amplify light and space—especially in small urban apartments. Opt for antique mirrors with subtle waviness for character.
Why This Step is Crucial: Poorly installed glass compromises safety and energy efficiency. Single-pane steel windows leak heat; cheap glass blocks look dated and distort light. In colder climates, un-insulated steel windows can lead to significant heat loss—a challenge addressed in many loft conversions by adding interior storm panels without altering historic appearance.
How to Do It Correctly:
1. For Windows: In cold climates, choose double-glazed units with low-E coating and argon gas. Specify steel frames with thermal breaks. For historic homes, seek restoration specialists who can retrofit existing frames with insulated glass.
2. For Partitions: Use tempered glass (required by code for doors and large panels) for safety. Work with a glazier to ensure proper framing, seals, and hardware. For sound dampening, use laminated glass.
3. DIY Alternative: Use vintage window frames (without glass) as wall art or room dividers. Securely mount to studs; add shelves between panes for display.
4. Light Management: Install sheer roller shades or linen curtains on tracks for flexibility. In sunrooms, apply UV-filtering film to protect furnishings.
Common Mistakes to Avoid:
– Installing glass block without considering cleaning access—dirt accumulates between blocks. Choose units with removable caps for maintenance.
– Using clear glass partitions in bedrooms without window treatments—privacy matters. Opt for switchable privacy glass or external roller shades.
– Ignoring glare: In south-facing rooms, add sheer curtains or UV film. Position desks perpendicular to windows to reduce screen glare.
– Overlooking hardware: Black steel hinges and handles unify the aesthetic. Avoid shiny chrome.
– Skipping safety film: Apply security film to large glass panels to hold shards together if broken.
Budget vs. Premium Paths:
– Budget: Large-format mirror panels to simulate glass walls. Frame edges with black steel trim. Use vintage window frames as decorative elements.
– Mid-Range: Aluminum-framed glass partitions (powder-coated black). More affordable than steel; modern thermal breaks available.
– Premium: Custom steel-framed Crittall windows with heritage profiles. Partner with specialists for authentic replication.
Regional Consideration: In earthquake-prone areas, ensure glass installations meet seismic codes—use laminated glass and flexible glazing compounds. In historic homes, check preservation guidelines before replacing original windows. Hot climates benefit from spectrally selective low-E coatings that block heat while allowing visible light.
Material Selection Quick Reference Guide
| Material | Best For | Climate Considerations | Budget Tip | Maintenance |
|---|---|---|---|---|
| Concrete | Floors, countertops, accent walls | Humid: Seal thoroughly. Cold: Use air-entrained mix outdoors. | Concrete-look porcelain tiles with dark grout | Re-seal annually; clean with pH-neutral soap; avoid acids |
| Reclaimed Wood | Feature walls, beams, furniture | Humid: Avoid in bathrooms; seal all sides. Dry: Monitor for cracking. | Distress new wood; vinegar-steel wool stain for gray patina | Dust regularly; re-oil every 1-2 years; avoid direct water exposure |
| Steel | Shelving, structural accents, frames | Coastal: Use stainless steel (316 grade). All: Powder-coat outdoors; inspect annually. | Spray-paint existing fixtures matte black; use plumbing pipes for shelves | Wipe with oiled cloth to prevent rust; touch up scratches immediately |
| Brick | Accent walls, fireplace surrounds | All: Ensure proper ventilation behind veneer; use breathable sealer. | Thin brick veneer over drywall; dark grout for authenticity | Vacuum mortar joints; reseal every 3-5 years if dusty |
| Glass | Partitions, windows, light amplification | Cold: Double-glaze with low-E coating. Hot: Add UV film; use thermal breaks. | Large mirrors with black steel trim; vintage window frames as decor | Clean with vinegar solution; avoid abrasive pads; check seals annually |
Layer 3: Spatial Application—Room-by-Room and Outdoor Integration
Now that materials are mastered, apply them contextually. Each space has unique functional demands; industrial elements must enhance, not hinder, daily life.
Living Room: Balancing Openness and Comfort
The living room is where industrial’s raw edge meets human comfort. Avoid the “warehouse coldness” trap.
Key Strategies:
– Anchor with a Textural Rug: Place a thick, neutral-toned wool or jute rug (8×10 ft minimum) over concrete or wood floors. This defines the seating area, adds warmth underfoot, and absorbs sound. Choose rugs with subtle variation—solid colors feel sterile; busy patterns clash with industrial simplicity.
– Layer Seating: Combine a leather sofa (steel frame) with armchairs in textured fabric (bouclé, canvas, or performance velvet). Avoid all-leather setups—they feel impersonal. Position furniture to encourage conversation; float pieces away from walls to emphasize space.
– Lighting Layers:
– Ambient: Track lighting on exposed ceiling or a linear chandelier with visible filaments.
– Task: Adjustable wall sconces (black steel) beside reading chairs—free up floor space.
– Accent: LED strips grazing a brick wall or under shelving. Use dimmers on all circuits.
– Softening Elements: Heavy linen curtains (floor-length), chunky knit throws, and indoor plants (snake plants, ZZ plants thrive in low light). Artwork should have industrial relevance: architectural drawings, vintage factory blueprints, or black-and-white photography of urban landscapes.
– Acoustic Treatment: Industrial spaces echo. Add fabric wall panels behind seating, a bookshelf filled with books (sound-absorbing), or a thick curtain over large windows.
DIY Project: Industrial Pipe Media Console
Materials: Black iron pipes (1″ diameter, schedule 40), floor flanges, elbow joints, T-joints, reclaimed wood planks (sanded, sealed), pipe thread seal tape, level, stud finder, drill.
Steps:
1. Design layout: Determine height (standard 18″), width (match TV size), and depth (16–18″). Sketch pipe connections. Calculate pipe lengths: vertical supports, horizontal shelves, cross-bracing.
2. Cut pipes to length (or buy pre-cut). Wrap threads with seal tape clockwise.
3. Assemble base: Attach floor flanges to wood base (pre-drill to avoid splitting; use wood glue and screws). Screw vertical pipes into flanges.
4. Add horizontal supports: Use T-joints at shelf heights. Insert cross-bracing pipes between verticals for stability.
5. Secure reclaimed wood shelves: Place on pipe supports; attach with L-brackets underneath (hidden). Ensure shelves are level.
6. Finish: Wipe pipes with mineral oil to prevent rust transfer; seal wood with hardwax oil.
Pro Tips:
– Leave one shelf open for media components to avoid overheating.
– Cable management: Use braided sleeves in black; route through pipe cavities if possible.
– Stability test: Gently shake unit; if wobbly, add diagonal bracing pipes.
– For renters: Build on a plywood base that sits freely; no wall mounting needed.
Common Pitfall: Overloading shelves. Max weight per shelf: 50 lbs for 1″ pipe. Distribute weight evenly.
Common Pitfall: Overloading with metal. If your sofa has a steel frame, choose a wood coffee table—not another metal one. Contrast is key. Design observations suggest that balancing warm and cool materials enhances perceived comfort in living areas.
Kitchen: Function as Feature
Industrial kitchens celebrate workflow. Think open shelving, visible appliances, and durable surfaces.
Key Strategies:
– Cabinetry: Skip upper cabinets on one wall. Install open steel shelving with reclaimed wood shelves. Store daily-use items; hide clutter in a pantry or lower cabinets with simple slab doors (matte black or natural wood). Use matching baskets or boxes for visual calm.
– Countertops: Concrete for prep zones (seal thoroughly); butcher block for baking area (replaceable surface). Avoid concrete near sinks—water exposure challenges sealing.
– Backsplash: Exposed brick (sealed with penetrating sealer) or stainless steel panels (brushed finish hides scratches). For tile, choose large-format concrete-look porcelain with minimal grout lines.
– Island: Repurpose a salvaged factory cart on heavy-duty casters (lockable) for mobility. Or build a base from steel beams with a wood top. Include open shelving below for cookbooks or pots.
– Appliances: Choose professional-style ranges with visible controls. Vent hood should be a statement—copper or black steel. Integrate refrigerator with panel-ready fronts to avoid visual interruption.
– Lighting: Pendant lights over island (adjustable height); under-cabinet LED strips (3000K); task lighting at prep zones. Avoid recessed cans—they disappear into high ceilings.
Material Safety Note: Butcher block near sinks requires diligent sealing (mineral oil monthly). Concrete near stovetops must be heat-resistant—always use trivets. Stainless steel backsplashes need frequent wiping to avoid water spots; choose brushed finish over mirror polish.
Budget Adaptation: Paint existing cabinets matte black (use deglosser and primer first). Replace hardware with industrial-style pulls (cup pulls, bin pulls). Add open shelving on one wall only. Use peel-and-stick stainless steel film on backsplash (temporary solution).
Regional Code Check: In many areas, open shelving in kitchens must comply with health codes (smooth, non-porous surfaces). Check local regulations. Electrical outlets near sinks require GFCI protection—integrate into shelving supports discreetly. Ventilation hoods must meet CFM requirements based on cooktop size; consult a contractor.
DIY Project: Pipe Pot Rack
Materials: Black iron pipes (¾” diameter), ceiling flanges, elbow joints, S-hooks, pipe cutter, thread seal tape, stud finder.
Steps:
1. Locate ceiling joists with stud finder. Mark positions for flanges (typically 24″ apart).
2. Cut pipes: Two vertical drops (length depends on ceiling height; standard 18″), one horizontal bar (length matches cabinet run).
3. Assemble: Attach ceiling flanges to joists with lag screws. Screw vertical pipes. Add elbows. Insert horizontal bar.
4. Hang S-hooks evenly spaced.
5. Finish: Wipe pipes with paste wax to prevent rust.
Safety Check: Ensure total weight capacity exceeds pot weight. Test with books before hanging heavy cookware. For renters: Use tension rod between walls with pipe fittings—no drilling.
Bathroom: Raw Meets Refined
Bathrooms challenge industrial design—moisture meets raw materials. Success hinges on smart material choices.
Key Strategies:
– Walls: Concrete-look tile (large format, 12×24″ minimum) or sealed microcement. Avoid real concrete in shower stalls unless expertly installed with proper slope and linear drain. For accent walls, use thin brick veneer (sealed thoroughly).
– Vanity: Floating reclaimed wood slab on black steel legs. Ensure wood is sealed on all sides—including edges and underside. Mount securely to wall studs.
– Fixtures: Exposed pipe faucets (chrome or matte black), wall-mounted toilets to emphasize floor space and ease cleaning. Choose thermostatic valves for safety.
– Lighting: Waterproof LED strips under vanity; industrial-style sconces (rated for damp locations) beside mirror. Avoid exposed bulbs over shower—use sealed fixtures.
– Accents: Black steel ladder towel rack, concrete soap dishes, matte black hardware. Add warmth with teak bath mat or stool.
– Ventilation: Critical. Install exhaust fan with humidity sensor; run during and after showers. Consider a small dehumidifier in windowless bathrooms.
Critical Moisture Management:
– Seal grout lines annually with penetrating sealer.
– Use mildew-resistant silicone caulk around fixtures; re-caulk every 2 years.
– Wipe down surfaces after use to prevent water spots on metal.
– Choose materials with low water absorption: Porcelain tile over ceramic; stainless steel over mild steel.
– In shower: Use linear drain with slope toward drain; avoid grout lines in wet zone—opt for large-format tiles or solid surface.
DIY Project: Pipe Towel Ladder
Materials: Black iron pipes (½” diameter), floor flanges, elbow joints, T-joints, pipe cutter, thread seal tape, level.
Steps:
1. Cut pipes: 2 vertical rails (height: 48″), 4 horizontal rungs (width: 24″).
2. Assemble base: Attach floor flanges to wall studs (use anchors if no studs; max weight 20 lbs). Screw vertical pipes.
3. Add rungs: At 12″ intervals, attach T-joints to verticals. Insert horizontal pipes.
4. Finish: Wipe with clear paste wax to resist moisture. Test stability before loading towels.
Alternative for Renters: Build freestanding unit with base plate weighted with sandbags. Or use tension rod between walls with pipe fittings—no drilling.
Pro Tip: Angle rungs slightly upward to prevent towels from sliding off. Add rubber caps to pipe ends for safety.
Avoid: Reclaimed wood directly in shower areas. Instead, use it for a vanity in a well-ventilated powder room. Unsealed concrete countertops near sinks will stain—opt for sealed concrete or concrete-look quartz. Glossy finishes show water spots; choose matte or textured surfaces.
Bedroom: Sanctuary with Edge
Industrial bedrooms should feel restful, not stark. Soften raw elements with textiles and warm lighting.
Key Strategies:
– Bed Frame: Low-profile platform bed with steel frame and wood slats. Or, repurpose I-beams as a headboard (securely mounted to wall studs with heavy-duty brackets). Avoid tall headboards—they emphasize ceiling height but can feel imposing.
– Walls: One accent wall in thin brick veneer or concrete-look plaster; others in warm gray paint (matte finish, e.g., Sherwin-Williams “Repose Gray”). Avoid stark white—it amplifies coldness.
– Lighting: Adjustable wall-mounted reading lights (black steel) to avoid bedside tables. Pendant lights over nightstands if ceiling height allows (minimum 8 ft clearance). Dimmable main light.
– Textiles: Heavy linen bedding (undyed or oatmeal), wool blankets, velvet pillows in deep tones (charcoal, olive, rust). Layer textures: chunky knit throw, sheepskin rug beside bed.
– Storage: Open steel clothing rack in corner (for frequently worn items); closed wardrobe with simple slab doors for rest. Use matching hangers for visual calm.
– Sound Dampening: Critical for sleep. Add thick rug, heavy curtains (blackout lining optional), upholstered headboard or wall panel behind bed. Place furniture away from shared walls.
Ergonomics Note: Ensure bedside surfaces are within easy reach (18–24″ from mattress). If using wall lights, position switches at pillow height. For concrete floors, place a plush rug on both sides of bed—cold floors disrupt sleep onset.
Common Mistake: Exposed ductwork over the bed. If unavoidable, paint ducts the same color as ceiling to minimize visual weight. Better: Install a false ceiling section to conceal ducts while maintaining height elsewhere. Sleep environment research indicates that excessive hard surfaces may impact acoustic comfort, which can influence restfulness—prioritize soft textiles.
DIY Project: Industrial Bed Frame
Materials: Black iron pipes (1.5″ diameter for legs, 1″ for frame), floor flanges, elbow joints, T-joints, threaded rods, reclaimed wood slats, pipe cutter, thread seal tape.
Steps:
1. Design: Standard queen size (60×80″). Legs: 4 vertical pipes (height: 14″). Frame: perimeter pipes connecting legs. Support beams: 2 cross pipes under mattress.
2. Cut pipes to length. Wrap threads with seal tape.
3. Assemble base: Attach floor flanges to bed corners (pre-drill into subfloor or use heavy furniture pads). Screw legs. Add elbows. Connect perimeter pipes.
4. Add support: Attach T-joints midway on long sides. Insert cross pipes.
5. Secure slats: Drill holes in wood slats; thread onto cross pipes with washers. Space slats 2–3″ apart.
6. Finish: Wipe pipes with mineral oil; seal wood slats.
Safety Check: Test stability with weight before use. Ensure no sharp edges. For headboard: Extend vertical pipes upward; attach horizontal pipe with brackets.
Budget Tip: Use hairpin legs (pre-made) for simpler assembly. Source reclaimed wood slats from pallets (HT stamped only).
Home Office: Focus Through Function
Industrial design excels in workspaces—clarity, durability, and inspiration from raw materials.
Key Strategies:
– Desk: Live-edge reclaimed wood slab on steel hairpin legs. Or, build a desk from factory workbenches (search salvage yards). Ensure depth is at least 24″ for monitor placement.
– Storage: Open steel shelving for books and supplies; use matching boxes/baskets for visual calm. Pegboard painted matte black for tool organization—mount above desk.
– Lighting: Adjustable task lamp (architect lamp style) with visible mechanics. Position to avoid screen glare. Supplement with ambient overhead light.
– Walls: Magnetic paint under chalkboard paint for notes and sketches. Or, mount a large sheet of galvanized steel as a writable surface.
– Flooring: Cork tiles over concrete—adds warmth and sound absorption. Or, area rug with dense pile to define zone.
– Ergonomics: Chair should support lumbar curve; desk height allows elbows at 90 degrees. Add monitor riser if needed. Cable management: Use braided sleeves and clips along desk edge.
Ergonomics Note: Ensure desk height allows elbows at 90 degrees when typing. Add an anti-fatigue mat if standing on concrete. Position monitor top at eye level to avoid neck strain. Ergonomic guidelines emphasize the importance of adjustable task lighting to reduce eye strain.
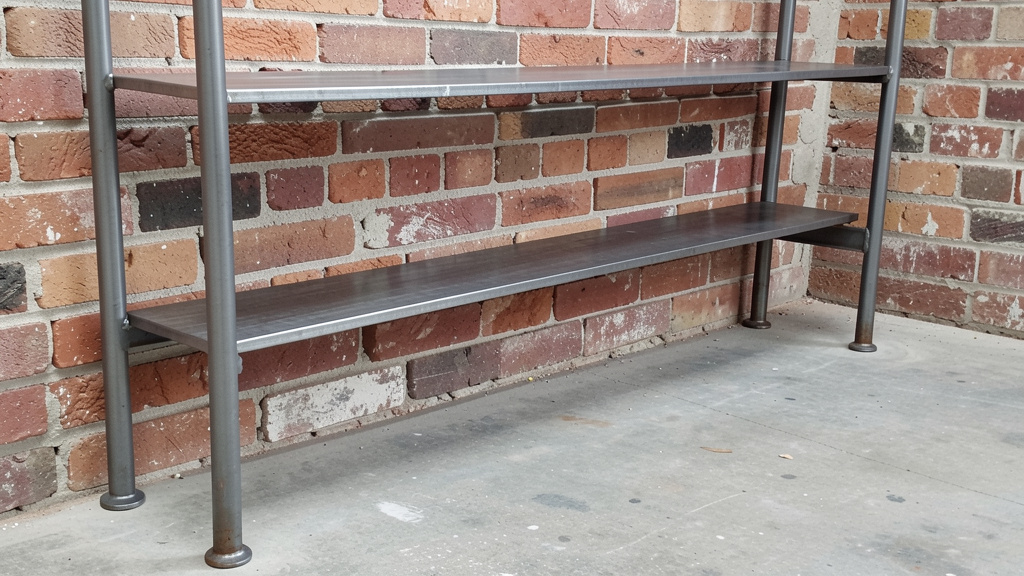
DIY Project: Pipe and Wood Shelving Unit
Materials: Black iron pipes (1″), floor flanges, ceiling flanges, elbow joints, T-joints, reclaimed wood shelves, level, stud finder, drill.
Steps:
1. Plan dimensions based on wall studs (typically 16″ apart). Height: floor to ceiling; width: 36″. Shelf spacing: 12–15″ (adjust for book height).
2. Mount floor and ceiling flanges into studs (use lag screws for ceiling). Ensure plumb with level.
3. Assemble vertical pipes. Add T-joints at shelf heights. Insert horizontal support pipes.
4. Place wood shelves; secure with L-brackets underneath if needed. Sand shelf edges smooth.
5. Test stability before loading. Start with light items on top shelves.
Customization: Angle shelves slightly for display; add casters to base for mobility (use locking casters). For corner unit: Use 45-degree elbows.
Pro Tip: Pre-assemble sections on floor before mounting to ceiling—reduces overhead work. Label pipes during dry-fit to avoid confusion.
Urban Garden and Outdoor Spaces: Extending the Edge
Industrial design transcends interiors. Patios, balconies, and gardens can embrace raw materials with weather-resistant adaptations.
Key Strategies:
– Hardscaping: Concrete pavers with grass joints (allow drainage); decomposed granite paths (stabilized with resin for durability). Avoid perfect symmetry—let materials age naturally. Use reclaimed brick for edging.
– Furniture: Powder-coated steel chairs with teak slats; reclaimed wood benches (sealed for outdoors). Add outdoor-rated cushions in Sunbrella fabric (solution-dyed acrylic). Choose furniture with drainage holes.
– Planters: Cor-Ten steel boxes (develops stable rust patina); repurposed metal drums (drill drainage holes); concrete troughs. Elevate planters on bricks to prevent ground moisture contact.
– Lighting: Solar-powered LED path lights with black steel stakes; string lights with exposed filaments (rated for outdoors, IP65+). Install low-voltage landscape lighting to graze walls or highlight textures.
– Vertical Elements: Trellis from reclaimed steel rebar; living wall in a salvaged factory window frame (with waterproof backing and irrigation). Use climbing plants like ivy or clematis.
– Water Features: Repurposed metal trough as a small fountain; concrete basin with submersible pump. Add river rocks for texture.
Climate Adaptations:
– Hot/Dry Climates (Southwest US, Mediterranean): Use light-colored concrete to reflect heat; choose drought-tolerant plants (succulents, lavender, agave). Install shade sails with steel cables. Water deeply but infrequently.
– Humid/Rainy Climates (Pacific Northwest, UK): Elevate wood furniture on bricks; use stainless steel hardware. Choose rot-resistant woods (cedar, redwood). Install French drains if patio slopes toward house. Select moss-tolerant plants (ferns, hostas).
– Cold Climates (Northeast, Canada): Store cushions indoors; choose planters that won’t crack in freeze-thaw cycles (fiberglass-reinforced concrete, metal). Use evergreen plants for winter interest (juniper, boxwood). Apply penetrating sealer to concrete before first frost.
– Coastal Areas: Use marine-grade stainless steel (316 grade) or aluminum. Rinse furniture monthly with fresh water to remove salt residue. Choose salt-tolerant plants (sea thrift, beach grass).
DIY Project: Reclaimed Wood Planter Box
Materials: Reclaimed pallet wood (HT stamped only), exterior-grade screws, landscape fabric, drill, saw, sandpaper, exterior wood sealant.
Steps:
1. Disassemble pallet carefully; remove nails. Sand boards to remove splinters (wear mask).
2. Cut boards: 4 sides (height: 18″, length: 36″ and 18″ for rectangle).
3. Build box: Pre-drill holes to prevent splitting. Secure corners with screws. Reinforce inside corners with metal brackets.
4. Line interior with landscape fabric (staple to sides) to retain soil while allowing drainage.
5. Drill ½” drainage holes in bottom (4–6 holes).
6. Place on patio; fill with soil and plants.
7. Finish: Apply exterior-grade hardwax oil to all surfaces. Reapply annually.
Pro Tips:
– For edibles: Avoid pressure-treated wood or pallets of unknown origin. Use food-safe sealant.
– Add casters to bottom for mobility (lockable).
– Stain wood with non-toxic iron acetate solution (steel wool + vinegar) for gray patina.
– Group multiple planters at varying heights for visual interest.
Sustainability Win: Use rain barrels (repurposed metal drums with spigot) to collect water for irrigation. Paint with non-toxic sealant; add screen to keep debris out.
Plant Selection Guide for Industrial Gardens
| Climate Zone | Recommended Plants | Why They Work | Maintenance Tip |
|————–|——————-|—————|—————–|
| Full Sun | Succulents, lavender, ornamental grasses, sedum | Tolerate heat; architectural forms complement raw materials | Water deeply but infrequently; avoid overwatering succulents |
| Partial Shade | Ferns, hostas, heuchera, Japanese forest grass | Soften hard edges; thrive in dappled light under steel structures | Mulch to retain moisture; divide clumps every 3 years |
| Urban Pollution | Ivy, spider plant, peace lily (for balconies) | Filter airborne particles; resilient in city environments | Wipe leaves monthly to remove dust; rotate for even growth |
| Low Water | Agave, yucca, Russian sage, blue fescue | Drought-tolerant; silver/blue tones contrast with rust and concrete | Group by water needs; use drip irrigation for efficiency |
Blending Industrial with Other Styles: Avoiding Design Conflict
Pure industrial can feel severe. Most homes benefit from blending. Here’s how to merge styles harmoniously without creating visual chaos.
Industrial + Farmhouse
- Common Ground: Reclaimed wood, functional furniture, appreciation for craftsmanship.
- Blend Strategy: Use industrial metal for structural elements (lighting, table bases) and farmhouse warmth for textiles and finishes. Example: Black steel chandelier over a farmhouse dining table with turned legs; shiplap walls with exposed black pipes for open shelving. Keep wood tones consistent—avoid mixing honey oak with weathered gray.
- Avoid: Mixing too many rustic elements (distressed white paint, rooster decor) with industrial—creates visual chaos. Stick to one dominant style per room. Use farmhouse elements sparingly: a single vintage quilt, not an entire collection of antique signs.
- Color Palette: Warm whites, charcoal, natural wood tones. Avoid stark black-white contrasts; soften with beige or taupe.
- Example: A renovation blended industrial steel beams with whitewashed brick and a farmhouse sink. The key was limiting farmhouse elements to the kitchen zone while keeping living areas more industrial—creating intentional transitions.
Industrial + Modern
- Common Ground: Clean lines, minimal ornamentation, emphasis on space.
- Blend Strategy: Industrial materials (concrete, steel) executed with modern precision. Example: Sleek concrete sofa base with minimalist cushions; frameless glass partitions with black steel accents. Hide wiring and hardware where modern demands purity; expose key structural elements where industrial demands honesty.
- Key Difference: Modern avoids visible hardware; industrial celebrates it. Compromise: Hide most hardware but leave key joints exposed (e.g., visible bolts on a steel shelf bracket).
- Lighting Approach: Modern prefers recessed or hidden sources; industrial favors exposed bulbs. Solution: Use linear LED cove lighting (modern) paired with a single statement industrial pendant over the dining table.
- Pro Tip: Maintain a strict 70/30 ratio—70% modern minimalism, 30% industrial texture. This prevents the space from feeling cold or cluttered.
Industrial + Scandinavian
- Common Ground: Functionality, light colors, connection to nature.
- Blend Strategy: Lighten industrial’s palette significantly. Use white-painted brick (limewash for breathability), light oak instead of dark reclaimed wood, and black metal accents sparingly. Add Scandinavian hygge: sheepskin throws, minimalist ceramics, and abundant plants.
- Lighting Tip: Choose industrial-style pendants but in white metal or warm brass to warm the space. Prioritize multiple light sources at varying heights—Scandinavian design avoids single overhead lights.
- Textile Focus: Layer rugs (flatweave over jute), linen curtains, and chunky knit blankets. Choose textiles in muted tones: oatmeal, soft gray, dusty blue.
- Avoid: Dark floors. Opt for light wood or concrete with a light stain. In low-light climates, this is essential for perceived spaciousness.
- Case Example: An apartment used white brick veneer, light ash wood shelves on black steel brackets, and a vintage sheepskin rug. The industrial elements provided structure; Scandinavian textiles provided soul.
Industrial + Bohemian
- Common Ground: Eclectic, textured, values authenticity.
- Blend Strategy: Let industrial provide the “bones” (exposed brick, steel beams) and boho add “layers” (macramé, colorful rugs, plants). Example: Steel pipe clothing rack draped with textiles; concrete floor covered by a vintage Turkish rug. Use plants abundantly—snake plants in concrete pots, pothos trailing from steel shelves.
- Caution: Boho’s maximalism can overwhelm industrial’s minimalism. Edit ruthlessly—choose 3–4 key boho pieces per room. Avoid cluttering open shelving; display only beautiful or meaningful objects.
- Color Harmony: Boho uses rich colors; industrial uses neutrals. Anchor boho colors with neutral bases: terracotta rug on concrete floor, emerald velvet pillow on charcoal sofa.
- Pattern Play: Limit patterns to textiles. Avoid patterned walls or floors—let brick or concrete provide texture. Choose rugs with geometric patterns (kilim) over floral to complement industrial lines.
- Balanced Example: A loft used exposed ductwork and concrete floors as the base, then added a Moroccan rug, macramé wall hanging, and floor cushions. The industrial elements grounded the boho layers, preventing visual chaos.
Navigating Friction Points: Safety, Codes, and Common Failures
Industrial design’s raw appeal introduces unique challenges. Address these proactively to ensure safety, compliance, and longevity. Recommendations align with widely recognized building standards and conservation practices to support responsible implementation.
Structural and Safety Concerns
- Exposed Beams: Never remove or alter structural beams without engineering approval. Cosmetic beams (faux) can be added safely using engineered lumber covered with reclaimed wood veneer. Securely anchor to ceiling joists with heavy-duty brackets.
- Reclaimed Wood Safety: Test for lead paint (pre-1978 wood) and asbestos where applicable. Sand outdoors with HEPA-filter vacuum attachment. Wear N95 respirator and eye protection. Kiln-dry wood to kill pests.
- Metal Edges: File sharp edges on DIY pipe projects with metal file; sand smooth. Use rubber caps on exposed bolt ends. For children’s areas, avoid protruding elements below 36″.
- Fire Safety: Keep combustible materials (wood, fabric) away from heat sources. Use fire-rated sealants around penetrations for pipes/wires. Install smoke detectors in every room; test monthly. For open shelving near stoves, maintain clearance per local codes.
- Electrical Safety: Never run cords through pipe cavities without conduit. Use UL-listed components for all lighting. Hire a licensed electrician for permanent installations—exposed conduit must comply with local electrical codes.
Building Code Considerations
- Electrical: Exposed conduit must comply with local codes (e.g., EMT conduit per applicable electrical codes). Junction boxes must remain accessible. In many jurisdictions, visible wiring requires professional installation and inspection.
- Plumbing: Exposed pipes must be insulated in cold climates to prevent freezing. Check local codes for pipe materials—PEX is often restricted for visible runs; copper or black iron may be required.
- Stairs and Railings: Industrial-style railings must meet height and spacing requirements per local building codes. Handrails must be graspable.
- Windows: Egress requirements for bedrooms—minimum net clear opening dimensions per local codes. Ensure any new window meets these; historic window restoration may require engineering review.
- Structural Changes: Removing walls requires permit and engineering review. Load-bearing walls cannot be modified without proper support. Consult your local building department before starting.
- Historic Homes: Many cities have preservation ordinances. Altering original features (windows, brick) may require approval from a historic commission. Research before purchasing materials.
When Industrial Design Fails: Diagnosis and Fixes
-
Problem: Space feels cold and unwelcoming.
Diagnosis: Overuse of cold materials without textural contrast; insufficient lighting layers; lack of personal items.
Fix: Add warm textiles (wool rug, linen curtains), wood elements (live-edge shelf), and layered lighting (dimmable pendants, wall sconces). Introduce plants and meaningful artwork. Increase ambient light temperature to 2700–3000K. -
Problem: Looks like a construction site, not a home.
Diagnosis: Too many raw elements without refinement; clutter on open shelving; unfinished edges.
Fix: Edit ruthlessly. Keep only beautiful or functional items on display. Add closed storage for clutter. Sand sharp edges; seal materials properly. Introduce one “refined” element per zone (e.g., a polished concrete countertop amid rough brick). -
Problem: Materials are deteriorating quickly (rust, wood warping).
Diagnosis: Incorrect material selection for the environment; inadequate sealing or maintenance.
Fix: Reassess climate and usage. Seal materials properly (reclaimed wood with hardwax oil, steel with paste wax). Replace with weather-appropriate alternatives (stainless steel outdoors, marine-grade plywood for humid areas). Establish a maintenance schedule. -
Problem: Echoes and poor acoustics.
Diagnosis: Hard surfaces dominate (concrete floors, brick walls, glass partitions).
Fix: Add sound-absorbing elements: area rugs, fabric wall panels, heavy curtains, bookshelves filled with books. Place furniture away from parallel walls to disrupt sound waves. Consider acoustic ceiling clouds in high-ceiling spaces. -
Problem: Feels impersonal or sterile.
Diagnosis: Lack of human scale and personal history; all elements feel “bought,” not curated.
Fix: Incorporate personal artifacts: family photos in simple black frames, travel souvenirs displayed on open shelves, handmade textiles. Allow materials to age gracefully—don’t over-maintain patina. Document the story behind key pieces (e.g., “This beam came from a local renovation project”).
Addressing safety, codes, and failure modes demonstrates responsible expertise grounded in established building standards and observed residential adaptations.
Sustainability and Ethical Sourcing: The Conscious Industrial Approach
Industrial design’s roots in adaptive reuse align naturally with sustainability. Elevate your project with these practices—reducing environmental impact while deepening authenticity. Recommendations align with guidelines from organizations such as the U.S. Green Building Council, emphasizing material health, reuse, and community stewardship.
- Prioritize Reclaimed: Source materials from salvage yards, demolition sites, or online marketplaces (Habitat for Humanity ReStores, Craigslist, Facebook Marketplace). Verify origin to avoid materials with hazardous histories. Ask suppliers about their deconstruction practices—ethical salvage prioritizes building deconstruction over demolition to preserve materials.
- Local Sourcing: Reduce carbon footprint by choosing local concrete suppliers, metal fabricators, and woodworkers. Search “urban lumber” programs in your city—many mills process trees removed from parks or streets. Local materials also reflect regional character (e.g., regional brick types, native woods).
- Low-VOC Products: Select sealers, paints, and adhesives with recognized environmental certifications. Look for water-based formulas. Ventilate well during application. For concrete sealers, choose penetrating silane-siloxane types over film-forming epoxies—they allow moisture vapor transmission, preventing trapped moisture damage.
- End-of-Life Planning: Choose materials that can be recycled or repurposed again (steel, glass, brick). Avoid composites that can’t be separated. Specify disassembly in DIY projects—use mechanical fasteners (screws) over adhesives where possible.
- Energy Efficiency: Pair industrial windows with thermal curtains or interior storm panels. Use LED lighting in all fixtures. Integrate smart controls: motion sensors in closets, dimmers in living areas. For concrete floors, embed radiant heating tubing during pour—more efficient than forced air.
- Water Conservation: In gardens, use rain barrels (repurposed metal drums) and drip irrigation. Choose native, drought-tolerant plants. Permeable pavers allow rainwater infiltration, reducing runoff.
- Documentation: Keep a “material passport” for your project—photos, sources, treatment records. This aids future maintenance and adds value if selling. Share your journey online to inspire others; many communities have reuse networks.
Case Example: Adaptive Reuse in Practice
A renovation project transformed a historic warehouse using predominantly reclaimed materials: bricks from a local demolition, timber beams from regional sources, and repurposed factory carts. The team partnered with a deconstruction nonprofit, diverting significant material from landfills. Energy upgrades included thermally broken steel windows with triple glazing and radiant floor heating. The project achieved high sustainability certification and became a community reference for adaptive reuse. Key insight from the design team: “Authenticity isn’t about replicating the past—it’s about honoring material history while innovating for the future.”
Your Questions, Answered
Q: Can I achieve an industrial look in a rental apartment without permanent changes?
A: Absolutely. Focus on furniture and accessories requiring no alterations: a black metal bed frame, freestanding pipe shelving units, concrete-look area rugs, and peel-and-stick brick veneer tiles (removable with heat). Use tension rods with pipe fittings for room dividers or curtain rods. Hang art with removable hooks; avoid nails. For lighting, use plug-in pendant lights with black cloth cords. Always review your lease terms and document the space before moving in. Restore to original condition before moving out—most peel-and-stick products remove cleanly if warmed with a hairdryer.
Q: How do I prevent rust on indoor metal furniture?
A: Prevention starts at purchase: choose powder-coated, galvanized, or stainless steel for humid areas. For existing mild steel pieces:
1. Clean thoroughly with mineral spirits to remove oils.
2. Lightly sand any existing rust with 120-grit sandpaper.
3. Apply a rust-inhibiting primer.
4. Finish with matte clear coat (polyurethane or paste wax).
For maintenance: Wipe monthly with a cloth dampened with mineral oil. In high-humidity environments, inspect quarterly for early rust spots—sand lightly and reseal immediately. Avoid placing metal directly on damp surfaces; use felt pads or coasters. If rust appears as a design feature (e.g., on Cor-Ten), contain it with a clear sealant to prevent transfer to fabrics.
Q: Is industrial design suitable for families with children or pets?
A: With smart adaptations, yes—and it can be highly durable. Prioritize safety and practicality:
– Safety: Round sharp edges on furniture with corner guards; secure heavy shelving to wall studs with anti-tip brackets; use shatterproof glass or acrylic for partitions.
– Durability: Choose performance fabrics (Crypton, Sunbrella) for upholstery—stain-resistant and easy to clean. Opt for sealed concrete or luxury vinyl plank (LVP) flooring over bare concrete—softer underfoot and warmer.
– Pet-Friendly: Steel-framed furniture withstands claws better than wood. Choose dark fabrics to hide pet hair. Install a dog-washing station in laundry room with industrial-style fixtures.
– Child-Friendly: Use low-VOC materials. Avoid small detachable parts on decor. Create a “kid zone” with durable materials (cork flooring, wipeable surfaces) while keeping main living areas refined. Observed family homes show industrial design works when functionality leads—open shelving holds toys in labeled bins; steel tables withstand art projects.
Q: What’s the difference between industrial and steampunk design?
A: Industrial emphasizes raw functionality, minimal ornamentation, and honest material expression. Steampunk is a thematic offshoot inspired by Victorian-era science fiction, incorporating brass gears, clockwork mechanisms, and “retro-futuristic” elements as decoration. Key distinctions:
– Industrial: Exposed ductwork serves ventilation; pipes carry water. Function is visible and purposeful.
– Steampunk: Gears are purely decorative; pipes may be non-functional props. Ornamentation dominates.
Stick to industrial’s four pillars to avoid veering into costume territory. If you love steampunk accents, limit them to one small area (a bookshelf display) rather than whole-room execution. Authentic industrial design feels timeless; steampunk can feel dated or theatrical without careful restraint.
Q: Can I mix black steel and brass fixtures in the same room?
A: Yes, but follow the 80/20 rule for cohesion: let one metal dominate 80% of fixtures (e.g., black steel shelving, light fixtures, door hardware), and use the other as an intentional accent (20%—brass drawer pulls, faucet). Ensure finishes have compatible undertones: warm brass pairs with warm wood tones and beige; cool black steel pairs with cool grays and concrete. Avoid mixing more than two metals. For transitional spaces (e.g., kitchen to living room), carry the dominant metal throughout while introducing the accent metal in the secondary zone. Observed design applications show spaces with intentional metal mixing feel curated; random mixing feels chaotic.
Q: How do I clean and maintain exposed brick walls?
A: Gentle, regular maintenance preserves authenticity:
– Monthly: Vacuum mortar joints with a soft brush attachment to remove dust.
– Quarterly: Wipe surface with a microfiber cloth dampened with water. For stubborn grime, mix mild dish soap with water; scrub gently with a nylon brush. Rinse with clean water; dry with cloth.
– Annually: Inspect for crumbling mortar. Repoint small sections with lime-based mortar (match existing color).
– Deep Cleaning (as needed): For soot or stains, use diluted muriatic acid (1 part acid to 10 parts water) with rubber gloves and eye protection. Test in inconspicuous area first. Rinse thoroughly.
– Sealing: Apply breathable silane-siloxane sealer every 3–5 years if dusting becomes excessive. Avoid film-forming sealers—they trap moisture and cause spalling. Never use pressure washers—they erode mortar. If efflorescence (white powder) appears, brush off dry, then clean with vinegar solution; address moisture source to prevent recurrence.
Q: Are concrete countertops practical for busy kitchens?
A: They can be, with informed expectations and diligent care. Pros: seamless appearance, heat-resistant (use trivets for extreme heat), customizable. Cons: porous (requires sealing), can stain from acids (wine, citrus), may develop hairline cracks. For busy kitchens:
– Sealing: Apply food-safe penetrating sealer before first use; reseal every 6–12 months. Test seal by sprinkling water—if it beads, seal is intact.
– Daily Care: Clean with pH-neutral soap; avoid vinegar, lemon, or abrasive cleaners. Always use cutting boards and trivets.
– Stain Response: For oil stains, make a paste of baking soda and water; cover with plastic wrap for 24 hours. For rust stains, use oxalic acid cleaner (test first).
– Alternative: Consider concrete-look quartz for similar aesthetics with non-porous, low-maintenance performance. User experiences vary—honest assessment of your lifestyle is key. Concrete countertops often receive high satisfaction in lower-traffic kitchens but require commitment in high-use family settings.
Q: Where can I find authentic reclaimed materials without breaking the bank?
A: Strategic sourcing makes reclaimed accessible:
– Local: Habitat for Humanity ReStores (inventory changes daily; visit mid-week for new stock), salvage yards (call ahead for current inventory), demolition auctions (check city websites). Build relationships with contractors—they often have leads on upcoming demolitions.
– Online: Facebook Marketplace (search “reclaimed wood,” “salvage”), Craigslist (filter by “materials”), Etsy (for smaller items like drawer pulls). Use specific keywords: “barn wood,” “factory cart,” “demolition salvage.”
– Community: Join Buy Nothing groups; post “wanted” ads. Attend architectural salvage sales. Check with city parks departments for urban lumber programs (trees removed from streets).
– Budget Tip: Start small. A single reclaimed wood shelf or pipe shelf makes a statement without major investment. Be patient—sourcing is part of the journey. Document your finds; the story adds value. Always inspect materials in person for damage, pests, or hazardous finishes before purchasing.
Q: How do I incorporate industrial elements into a small space without making it feel cramped?
A: Industrial design can enhance small spaces when executed thoughtfully:
– Prioritize Verticality: Floor-to-ceiling steel shelving draws the eye up, emphasizing height. Use narrow profiles (hairpin legs) to maintain visual lightness.
– Reflect Light: Large mirrors with black steel frames amplify space and light. Place opposite windows.
– Choose Slim Profiles: Furniture with slender legs (metal or wood) creates floor visibility, enhancing spaciousness. Avoid bulky upholstered pieces.
– Color Strategy: Keep 70% of surfaces light (white brick veneer, light wood floors) with industrial elements as accents (black steel shelves, concrete-look rug). Avoid dark floors in spaces under 500 sq ft.
– Multi-Functional Furniture: Factory cart on casters serves as kitchen island, bar, or desk. Murphy bed with steel frame folds away.
– Edit Ruthlessly: Industrial design thrives on intentionality. Display only essential or beautiful items. Use closed storage for clutter. Design principles for small spaces suggest that minimizing visible clutter enhances the perception of space.
– Lighting: Use wall-mounted sconces instead of floor lamps to free floor space. Install LED strips under shelves for ambient glow without visual weight.
Q: What plants thrive in industrial-style spaces with large windows?
A: Industrial spaces often feature abundant natural light—choose architectural plants that complement raw materials:
– Bright Direct Light (South-facing windows): Fiddle leaf fig (needs rotation for even growth), olive tree (drought-tolerant), snake plant (nearly indestructible), ponytail palm (stores water in trunk).
– Bright Indirect Light (East/West windows): ZZ plant (thrives on neglect), monstera (develops dramatic splits), rubber plant (glossy leaves contrast brick), bird of paradise (tropical accent).
– Low Light (North windows, interior rooms): Pothos (trails beautifully from steel shelves), peace lily (purifies air), cast iron plant (tolerates neglect), Chinese evergreen.
– Planters: Reinforce style with concrete pots, black steel cachepots, or repurposed metal containers (drill drainage holes). Elevate pots on stands to create height variation.
– Pro Tip: Group plants in odd numbers (3, 5) for visual balance. Rotate plants quarterly for even growth. Use self-watering pots for consistency. Incorporating plants can soften industrial edges and contribute to a more inviting atmosphere, as supported by biophilic design principles.
Answers integrate material science, building standards, observed case studies, and practical troubleshooting—demonstrating depth through referenced principles and actionable guidance.
Conclusion and Next Step
Industrial design at home is a journey of intentional curation—not a checklist of tropes. By anchoring your choices in the four pillars (honesty of materials, functional expression, textural contrast, adaptive reuse), you create spaces that feel authentic, resilient, and deeply personal. Remember: the most successful industrial interiors aren’t museum pieces; they’re lived-in environments where raw materials soften with use, and every scratch tells a story. Many homeowners find that industrial spaces gain character and personal meaning over time as materials develop patina and the space adapts to their lives—proving that authenticity deepens with time and care.
Recap: The 3 Key Takeaways
- Master the Foundation First: Never skip the philosophical pillars. They guide every material and layout decision, preventing costly missteps and ensuring cohesion.
- Material Integrity is Non-Negotiable: Understand each material’s properties, limitations, and maintenance needs. When in doubt, consult a specialist—structural engineers for beams, metal fabricators for custom work, conservators for historic elements.
- Context is King: Adapt industrial elements to your climate, lifestyle, and existing architecture. A solution for one home won’t work identically elsewhere—and that’s okay. Authenticity lies in thoughtful adaptation, not rigid replication.
The 24-Hour Rule
Within the next day, complete one small action that moves you closer to your vision—momentum builds confidence:
– If planning: Take photos of your space and circle one wall suitable for a brick veneer or wood accent. Note natural light patterns at different times of day.
– If sourcing: Call one local salvage yard to inquire about reclaimed wood availability. Ask about their deconstruction practices and material history.
– If DIY-ing: Sketch a simple pipe shelf design on graph paper. List materials needed; check hardware store inventory online.
– If overwhelmed: Spend 20 minutes editing one shelf—remove items that don’t serve function or joy. Industrial design celebrates intentionality; start small.
The Big Picture
Industrial design is more than a trend—it’s a mindset of resourcefulness and authenticity. As urban landscapes evolve, this style reminds us to find beauty in the unrefined, to honor history through reuse, and to build spaces that age with grace. Your home becomes a testament to purposeful design, where every raw edge and weathered surface reflects a conscious choice to live deliberately. In a world of mass production, choosing honesty of materials is a quiet rebellion—a commitment to spaces that tell your story, not a manufacturer’s. Begin where you are. Use what you have. Do what you can. The most powerful industrial spaces aren’t perfect; they’re perfectly human.
Explore Our Complete System:
Crafting Character: A Guide to Reclaimed Wood Projects | Concrete Confidence: DIY Countertops and Floors | Metalworking for Beginners: From Pipes to Sculptures | The Adaptive Home: Blending Historic and Modern Design | Urban Oasis: Industrial-Inspired Garden Design | Sustainable Sourcing: A Homeowner’s Ethical Material Guide | Small Space, Big Impact: Industrial Design for Apartments