Don’t wait for sparks, smoke, or silence. Learn to identify clear warning signs, understand your upgrade pathway with confidence, and take informed steps to protect your home—without fear, confusion, or unnecessary expense.
Your home’s electrical panel quietly powers daily life—from preserving food in the refrigerator to maintaining comfort through seasonal extremes. Yet hidden behind that unassuming metal door lies a critical safety component many overlook until warning signs appear. Electrical system issues contribute to tens of thousands of residential fires annually across the United States, resulting in billions of dollars in property damage. This guide transforms uncertainty into clarity. We’ll walk you through observable warning signs any homeowner can recognize, translate technical concepts into plain language, outline the upgrade process transparently, and equip you with precise questions for licensed professionals. Most importantly, you’ll gain perspective on when action is urgent versus when thoughtful planning is appropriate—because electrical safety is about informed stewardship, not fear.
Introduction
Tucked away in a basement corner, garage wall, or utility closet, your electrical panel operates reliably—until subtle signs suggest otherwise. For decades, this metal enclosure has distributed power through circuits branching like veins throughout your home. But technology evolves. Appliance demands increase. Safety standards advance. Materials age. What sufficed for a mid-century home with minimal electronics may now strain under home offices, EV chargers, smart kitchens, and entertainment systems. The National Electrical Code (NEC), updated every three years through collaborative review by safety engineers, fire professionals, and industry experts, establishes minimum standards to protect lives and property. Compliance reflects decades of analysis from real-world incidents, technological shifts, and safety innovations. Understanding your panel’s condition within this evolving framework transforms it from a forgotten utility into a proactive element of household safety. This guide synthesizes current safety standards, practical observation techniques, and industry practices to provide a clear, actionable roadmap—whether you’re noticing subtle changes or planning a renovation. Your journey toward a safer, more capable electrical system begins with awareness.
The Five Critical Triggers Framework: Is Your Panel Sending Signals?
Electrical issues rarely announce themselves dramatically. Instead, they manifest through subtle, observable patterns easily dismissed as minor inconveniences. The Five Critical Triggers Framework converts these patterns into clear decision points. Developed from documented failure patterns cited by the National Fire Protection Association (NFPA) and field reports from licensed electrical contractors, this framework identifies objective conditions warranting professional evaluation. Experiencing even one trigger merits attention. Multiple triggers suggest prioritizing assessment. Each represents a distinct category of concern.
Trigger 1: Age and Obsolescence – Recognizing Time-Based Vulnerability
Electrical panels, like all mechanical systems, experience predictable degradation over time due to thermal cycling (repeated heating and cooling), oxidation, material fatigue, and environmental exposure. While a well-maintained panel in a stable environment may function longer, industry consensus identifies clear age-related considerations rooted in material science and historical performance data.
The 25–40 Year Consideration: Most modern circuit breaker panels function reliably for 25–40 years under typical residential conditions. Why this range? Internal components—spring mechanisms in breakers, bus bar connections, insulating materials—undergo cumulative stress. Breakers designed to trip at precise amperage levels may become less responsive over decades. Bus bars (metal strips distributing power) can develop micro-fractures or corrosion at connection points, creating resistance that generates heat. A panel installed during the late 20th century is operating beyond its original design context. Even if functioning presently, its protective components may not perform optimally during an overload—the precise moment safety depends on them.
Legacy Panel Types Requiring Professional Evaluation: Age alone isn’t the sole factor. Specific panel brands manufactured between the 1950s and 1990s have documented performance concerns confirmed by Underwriters Laboratories (UL) investigations, Consumer Product Safety Commission (CPSC) advisories, and industry consensus. These aren’t merely “older models”—they represent designs with verified limitations:
- Federal Pacific Electric (FPE) Stab-Lok Panels (1950s–1980s): Found in millions of U.S. homes. Independent testing and CPSC documentation indicate breakers may fail to trip during overloads or short circuits under specific conditions. Internal design characteristics can cause breakers to remain energized even when the handle is switched “off,” creating shock hazards during maintenance. UL records confirm these panels were never certified to applicable safety standards. If your panel label shows “Federal Pacific,” “FPE,” or “Stab-Lok” (often with distinctive colored handles), professional evaluation is strongly recommended. Visual identification guides are available through the CPSC website.
- Zinsco / GTE-Sylvania Panels (1960s–1980s): Characterized by breakers that screw into the bus bar. Documentation indicates a potential failure mode where the breaker connection can fuse to the bus bar during a fault event, preventing proper tripping and complicating safe removal. Corrosion accelerates this vulnerability. Panels labeled “Zinsco,” “GTE-Sylvania,” “Challenger” (early models), or “Sylvania” with screw-in breakers warrant professional assessment.
- Split-Bus Panels (Common pre-1980s): These lack a single main disconnect breaker. Power flows through multiple “main” breakers (often 2–6) at the top. Shutting off all power during an emergency requires switching every main breaker—a potentially confusing process under stress. Modern NEC requirements emphasize a single, clearly identifiable main disconnect for rapid emergency shutdown. Additionally, split-bus panels typically max out at 100 amps, which may be insufficient for contemporary homes.
Illustrative Scenario: Consider a hypothetical home built in the late 1970s. The electrical panel, labeled “Federal Pacific,” has operated without incident for decades. During a family gathering with multiple heating appliances in use, an overload occurs on a kitchen circuit. Due to documented performance limitations in this panel type, the breaker fails to interrupt the circuit promptly. Wires overheat within walls. Smoke detectors activate. While emergency response prevents catastrophe, investigation traces the initiating factor to the panel’s compromised protective function. This pattern aligns with documented fire investigation reports. Age combined with known design characteristics creates a foreseeable vulnerability path. Proactive evaluation eliminates this preventable risk factor.
Action Step: Locate your panel (typically in basement, garage, or utility room). Without opening the deadfront cover (the outer metal door), examine the visible label. Note the manufacturer name, model number, and any date markings. Take a clear photo. Search “[Your Panel Brand] safety information” or consult the CPSC website. If you identify FPE, Zinsco, or a split-bus design, contact a licensed electrician for evaluation. Do not delay.
Trigger 2: Chronic Overloading – When Demand Exceeds Capacity
Your electrical panel has a maximum capacity measured in amperes (amps)—the “volume” of electricity it can safely distribute. Older homes commonly feature 60-amp or 100-amp services. Modern homes typically require 200 amps. When demand consistently approaches or exceeds capacity, the system experiences thermal stress with cumulative effects.
Recognizing Overload Patterns:
* Predictable Breaker Tripping: Not occasional tripping from a single faulty appliance, but consistent tripping when using specific appliance combinations (e.g., air conditioner activating while oven is preheating). This indicates circuits are regularly overloaded.
* Flickering or Dimming Lights: Especially noticeable when major appliances (refrigerator compressor, AC unit, well pump) cycle on. This suggests voltage fluctuation due to insufficient capacity or loose connections under load—a potential precursor to more serious issues.
* Warmth or Discoloration at Outlets/Switches: Safely place your hand near (not on) outlets. Unusual warmth, buzzing sounds from switches, or brown scorch marks around faceplates indicate resistance at connection points—often linked to circuit strain.
* Unusual Odors Near Panel or Outlets: A distinct smell of hot plastic, ozone, or “fishy” notes (sometimes associated with overheating components) warrants immediate attention. If detected, turn off non-essential appliances and contact a professional.
Contemporary Power Demand Context: A mid-20th century home might have required 30–40 total amps. Today’s essential loads create significantly higher demand:
* Central Air Conditioning: 30–50 amps
* Electric Range/Oven: 40–50 amps
* Electric Water Heater: 30 amps
* Electric Dryer: 30 amps
* EV Charger (Level 2): 30–50+ amps
* Home Office Systems: 15–20 amps
* Entertainment Systems: 15–20 amps
* Modern Kitchen Loads: 30–40+ amps
Summing these reveals why a 100-amp panel may be undersized for current needs. Homeowners adding EV chargers, heat pumps, or dedicated workshops often discover their existing service lacks necessary capacity. The NEC requires new circuits and major additions to meet current code, which frequently necessitates panel evaluation to accommodate additional load safely. A licensed electrician performs a “load calculation” (NEC Article 220) to determine your home’s actual demand versus panel capacity—a critical step before adding significant new loads.
Understanding “Double-Tapping”: A hazardous, non-compliant condition sometimes found in strained panels is “double-tapping”—connecting two circuit wires to a single breaker terminal designed for only one. This creates loose connections, arcing potential, and excessive heat. Never attempt this yourself. If visible during professional inspection (two wires under one breaker screw), correction is essential during any upgrade.
Action Step: Track breaker tripping events. Note which appliances are operating. If tripping occurs predictably during normal use, document it. This log provides valuable context for your electrician. Never replace a tripped breaker with a higher-ampacity model—this bypasses critical protection and creates serious hazards. The solution addresses the root cause: insufficient capacity.
Trigger 3: Physical Damage and Corrosion – Visible External Indicators
Electricity requires secure, clean connections. Moisture, pests, physical impact, or environmental contaminants introduce variables that compromise integrity. Unlike internal aging, many warning signs are visible during a safe, external inspection (never open the panel yourself).
Key Visual Indicators:
* Rust or Corrosion on Panel Exterior: Especially around seams, door latch, or conduit entries. Rust suggests moisture exposure. Internally, moisture accelerates oxidation on bus bars and connections, increasing resistance and heat generation. Coastal or humid environments accelerate this process.
* Scorch Marks, Melting, or Discoloration on Cover: Brown, black, or bubbled areas near breaker handles or main disconnect signal past thermal events or sustained overheating.
* Physical Damage to Enclosure: Dents (e.g., from garage equipment), cracks, or compromised seals allowing dust/debris ingress. Damage may misalign internal components or create shock hazards.
* Pest Evidence: Rodent droppings, chewed insulation at conduit entries, or insect nests near the cabinet. Rodents gnawing wires create short-circuit risks; nesting materials are flammable.
* Water Stains or Mineral Deposits: Below the panel or on surrounding walls indicate past moisture exposure. Even if dry now, internal components may be affected.
Location-Based Vulnerability:
* Garage Panels: Subject to temperature swings, vibrations, and chemical exposure.
* Basement Panels: Vulnerable to humidity, potential flooding, or condensation from concrete walls.
* Outdoor Panels (Meter-Mains): Exposed to UV degradation, precipitation, and temperature extremes. Gaskets and seals deteriorate over time.
A panel showing significant external corrosion or damage likely has internal compromise. Moisture penetration doesn’t stop at the enclosure. Corrosion on conductive surfaces creates high-resistance points that generate heat under load—a documented ignition pathway. Replacing a damaged panel restores the integrity of this central safety component.
Action Step: During daylight, safely inspect the closed panel exterior. Use a flashlight. Look for rust, discoloration, dents, or signs of moisture/pests. Take photos. If observed, schedule professional inspection. Never open the panel yourself—live components pose severe shock risks.
Trigger 4: Recurring Electrical Issues – Patterns Pointing to Panel-Level Concerns
Isolated electrical glitches happen—a faulty lamp, a tripped bathroom GFCI. But persistent, unexplained issues across multiple circuits often trace back to panel-level instability. Pattern recognition is key.
Notable Patterns:
* Intermittent Power Loss: Lights or outlets in specific areas flicker or lose power momentarily without breaker tripping. This may indicate a loose main service connection (where utility power enters) or a failing main breaker. Loose connections can arc violently, generating intense heat.
* Unusual Sounds from Panel: While a faint hum is normal, new or pronounced buzzing, humming, or crackling suggests arcing—electricity jumping across gaps due to loose connections or component stress. If heard, turn off non-essential appliances, avoid the area, and contact an electrician promptly. Do not open the panel.
* Breakers Feeling Loose or Failing to Latch: Breakers should click firmly into “ON” and “OFF” positions. Wobbling, sliding easily, or refusing to stay in position indicates mechanical wear or bus bar issues. Reliability is compromised.
* Multiple Unexplained Appliance Failures: Repeated motor failures in refrigerators, AC units, or pumps may occasionally stem from voltage instability originating at the panel, though appliance issues are more common. If multiple major appliances fail unexpectedly within a short timeframe, panel evaluation is prudent.
Understanding “Ghost Tripping”: Breakers tripping with no apparent load or appliance fault. Potential contributors include:
* Internal panel connection issues
* Moisture intrusion creating conductive paths
* Aging breaker mechanisms causing false trips
* Wiring configurations like older multi-wire branch circuits requiring specific handling
While troubleshooting individual circuits has value, recurring issues across different circuits strongly point to the panel as the common factor. Ignoring these patterns is like disregarding persistent engine knocking—it signals underlying stress requiring attention.
Action Step: Keep a simple log: Date, time, affected area/appliance, weather conditions (storms can exacerbate issues), and observations (sound, smell, visual). This objective record aids professional diagnosis. If loud buzzing/crackling is heard from the panel, treat it as urgent.
Trigger 5: Expansion Needs – Planning for Future Electrical Demands
Sometimes, the catalyst isn’t current failure—it’s forward-looking preparation. Adding significant new electrical loads requires safe, code-compliant integration. Forcing new circuits into an already constrained panel creates compromises.
Common Scenarios Requiring Panel Evaluation:
* Adding an Electric Vehicle (EV) Charger: Level 2 chargers typically require dedicated 30–50+ amp circuits. Many existing panels lack spare capacity or physical space for a new double-pole breaker. A load calculation is essential before installation.
* Installing Heat Pumps or Mini-Splits: Modern systems can demand 30–60+ amps. Older panels may not support this without evaluation.
* Finishing Basements, Attics, or Garages: Adding lighting, outlets, HVAC, or kitchenettes significantly increases circuit count and total load. NEC requires specific circuit types (AFCI, GFCI) in new living spaces, which older panels may not support.
* Creating Home Offices, Server Rooms, or Workshops: High-density computing, printers, or power tools require dedicated circuits and stable voltage. An undersized panel leads to voltage drop, potentially affecting sensitive electronics.
* Installing Generators or Solar Systems: These require specialized interlock kits or transfer switches integrated at the main panel. Older panels may lack compatibility, physical space, or structural integrity for safe integration. Modern panels often include features facilitating renewable energy integration.
The Space Constraint Reality: Panels have finite slots for circuit breakers. A “full” panel (all slots occupied) cannot accept new circuits. “Tandem” breakers (two circuits in one slot) offer limited relief but have strict constraints:
* Not all panels accept them (check manufacturer labeling)
* They don’t increase the panel’s total amperage capacity—only circuit count
* NEC restrictions limit where they can be used
* They complicate future upgrades and reduce panel organization
Forcing expansions into an inadequate panel leads to unsafe workarounds: double-tapping, overloading circuits, or improper sub-panels. A panel upgrade during expansion is often the most sustainable, safest long-term solution—it future-proofs your home, supports property value, and ensures new installations meet current safety standards.
Action Step: Before planning major additions, renovations, or high-demand appliances, consult a licensed electrician for a load calculation and panel assessment. Budgeting for potential upgrade upfront prevents delays, rework, and safety compromises later. It’s an investment in seamless integration of modern technology.
The Fundamental Principle: Electrical safety is proactive system stewardship. Your panel’s condition isn’t governed by “if it ain’t broke, don’t fix it.” It is the foundational component upon which every other electrical safety device—GFCIs, AFCIs, smoke detectors—depends. Compromising its integrity affects your entire home’s defense against fire and electrocution risks.
Understanding Panel Types: From Legacy Systems to Modern Standards
Familiarity with electrical panel terminology empowers informed conversations with professionals. This section explains core technologies, capacity considerations, and the evolution of safety features defining contemporary standards. Knowledge reduces uncertainty and supports confident decision-making.
Legacy Panels: Context on Historical Designs
While Trigger 1 introduced legacy panels, deeper context clarifies the reasoning behind professional recommendations. These designs aren’t merely “old”; they possess characteristics validated by decades of field experience and safety analysis.
Federal Pacific Electric (FPE) Stab-Lok: Documented Performance Concerns
Independent testing referenced by the CPSC and industry bodies revealed inconsistent performance under fault conditions:
* Breakers sometimes failed to trip within required timeframes during overload tests
* The “stab-in” connection design was prone to loosening over time due to thermal expansion/contraction
* A documented condition allowed handles to be switched “off” while internal contacts remained energized under specific scenarios
UL certification records indicate FPE panels were not certified to applicable UL 489 standards. While no federal recall was mandated, safety authorities consistently recommend replacement. Visual identification is critical: Look for “Federal Pacific,” “FPE,” or “Stab-Lok” on the label. Breakers often feature colored handles and status windows. If confirmed, professional evaluation is strongly advised. Component replacement does not resolve core architectural concerns.
Zinsco / GTE-Sylvania: Connection Vulnerability
Zinsco’s screw-in breaker design had a documented failure mode: during high-current fault events, heat could cause the aluminum breaker body to fuse to the aluminum bus bar. Consequences included:
* Potential failure to interrupt fault current
* Significant challenges in safe breaker removal without utility coordination
* Accelerated degradation from oxidation at connection points
Panels labeled “Zinsco,” “GTE-Sylvania,” “Challenger” (pre-1980s models with screw-in breakers), or “Sylvania” with this design warrant professional assessment. Later Challenger panels (post-Westinghouse acquisition) used different breakers and are generally evaluated on individual condition.
Other Panels Warranting Awareness:
* Pushmatic (ITE, Bulldog): Mechanically robust but lack compatibility with modern Arc-Fault Circuit Interrupter (AFCI) breakers required by current code for bedroom circuits. Breakers can stiffen with age. Not inherently hazardous like FPE/Zinsco, but obsolete. Replacement is often considered during renovations requiring AFCI protection.
* Split-Bus Panels (“Rule of Six”): Lack of a single main disconnect conflicts with modern NEC requirements (Article 230.71) for rapid emergency shutdown. Multiple main breakers create potential confusion during emergencies. Upgrading enhances safety clarity.
Why Full Replacement is Standard Practice: Legacy panels cannot be reliably “fixed” by replacing individual breakers. Bus bars, internal architecture, and component compatibility are interdependent. Installing modern breakers in obsolete panels is often physically incompatible and voids safety certifications. Full replacement is the industry-standard approach for panels with documented limitations.
Understanding Amperage: Matching Capacity to Verified Need
Amperage (amps) measures electrical current flow—the volume of electricity available. Voltage (120V/240V in US homes) is the electrical “pressure.” Your panel’s main breaker rating defines the maximum safe current for the entire system. Selecting appropriate capacity balances verified demand with prudent headroom.
Common Service Sizes Context:
* 60-Amp Service: Typical in pre-1960s homes. Generally inadequate for modern electrical demands beyond very small dwellings with gas appliances. Upgrade is commonly recommended.
* 100-Amp Service: Standard for homes built from the 1960s through early 1990s. May suffice for smaller homes (under 1,800 sq ft) with gas heating/cooking and modest electrical use. Adding EV chargers, heat pumps, or significant renovations often exceeds safe capacity. Some insurers review these systems closely during underwriting.
* 150-Amp Service: An intermediate size found in some larger older homes. Offers more capacity than 100A but is increasingly bypassed for 200A during upgrades for future flexibility.
* 200-Amp Service: Current standard for new construction and major renovations in single-family homes. Supports:
* Larger homes (2,500+ sq ft)
* All-electric systems (heat pump HVAC, electric water heating, cooking)
* EV charging infrastructure
* Home workshops, pools, spas
* Modern electronics density
* Reasonable future expansion
* 400-Amp Service (or Dual 200A): Typically reserved for very large homes (4,000+ sq ft), properties with multiple high-demand features (dual EV chargers, large pools), or accessory dwelling units (ADUs). Involves larger meter bases and often two separate panels.
The Load Calculation: Your Objective Assessment Tool
Guessing capacity needs is unreliable. The NEC mandates a formal load calculation (Article 220) for new services and major additions. A qualified electrician performs this using a standardized worksheet considering:
1. Square footage (general lighting/receptacle load)
2. Small appliance branch circuits (kitchen, laundry)
3. Fixed appliance nameplate ratings
4. Cooking equipment (with NEC demand factors)
5. HVAC load (larger of heating or cooling)
6. Largest motor load
7. Applicable demand factors for intermittent use
This calculation determines the minimum required service size. Reputable electricians often recommend sizing 10–20% above the calculated minimum to accommodate foreseeable needs. For most existing homes undergoing renovation or adding major loads, upgrading to 200A represents a balanced choice—it addresses current needs, allows future flexibility, and aligns with resale expectations. Upgrading directly to 400A is rarely necessary for typical single-family homes and significantly increases cost without proportional benefit unless specific high-demand features are confirmed.
Clarifying a Common Question: “Will a Larger Panel Increase My Electric Bill?”
No. Your panel’s amperage rating is a capacity limit, like the size of a water main to your house. It does not determine how much electricity you consume. Your meter and utility bill reflect actual usage (kilowatt-hours). A 200A panel doesn’t “draw” more power than a 100A panel; it simply allows higher-demand appliances to operate safely when needed. Upgrading capacity enables efficient use of modern appliances but doesn’t inherently increase consumption.
Breaker Panels vs. Fuse Boxes: Understanding the Evolution
While “fuse box” is sometimes used generically, true fuse-based panels (common pre-1960s) represent an earlier technology with notable limitations compared to modern circuit breakers.
Fuse Box Considerations:
* Single-Use Protection: Fuses contain a metal element that melts (“blows”) during overloads, breaking the circuit. They must be physically replaced after each event.
* Human Error Risk: A dangerous practice involves inserting a higher-amp fuse (e.g., replacing a blown 15A fuse with a 20A or 30A fuse) to stop “nuisance blowing.” This bypasses overcurrent protection. Wiring rated for 15A can overheat dangerously with higher current flowing, potentially igniting insulation. This “fuse mismatching” is a documented fire contributor.
* Limited Modern Protection: Cannot accommodate AFCI or GFCI protection at the panel level (required by NEC for many circuits since the late 1990s/early 2000s). GFCI protection would require individual receptacles throughout the home.
* Component Degradation: Porcelain fuse holders can crack. Screw-in bases can corrode or loosen, creating arcing hazards.
Circuit Breaker Advantages:
* Resettable: Restore power by flipping the switch after correcting the overload cause. No need for spare parts.
* Tamper-Resistant Design: Breakers are engineered to accept only the correct amperage rating for their slot, preventing intentional mis-sizing.
* Precise Response: Modern thermal-magnetic breakers respond quickly to both moderate overloads (thermal mechanism) and dangerous short circuits (magnetic mechanism).
* Foundation for Advanced Safety: Panel-ready AFCI (mitigates arc-fault fire risks) and GFCI (mitigates shock risks) breakers provide whole-circuit protection more comprehensively than outlet-level devices. Dual-function AFCI/GFCI breakers are now standard for many circuits.
* Clear Status Indication: “ON,” “OFF,” and “TRIPPED” positions are visually obvious. Many include trip indicators.
Professional Perspective: If your home operates on a fuse box, upgrading to a modern circuit breaker panel is widely regarded as a fundamental safety enhancement. The risks of fuse mismatching, lack of modern protection options, and component degradation are significant considerations. This upgrade is often bundled with increasing service amperage (e.g., from 60A fuse to 200A breaker panel) for comprehensive modernization.
The Upgrade Journey: A Transparent, Step-by-Step Overview
Uncertainty fuels anxiety about electrical work. Demystifying the process—from initial assessment to final inspection—builds confidence and sets realistic expectations. This section details each phase with clarity, including timelines, homeowner considerations, and markers of quality work. Transparency supports informed partnership.
Phase 1: Professional Assessment – Establishing the Baseline
This initial visit (often low-cost or complimentary from reputable companies) is diagnostic. A thorough assessment forms the basis for an accurate scope of work and quote. Expect a licensed electrician to:
- Discuss Your Situation: Review observed symptoms (tripping patterns, sounds), planned expansions (EV charger, renovation), timeline, and concerns.
- Exterior Panel Inspection: Examine the enclosure for rust, damage, corrosion, scorch marks, and labeling (manufacturer, amperage, model). Check conduit entries for damage or pest evidence.
- Controlled Internal Inspection (Power ON): Performed only by licensed professionals with appropriate PPE and tools:
- Verify panel type and approximate age
- Assess bus bar condition (corrosion, pitting, discoloration)
- Check for double-tapped breakers, loose wires, or signs of arcing
- Measure voltage at key points to identify imbalances
- Evaluate available space for new circuits
- Inspect grounding and bonding connections
- Load Calculation: Perform NEC Article 220 calculation to determine required service size for current and planned loads.
- Site Assessment: Evaluate panel location accessibility, condition of existing service entrance cable, proximity to utilities, and space for potential relocation if needed (e.g., for NEC clearance requirements).
- Discussion & Options: Present findings clearly. Explain why recommendations are made (referencing specific observations). Discuss options:
- Full panel replacement (most common)
- Panel relocation if current location violates NEC clearance rules (36″ depth, 30″ width, 78″ height in front)
- Amperage options based on load calc and budget
- Panel brand considerations (Square D Homeline/QO, Siemens, Eaton CH/BR—known for reliability and parts availability)
- Inclusion of AFCI/GFCI breakers where beneficial or code-required
- Written Proposal: Provide a detailed, line-item quote including:
- Scope of work (e.g., “Replace 100A panel with new 200A Square D QO panel, 40 spaces”)
- Materials list (panel brand/model, breaker types/quantities)
- Labor estimate
- Permit fees (if included)
- Timeline estimate
- Warranty details (parts and labor)
- Clarification of exclusions (e.g., drywall repair, updating old branch wiring)
Professional Red Flags to Note:
* Refusal to inspect the panel internally (“I can tell from the outside”)
* Pressure to sign immediately with “today-only discount”
* Vague quote lacking specifics
* Suggesting unsafe shortcuts (e.g., “We can just add a sub-panel to avoid replacing the main”)
* Inability to provide proof of license, insurance, or references
Homeowner Preparation: Before the visit, compile symptom notes, photos of the panel label/exterior, list of planned electrical additions, and any previous electrical records. Clear access to the panel area. This streamlines assessment and demonstrates engagement.
Phase 2: Permitting and Code Compliance – Ensuring Independent Verification
Electrical work is regulated for life-safety reasons. Securing a permit isn’t bureaucratic formality; it’s your guarantee of independent verification that work meets minimum safety standards. Skipping permits risks:
* Safety Oversight: Uninspected work may have hidden flaws
* Insurance Complications: Unpermitted work discovered after an incident may affect claim resolution
* Resale Considerations: Unpermitted major system work often requires disclosure and can complicate home sales
* Regulatory Penalties: Local building departments may impose fines for unpermitted work
Typical Permit Process:
1. Application: Electrician submits application to local building department with scope, diagrams, license info.
2. Review: Department reviews for compliance with NEC and local amendments (e.g., coastal, seismic requirements). May request revisions.
3. Issuance: Permit issued upon approval. Fees vary locally (typically $100–$300 for panel upgrade).
4. Posting: Permit visibly posted at job site during work.
5. Inspections: Scheduled at key stages:
* Rough-In (if wiring modified): Before walls are closed
* Final Inspection: After installation, energization, and completion. Inspector verifies:
* Correct panel type/size for calculated load
* Proper grounding and bonding
* Adequate working clearance (NEC 110.26)
* Correct breaker types and labeling
* Secure connections, no double-tapping
* Compliance with local amendments
6. Sign-Off: Inspector approves work. Permit closed. Documentation filed with property records.
NEC Requirements Impacting Upgrades:
* AFCI Protection (NEC 210.12): Required for 15A/20A, 120V branch circuits in living rooms, bedrooms, dining rooms, hallways, and similar areas. Modern panels facilitate AFCI breaker installation.
* GFCI Protection (NEC 210.8): Required for kitchen, bathroom, garage, outdoor, basement, and laundry outlets. Achieved via GFCI breakers (preferred for whole-circuit protection) or receptacles.
* Working Space (NEC 110.26): Minimum 36″ deep, 30″ wide (or panel width), 78″ high clearance in front of panel. Violations may necessitate relocation.
* Labeling (NEC 408.34): Every circuit must be clearly identified on the panel directory (e.g., “Master Bedroom Receptacles”).
A reputable electrician manages permitting seamlessly. Confirm permit inclusion in the quote. Ask: “Will you secure the permit and schedule inspections?” This is standard professional practice. Understanding this process empowers verification of compliance and appreciation of its role in safeguarding your investment.
Phase 3: Installation Day – Timeline, Disruptions, and Protocols
Knowing what to expect reduces stress. A standard panel replacement (without relocation or major wiring updates) typically takes one full workday (6–10 hours). Complexity affects duration.
Typical Sequence:
* Morning (8:00 AM – 10:00 AM): Setup & Power Down
* Crew arrives, sets up workspace (drop cloths, tool organization)
* Critical Step: Electrician coordinates with utility company for “meter pull” or “service disconnect.” Only the utility can safely disconnect power at the meter. Scheduling this in advance is essential. Never attempt meter removal yourself—lethal voltage is present.
* Once utility confirms power is off, electrician verifies zero energy using calibrated testers (Lockout/Tagout procedure)
* Late Morning (10:00 AM – 1:00 PM): Removal & Preparation
* Remove old panel deadfront and breakers
* Disconnect all circuit wires and main service wires (de-energized)
* Remove old panel enclosure
* Prepare mounting surface: Repair damaged areas if needed, ensure plumb and level
* Install or verify grounding electrode conductor to grounding rod(s) if required
* Afternoon (1:00 PM – 4:00 PM): New Panel Installation
* Mount new panel enclosure securely
* Install main breaker (if not integral)
* Organize and reconnect circuit wires to new breakers. Critical quality step: Torque all terminal screws to manufacturer specifications using a torque screwdriver—under-torqued connections loosen; over-torqued damage wires. This hallmark of professional work is often overlooked by non-specialists.
* Install AFCI/GFCI breakers as planned
* Secure grounding and bonding wires
* Neatly dress wires inside panel (avoiding sharp bends, securing with clamps)
* Install new, clearly labeled circuit directory
* Late Afternoon (4:00 PM – 5:30 PM): Utility Restore & Testing
* Electrician notifies utility that work is complete for power restoration
* Utility technician re-installs meter and restores power
* Systematic Energization & Testing:
* Turn on main breaker
* Sequentially energize each branch circuit
* Test voltage at key points
* Verify breaker operation (trip test sample AFCI/GFCI breakers)
* Check for abnormal sounds, smells, or heat
* Test outlets, lights, and appliances on multiple circuits
* Confirm new circuits function correctly
* Cleanup & Walkthrough (5:30 PM – 6:00 PM):
* Thorough cleanup of work area
* Review completed work: Explain new panel features, demonstrate breaker operation, review circuit directory
* Provide warranty information, permit documentation, manuals
* Schedule final inspection if not completed on-site
Managing Disruption:
* Power Outage: Plan for a full day without electricity. Refrigerator/freezer stay cold several hours if unopened; use coolers for perishables. Charge devices overnight.
* Noise & Activity: Expect tool noise and crew movement. Keep pets and children away from the work area.
* Access: Ensure clear path to panel location and meter. Move vehicles if meter is in driveway.
* Contingencies: Discuss potential surprises beforehand (e.g., “If we find damaged mounting surface, repair cost is X”). A good contract includes a clause for unforeseen conditions with pre-agreed pricing.
Homeowner Role During Installation:
* Stay Clear: Do not enter the work area. High-voltage components are exposed during critical phases.
* Trust the Process: Do not urge skipping safety steps (like waiting for utility coordination).
* Ask Questions After: Save detailed questions for the walkthrough. Crews require focus during technical phases.
Witnessing the methodical process—utility coordination, verification of zero energy, torque specifications, systematic testing—reinforces why this work requires licensed professionals. It’s rebuilding the heart of your home’s electrical safety system with precision.
Phase 4: Final Inspection and System Handover – Completing the Process
The project concludes when the local authority having jurisdiction (AHJ)—the building inspector—verifies compliance. This independent check is your ultimate quality assurance.
Inspection Process:
* Inspector reviews permit and scope
* Conducts visual and functional checks per NEC and local code
* May test GFCI/AFCI breakers, verify clearances, check labeling
* Provides immediate feedback: “Approved,” “Approved with corrections,” or “Failed”
* Signs permit documentation
If Corrections Are Needed: Minor items (e.g., missing label detail, minor clearance adjustment) are common. Reputable electricians address them promptly at no extra charge and reschedule inspection. Major failures are rare with qualified contractors.
System Handover Documentation: Upon approval, retain:
1. Signed Permit: Proof of compliant work for records and future resale
2. As-Built Diagram: Simple sketch showing panel layout and circuit assignments
3. Warranty Certificates: For panel, breakers, and labor
4. Updated Circuit Directory Photo: Take a clear photo for your phone/files
5. Electrician’s Contact Information: For future service or questions
Post-Installation Best Practices:
* Familiarize Yourself: Spend five minutes reviewing the new circuit directory. Test GFCI/AFCI breakers monthly using the “TEST” button (they should trip; reset with “ON” handle).
* Initial Monitoring: Note any unusual behavior during the first week—though rare with quality work, early reporting is valuable.
* Maintain Clearance: Keep the 36″ x 30″ workspace in front of the panel permanently clear of storage.
* Document: File all paperwork with home maintenance records. Update your home inventory.
This meticulous closure transforms the upgrade from a transaction into a documented enhancement to your home’s safety infrastructure. The signed permit is tangible evidence of due diligence—a valuable asset for insurance and future ownership.
Cost Considerations: Realistic Budgeting and Value Perspective
Cost transparency prevents anxiety and supports informed decisions. Panel upgrade costs vary based on location, scope, and local factors. This section breaks down components, provides realistic ranges (based on aggregated industry data), and identifies value beyond initial price.
Factors Influencing Upgrade Costs
| Factor | Lower Complexity / Cost Impact | Higher Complexity / Cost Impact | Why It Matters |
|---|---|---|---|
| Panel Type & Amperage | Replacing panel with same amperage (rare) | Upgrading amperage (e.g., 100A to 200A); adding surge protection | Higher amperage requires larger components. 200A is standard value for most homes. |
| Panel Condition & Location | Modern panel in accessible location | Legacy panel (FPE/Zinsco); severe corrosion; panel in tight space (closet) | Hazardous panels require extra caution. Difficult access increases labor. Relocation adds cost. |
| Utility Involvement | Simple meter pull/restore | Meter base upgrade required; underground service complications | Utility coordination delays add crew time. Meter base replacement is a significant adder. |
| Wiring Updates | Panel replacement only | Adding circuits; correcting double-taps; updating grounding | Each additional circuit adds cost. Critical safety corrections are non-optional. |
| Permits & Inspections | Included in quote; straightforward approval | Local fees high; multiple inspection visits needed | Always budget for permits. Reputable contractors include this. |
| Geographic Location | Areas with moderate labor costs | High-cost areas (CA, NY, MA, urban centers) | Labor rates vary significantly between regions. Get local quotes. |
| Timing | Off-peak seasons (late fall, winter) | Peak demand (spring/summer renovation season) | Scheduling flexibility may yield slight adjustments. |
| Emergency vs. Planned | Scheduled during business hours | After-hours emergency call (panel showing active hazards) | Emergency premiums increase cost. Plan proactively when possible. |
Realistic National Cost Ranges (General Estimates):
* Basic Panel Replacement (Same Location, Same Amp): $1,200 – $2,500
Rare scenario; typically only for hazardous panels where amperage is sufficient. Includes permit, labor, standard breakers.
* Standard Upgrade (100A to 200A, No Relocation): $2,000 – $4,000
Most common scenario. Includes new 200A panel (20–40 spaces), breakers, grounding update, permit, labor. AFCI/GFCI breakers add incrementally.
* Complex Upgrade (Relocation, Meter Base, New Circuits): $3,500 – $7,000+
Panel moved for clearance; meter base upgraded; 2–4 new circuits added; grounding updates. Common in older homes with panels in closets or obstructed areas.
* Full Service Upgrade (Underground Service Changes): $5,000 – $10,000+
Rare for typical upgrades; involves utility coordination for service drop changes. Usually tied to major renovation or utility requirement.
Why Quotes Vary: A $1,800 quote and a $3,800 quote for similar work likely differ in scope:
* Materials: Economy panel vs. major brand (Square D, Siemens, Eaton). Standard breakers vs. AFCI/GFCI on required circuits.
* Labor Scope: “Box swap” vs. comprehensive work (torque verification, grounding updates, labeling, testing).
* Permits: Included vs. homeowner responsibility.
* Warranty: Limited vs. comprehensive labor warranty.
* Business Costs: Legitimate contractors factor in insurance, licensing, and overhead; unlicensed operators may undercut unsafely.
Quote Red Flags:
* Significantly Below Market Rate: ($1,000 for 100A→200A). Indicates potential cut corners: skipping permit, substandard parts, unlicensed labor.
* Vague Line Items: “Panel upgrade: $2,500” with no breakdown. Demand specificity.
* Cash-Only Discount: Often used to avoid taxes, permits, or insurance documentation. Exercise caution.
* No Written Contract: Verbal agreements offer no protection. Insist on signed contract detailing scope, price, timeline, warranty.
Anticipating Additional Considerations
Proactive budgeting prevents surprises. Discuss these potential items during assessment:
- Grounding System Update: Older homes may require updated grounding (e.g., adding grounding rods). Cost: $200–$600. Often necessary for code compliance.
- Meter Base Replacement: If the utility-owned meter socket is old or incompatible, replacement may be required. Cost: $500–$1,500+. Clarify responsibility during assessment.
- Service Entrance Cable Replacement: Old or undersized cable from meter to panel may need updating. Cost: $300–$800. Critical if damaged.
- Branch Circuit Corrections: Fixing double-tapped breakers or outdated wiring discovered during work. Cost: $100–$300 per correction. Safety-critical; budget contingency (10–15% of base quote).
- Drywall Repair/Painting: If panel is relocated or wall damage occurs. Cost: $150–$500. Discuss responsibility upfront.
- Utility Fees: Some utilities charge a “service change” fee for meter pull/restore ($50–$200). Confirm with electrician.
Smart Budgeting Approach:
1. Get 3 detailed, written quotes from licensed, insured electricians.
2. Compare line items, not just totals. Ask: “Why does Quote A differ from Quote B?”
3. Build a 10–15% contingency fund for unforeseen corrections (common in older homes).
4. Prioritize safety-critical items (grounding, hazard corrections) if budget constrained.
5. View the upgrade as home infrastructure investment—enhancing safety, functionality, insurance eligibility, and resale readiness.
Financing Considerations and Insurance Dialogue
The upfront cost can feel significant, but options exist:
- Home Equity Options: HELOC or home equity loan leveraging existing equity. Ideal when bundled with other renovations.
- Personal Loans: Fixed-rate loans from banks/credit unions. Compare terms carefully.
- Contractor Financing: Many electrical companies offer financing partners. Scrutinize terms: Interest rates, fees, promotional periods (“same as cash” requires full payment before period ends to avoid accrued interest).
- Credit Cards: Only advisable for small upgrades if paid off immediately. High interest makes this costly for larger amounts.
- Energy Program Incentives: Some utilities or state programs offer rebates for upgrades enabling energy-efficient technology (e.g., heat pumps, EV chargers). Check the DSIRE database (dsireusa.org).
- Insurance Provider Dialogue: Contact your homeowner’s insurance provider before upgrading. Many companies offer premium considerations for:
- Replacing panels with documented limitations (FPE, Zinsco)
- Upgrading from 60A/100A to 200A service
- Installing modern panels with AFCI/GFCI protection
- Providing proof of permit and inspection sign-off
- Document any potential adjustment before proceeding—it can offset project cost over time.
Perspective on Value: Consider the upgrade within broader context:
* Risk Mitigation: Addresses documented fire risks associated with outdated systems.
* Insurance Continuity: Supports maintaining coverage with major insurers.
* Resale Readiness: A modern electrical system is a documented asset during home inspections.
* Future-Proofing: Enables safe integration of EV chargers, heat pumps, workshops, and other modern amenities.
* Peace of Mind: Tangible confidence in your home’s foundational safety systems.
Investing in a panel upgrade is investing in risk management, home value preservation, and the foundational safety of your living environment. Documented insurance considerations alone can make the project financially prudent over a multi-year horizon.
Safety Imperatives: The Necessity of Licensed Professional Engagement
This bears emphasis: Electrical panel replacement requires licensed electrical professionals. The risks extend far beyond personal injury to potential property damage and liability implications. Understanding why reinforces the importance of professional engagement.
Understanding the Hazards of Unqualified Work
Working inside a main electrical panel involves hazards that cannot be mitigated without specialized training, tools, and protocols:
- Lethal Voltage Exposure: Even with the main breaker “off,” the line-side terminals (where utility power enters) remain energized at 240V until the utility physically disconnects the meter. Accidental contact causes severe injury or death. Utility disconnection requires coordination and verification protocols beyond homeowner capability.
- Arc Flash Potential: A momentary short circuit (e.g., tool drop, accidental contact) can trigger an arc flash—an explosive release of energy reaching extreme temperatures. This creates intense heat, pressure waves, and shrapnel. Proper Arc-Rated PPE and procedures are mandatory—unavailable and unknown to non-professionals.
- Hidden Fire Risks: Incorrect wiring (reversed polarity, loose connections) creates latent fire hazards that may smolder before erupting. A DIY error might “function” initially but fail catastrophically under load.
- Code Compliance Implications: Improper grounding, incorrect breaker types, or inadequate clearances create violations that may go unnoticed until an emergency or inspection, affecting insurance and resale.
- Liability Exposure: If unqualified work causes damage, insurance coverage may be compromised. Permits typically require licensed contractor signatures; pulling a permit as an unlicensed homeowner for this work is often prohibited.
The “Handy Friend” Consideration: Well-meaning friends or handymen without specific, current electrical licensing pose similar risks. Electrical codes are complex and updated regularly. Panel work requires specialized training in high-voltage safety, NEC compliance, and utility coordination. Licensing ensures:
* Proven competency via rigorous examination
* Mandatory continuing education on code updates
* Carried liability insurance (protecting you if damage occurs)
* Bonding (financial recourse if work is defective)
* Adherence to ethical and safety standards
The marginal cost savings of unlicensed work are vastly outweighed by the risks. Your family’s safety and your largest financial asset deserve qualified expertise.
Vetting an Electrician: A Practical Protocol
Choosing the right professional is critical. Follow this vetting process:
Step 1: Verify Licensing and Insurance (Non-Negotiable)
* License: Contact your state/local licensing board (search “[Your State] electrical contractor license lookup”). Verify:
* License is active and in good standing
* License class covers residential panel work
* Business name matches company name
* Insurance: Request Certificates of Insurance for:
* General Liability: Minimum $1 million coverage
* Workers’ Compensation: Covers employees injured on your property
* Ask Directly: “May I see your current license and insurance certificates?” Reputable contractors expect this.
Step 2: Assess Experience and Process
* Ask: “How many panel upgrades have you completed recently? Specifically, experience with [FPE/Zinsco] panels?”
* Inquire: “Do you handle the permit process and inspections?” Full-service management is preferable.
* Check Reviews: Read Google, Yelp, BBB reviews critically. Look for patterns: “professional,” “explained everything,” “clean” vs. “rushed,” “hidden fees.” Note how they respond to concerns.
* Request References: Ask for 2–3 recent clients with similar upgrades. Call them. Ask: “Were they punctual? Clean? Did they explain the process? Any surprises? Would you hire them again?”
Step 3: Evaluate Communication and Professionalism
* Initial Contact: Responsiveness and detailed questioning
* Assessment Visit: Thorough inspection, clear explanations without excessive jargon, detailed written quote
* Quote Clarity: Explicit scope, specified materials (brand, model), permits/fees included, warranty stated
* Contract: Professional document with start/completion dates, payment schedule (avoid large upfront payments >30%), scope details, warranty terms
Red Flags Checklist:
* ❌ Unwilling to provide license/insurance verification
* ❌ Pressure for immediate signing or cash payment
* ❌ Vague quotes or pricing significantly below market
* ❌ No physical business address
* ❌ Unmarked vehicles or unprofessional presentation
* ❌ Dismissive of permit requirements
* ❌ Negative patterns in reviews (safety concerns, hidden costs)
* ❌ Cannot provide recent, verifiable references
Trusted Resources:
* Local Building Department: Often maintains lists of licensed contractors active in your area
* NECA (National Electrical Contractors Association): necanet.org
* IBEW (International Brotherhood of Electrical Workers): ibew.org
* Reputable Referral Services: Use with independent verification of licenses
Investing time in vetting pays dividends in peace of mind, quality workmanship, and long-term safety. Thorough due diligence is essential.
Hallmarks of Quality Installation: What to Observe
Even without electrical expertise, you can observe markers of professional work during the walkthrough:
- Panel Exterior:
- [ ] Enclosure is plumb, level, and securely mounted
- [ ] Deadfront cover fits snugly with no gaps
- [ ] Clear, legible circuit directory label is installed
- Visible Workmanship (Viewed with electrician present):
- [ ] Wires are neatly organized, not haphazardly stuffed
- [ ] No wires are pinched, kinked, or bent sharply
- [ ] All breaker terminals have exactly one wire (no double-tapping)
- [ ] Grounding and neutral wires are on separate, dedicated bus bars
- Safety & Compliance:
- [ ] Minimum 36″ clearance in front of panel is maintained
- [ ] Panel is accessible (not blocked by furniture)
- [ ] Electrician demonstrated AFCI/GFCI breaker test function
- [ ] Permit documentation and inspection sign-off are provided
- Professionalism:
- [ ] Work area is thoroughly cleaned
- [ ] Old panel and debris are removed
- [ ] Electrician reviewed operation, warranty, and answered questions patiently
Professional pride in visible craftsmanship often correlates with attention to critical internal details like proper torque and connection integrity. Trust your instincts—if visible work appears careless, discuss concerns respectfully. Reputable contractors welcome questions and explain their process confidently.
When an Upgrade Isn’t Immediate: Responsible Interim Strategies
While the Five Critical Triggers warrant attention, some situations allow for strategic planning. However, “interim” must never mean “ignoring.” This section provides responsible, safety-conscious strategies for managing risk while preparing for an upgrade—plus clarifies when alternatives are viable versus inappropriate.
Load Management Strategies for Interim Periods
If your panel is aging or slightly undersized but shows no critical triggers (no legacy panels with documented limitations, no physical damage, no chronic tripping), careful load management may extend functional life safely while saving for an upgrade. This is NOT a solution for panels with documented limitations or severe overloading.
- Circuit Mapping & Awareness:
- With professional guidance (or carefully during daylight), map which outlets/lights are on each circuit. Flip one breaker off at a time and note affected areas. Label the panel directory accurately.
- Identify high-draw appliances (space heaters, hair dryers, microwaves, air conditioners).
- Create a “load schedule”: Avoid using multiple high-draw appliances on the same circuit simultaneously. Example: Don’t run microwave and toaster oven on the same kitchen circuit. Use hairdryer after clothes dryer cycle ends if they share a circuit.
- Strategic Appliance Use:
- Run major appliances (dishwasher, washing machine) during off-peak hours when other loads are low.
- Avoid portable space heaters (1500W) on circuits already powering other devices. Plug heaters directly into wall outlets on dedicated circuits if possible.
- Unplug “energy vampire” devices (chargers, entertainment centers on standby) to reduce constant minor load.
- Targeted Outlet Upgrades (With Professional Guidance):
- Installing GFCI receptacles in kitchens, bathrooms, garages adds shock protection at the outlet even if the panel lacks GFCI breakers. Note: A GFCI receptacle only protects itself and downstream outlets on the same circuit. It does not protect upstream wiring. Consult an electrician for optimal placement. Cost: $15–$30 per receptacle + labor.
- Limitation: GFCI receptacles do not provide Arc-Fault protection (AFCI), critical for preventing fires in bedroom/living area circuits. This requires panel-level AFCI breakers.
Critical Boundary: Load management is a temporary bridge, not a permanent solution. If breakers trip during normal, reasonable use (e.g., using one appliance per circuit), the panel is likely undersized—management is insufficient. Upgrade planning should be active.
Circuit Redistribution: Limited Applicability
In panels with unused slots but insufficient total capacity, an electrician might redistribute circuits to balance load. However, this has constraints:
- Does Not Increase Total Capacity: The panel’s main breaker rating (e.g., 100A) remains the absolute limit. Redistribution only optimizes existing capacity.
- Requires Professional Assessment: Only a licensed electrician can safely determine feasibility without violating code.
- Temporary at Best: As appliance loads increase, redistribution becomes ineffective. It delays but does not eliminate the need for upgrade.
- Not Viable for Full Panels: If all slots are occupied, redistribution is impossible without tandem breakers (which have limitations) or panel modification.
When Redistribution Might Be Considered: A short-term measure (6–12 months) for a homeowner who has confirmed via load calculation that current usage is just below capacity, with a concrete upgrade plan and timeline. It is never a solution for panels with documented limitations or physical damage.
Recognizing When Delay Becomes Unwise
Delaying an upgrade is sometimes prudent (e.g., saving funds, scheduling around life events). But certain conditions warrant prompt professional evaluation. Schedule immediate assessment if you observe:
- Confirmed legacy panels with documented limitations (FPE, Zinsco, split-bus) via label/photo
- Visible scorch marks, melting, or significant rust on panel exterior
- Audible buzzing, crackling, or sizzling sounds from the panel
- Burning smells near panel or outlets
- Breakers that feel loose, won’t stay in position, or show visible damage
- Frequent tripping correlating with normal appliance use
- Whole-house flickering lights (not isolated to one circuit), especially when major appliances cycle on
Perspective on Timing: The cost of an upgrade is fixed. The cost of inaction carries potential consequences. Insurance considerations may change for known hazards. The emotional assurance of addressing a documented risk is immediate. If critical triggers are present, view the upgrade as eliminating a known vulnerability—not an optional expense. Prioritize it in your planning. Explore financing options. The peace of mind and safety assurance are profound.
Responsible Interim Protocol (If No Critical Triggers Present):
1. Get Professional Assessment: Confirm panel condition and remaining functional life. Obtain formal quote.
2. Create Savings Plan: Set aside fixed amount monthly. Open dedicated “Home Safety” savings account.
3. Implement Strict Load Management: Follow strategies meticulously. Document any performance changes.
4. Schedule Annual Check-ins: Have assessing electrician perform brief visual check yearly.
5. Set Hard Deadline: “We will complete upgrade by [Date 12 months from now].” Calendar it.
6. Monitor Vigilantly: At the first sign of new symptom (tripping, sound, smell), proceed immediately.
Safety is about proportionate, informed response. This protocol transforms passive waiting into active, responsible stewardship—keeping risk managed while preparing for definitive resolution.
Your Questions, Answered
Homeowners consistently voice these concerns. Answers are grounded in safety standards, industry practice, and practical considerations.
Q: My panel is old but has never tripped or caused issues. Why consider evaluation?
A: Safety devices like circuit breakers can degrade silently over decades. A panel from the 1970s may not respond optimally during a fault event—the precise moment safety depends on it. Think of it like vehicle brakes: they might function until the critical moment. Proactive evaluation eliminates hidden risk. For panels with documented limitations (FPE, Zinsco), safety authorities consistently recommend replacement regardless of current function.
Q: Can I just replace the breakers in my old Federal Pacific panel to make it safe?
A: No. The documented performance concerns in FPE Stab-Lok panels relate to the bus bar assembly and internal architecture—not solely the breakers. Installing modern breakers is physically incompatible and does not resolve core design characteristics. UL and CPSC documentation explicitly state these panels cannot be made safe through component replacement. Full panel replacement is the industry-standard solution. Any suggestion otherwise contradicts safety authority guidance.
Q: How long does a new electrical panel last?
A: A modern panel from a reputable brand (Square D, Siemens, Eaton), installed correctly in a suitable environment (dry, temperature-stable location), typically functions reliably for 25–40 years. However, evolving technological needs often drive upgrades before panel degradation. You may choose to upgrade sooner to add capacity (for EV charger, renovation) or incorporate newer safety features. Regular visual inspections (checking for corrosion, damage) and professional assessments every 10–15 years support ongoing safety.
Q: Will upgrading my panel increase my home’s value?
A: While not always reflected dollar-for-dollar in appraisal, a modern, code-compliant 200-amp panel with AFCI/GFCI protection is a significant positive factor for buyers. It signals that the home’s electrical system is safe, updated, and capable of supporting contemporary living demands. During inspections, it eliminates a common concern that can delay sales or trigger repair requests. It’s widely viewed as a prudent infrastructure investment that supports overall property readiness.
Q: How can I safely inspect my electrical panel for warning signs?
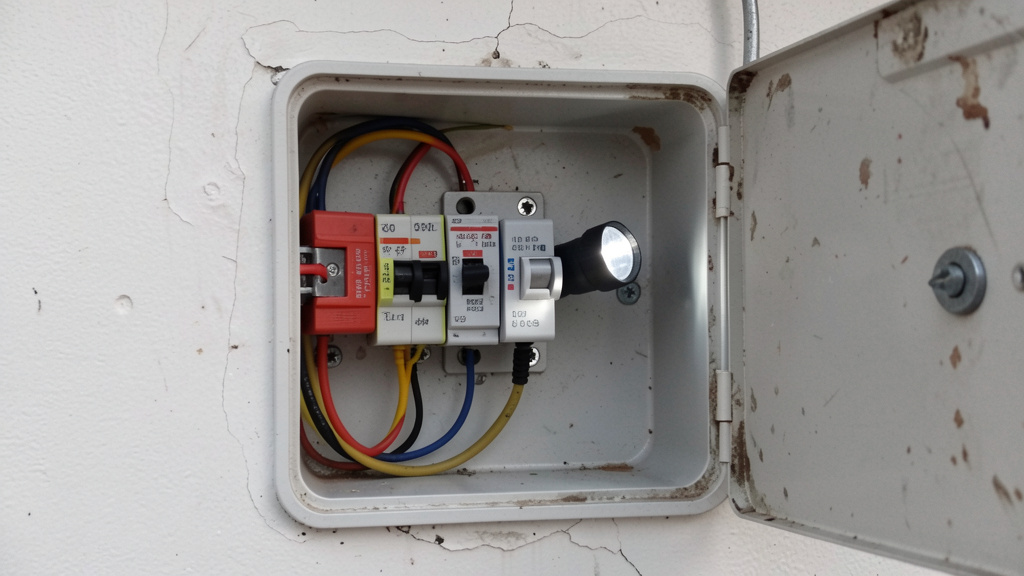
A: Safety first: Never open the panel cover yourself. During daylight, safely inspect the closed exterior: Look for rust, corrosion, scorch marks, dents, or discoloration. Check for unusual warmth on the cover (use back of hand briefly), buzzing sounds, or burning odors. Ensure the area in front maintains 36 inches of clear space. Take a photo of the visible label. If you observe any concerns, contact a licensed electrician for professional evaluation.
Q: What’s the difference between a panel upgrade and a service upgrade?
A: “Panel upgrade” typically means replacing the interior components and enclosure while maintaining the same amperage service (e.g., replacing a 100A panel with a new 100A panel—rare). “Service upgrade” usually means increasing the amperage capacity (e.g., from 100A to 200A), which often involves replacing the panel, upgrading the service entrance cable, and potentially updating the meter base. Most homeowner “upgrades” are service upgrades to increase capacity.
Q: Can adding a subpanel solve my electrical capacity issues?
A: A subpanel adds circuit spaces but does not increase your home’s total electrical capacity. If your main panel is already at its amperage limit (e.g., 100A), adding a subpanel doesn’t create more power—it just redistributes the existing capacity. Subpanels are excellent solutions for adding circuits in distant areas (garage, workshop) if your main panel has sufficient spare capacity and physical space. If your main panel is undersized or full, a main panel/service upgrade is usually necessary first.
Q: How do I verify my electrician is licensed and insured?
A: 1) Ask for license number and verify it on your state’s contractor licensing board website. 2) Request Certificates of Insurance for General Liability and Workers’ Compensation—call the insurance agent listed to verify coverage is active. 3) Check business registration with your state’s Secretary of State office. Reputable contractors welcome this verification and provide documents readily. Never skip this step.
Q: Are there temporary solutions if I can’t afford an upgrade right now?
A: If no critical triggers are present (no legacy panels with documented limitations, no physical damage, no chronic tripping), responsible interim strategies include: meticulous load management (mapping circuits, avoiding simultaneous high-draw appliance use), installing GFCI receptacles in wet areas for added shock protection (consult electrician), and creating a dedicated savings plan with a hard deadline. However, if critical triggers exist, interim measures are insufficient—prioritize professional evaluation and explore financing options. Safety should not be compromised by budget constraints.
Q: What questions should I ask during the electrician’s assessment?
A: Key questions: “What specific conditions warrant recommendation?” “Can you show me the evidence?” “What are my options, including doing nothing?” “What’s included in the quote (permit, cleanup, warranty)?” “What potential surprises might arise, and how are they priced?” “Can you provide references from similar upgrades?” “How do you ensure torque specifications on connections?” “Will you handle permit and inspections?” These questions demonstrate engagement and clarify scope.
Q: How often should I have my electrical panel inspected?
A: For panels under 25 years old with no issues, a visual check during routine home maintenance is sufficient. For panels over 25 years old, or if you have concerns, a professional inspection every 5–10 years is prudent. Immediately schedule inspection if you observe any warning signs (tripping, sounds, smells, visible damage). Homes with legacy panels (FPE, Zinsco) or known limitations warrant prompt professional evaluation regardless of age.
Q: What is the most common mistake homeowners make regarding their electrical panel?
A: Ignoring visible warning signs (flickering lights, tripping breakers, buzzing sounds) or delaying evaluation of legacy panels with documented limitations. Another frequent error is attempting DIY fixes or hiring unlicensed individuals for panel work due to cost concerns—this creates significant safety risks and potential liability. The wisest approach is proactive professional evaluation when concerns arise, viewing it as essential home maintenance rather than an optional expense.
Conclusion and Next Step
Recap: Your electrical panel is foundational to home safety and functionality. Remember these essentials: (1) Age combined with specific legacy panel types (like Federal Pacific or Zinsco) represents a documented consideration warranting professional evaluation; (2) Chronic overloading patterns, physical damage, or recurring electrical issues signal the need for assessment; (3) Upgrading is a strategic investment that enhances safety, supports modern living demands, and strengthens your home’s infrastructure.
The 24-Hour Rule: Within the next day, take one small, concrete step: Locate your electrical panel. Ensure the area in front maintains the required 36-inch clearance (move any stored items). Take a clear photo of the panel’s visible label without opening the cover. Save this photo to your phone. This simple action creates a baseline record and moves you from awareness to preparedness.
The Big Picture: An electrical panel upgrade is more than a technical update—it’s an act of stewardship for your home and household. It integrates with broader safety systems (smoke detectors, GFCIs) and enables sustainable living choices (EV charging, heat pumps). By addressing this foundational element thoughtfully, you create a resilient electrical infrastructure ready for today’s needs and adaptable for tomorrow’s innovations. Your journey toward a safer home continues with informed, proactive steps—one thoughtful decision at a time.
Explore Our Complete System:
Understanding Home Electrical Safety Fundamentals | Choosing and Verifying a Licensed Electrician | Seasonal Home Maintenance Checklist | Preparing for a Home Inspection: Electrical Readiness | Smart Integration: Adding Technology Safely | Emergency Preparedness: Power Outage Planning | Sustainable Home Upgrades: Efficiency and Safety