Unlock Consistently Better Surface Preparation Across Wood, Metal, Drywall, and More—With Practical Methods to Avoid Common Pitfalls and Build Confidence
Sanding transforms uneven, textured surfaces into receptive foundations for finishes. Yet many projects encounter avoidable setbacks—not from lack of effort, but from subtle missteps in sequence, tool choice, or material awareness. This guide offers a clear, adaptable framework for sanding success. You’ll learn how to select abrasives thoughtfully, operate tools with intention, progress through grits logically, and recognize completion cues unique to each material. Whether refinishing a cherished piece, prepping walls for paint, or smoothing metalwork, these principles help you work efficiently while protecting your health and project integrity. True smoothness emerges not from force, but from understanding how abrasion interacts with the surface beneath your hands.
Introduction: Sanding as Foundational Craftsmanship
Sanding is rarely the most glamorous step in a project, yet its influence echoes through every subsequent stage. A thoughtfully prepared surface allows finishes to adhere evenly, reveal material character, and endure daily use. Rushed or inconsistent sanding, by contrast, can magnify flaws, compromise durability, or require extensive rework. This phase is less about removing material and more about intentional refinement—aligning technique with the material’s structure, the project’s purpose, and the finish’s requirements.
Safety standards from organizations like OSHA and ANSI consistently emphasize surface preparation as a critical control point. Guidelines addressing dust exposure, tool operation, and respiratory protection reflect decades of field experience. This guide distills those principles into accessible practices applicable across home workshops and professional settings. By observing how abrasives interact with different substrates—how grain direction guides wood sanding, how heat affects metal, how joint compound responds to pressure—you cultivate a tactile awareness that elevates every project. Sanding, approached with patience and purpose, becomes a quiet act of care.
The Progressive Sanding Framework: A Three-Phase Approach to Surface Readiness
Effective sanding follows a logical progression: remove major flaws, refine the texture, then prepare for finishing. This three-phase structure applies universally—whether working on cabinetry, drywall seams, metal brackets, or outdoor furniture. The specific grits, tools, and timing will vary by material and goal, but the underlying sequence remains consistent. Skipping phases or compressing steps often introduces defects that finishes later reveal. Progress deliberately; each stage sets the stage for the next.
Core Insight: Each grit’s purpose is to eliminate the scratches left by the previous one. Rushing this sequence embeds imperfections that become visible only after finishing.
Phase 1: Foundation Work (Coarse Grits) — Addressing Major Irregularities
Purpose: Remove deep tool marks, old finishes, adhesive residue, weld seams, or significant unevenness. This phase establishes a uniform baseline—not a smooth surface.
When to Apply: Begin here if your fingernail catches on the surface, visible saw marks remain, or material removal is needed (e.g., stripping paint, leveling joints). For delicate surfaces like veneers or thin drywall compound, this phase may start at a finer grit or be unnecessary.
Tool Guidance by Scenario:
– Belt Sander: Best for large, flat wooden surfaces (tables, decks, doors). Always move with the wood grain. Start the tool before contact; lift before stopping. Work in overlapping lanes (50% overlap), maintaining steady motion to avoid depressions (“dishing”). Use lower speeds on variable-speed models for better control.
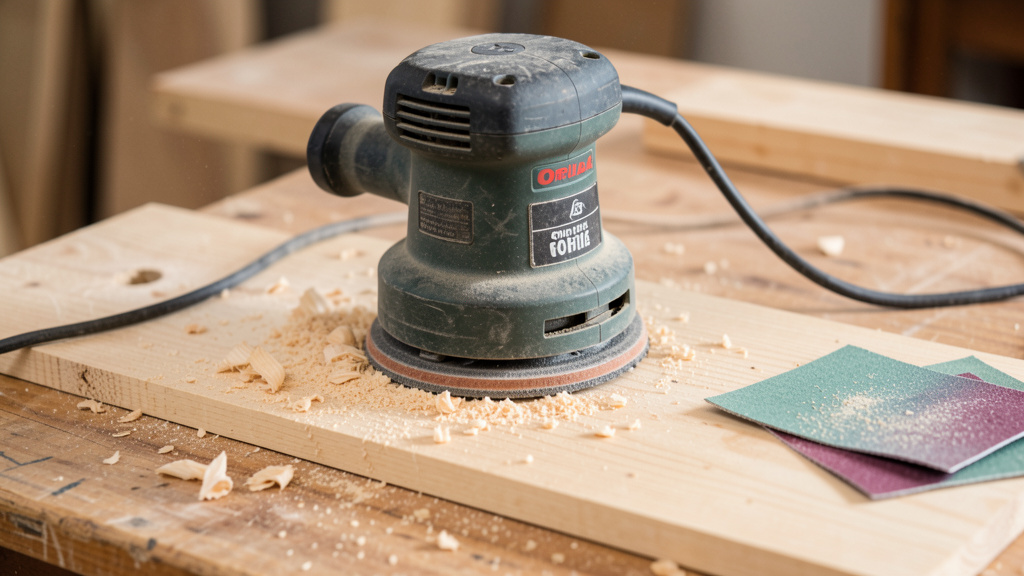
– Random Orbital Sander (ROS) with Coarse Grit: Ideal for medium tasks where a belt sander is too aggressive (cabinet faces, chair seats, curved edges). The dual-motion action minimizes consistent swirl patterns. A 5-inch pad offers versatility; ensure dust extraction is connected.
– Angle Grinder with Flap Disc (Metal/Masonry): For weld smoothing, rust removal, or concrete leveling. Use Type 29 (curved) discs for contours; Type 27 (flat) for broad areas. Critical: Always use the guard, secure the workpiece firmly, and wear full-face protection. Flap discs conform better than grinding wheels and reduce deep scratching.
Practical Technique Flow:
1. Assess First: Run a gloved hand slowly over the surface. Note high spots, deep gouges, or sticky residues. Lightly mark stubborn areas with a pencil line across the grain—this disappears only when sanding is complete.
2. Secure the Work: Clamp wood firmly. For walls or floors, clear the area, lay drop cloths, and seal nearby vents. Unsecured items vibrate, causing uneven results and safety risks.
3. Begin with Appropriate Grit: Start coarse enough to cut efficiently but not so aggressive that you remove excess material (e.g., 60 grit for pine; 40 grit only for severe defects on dense hardwoods or metal). Let the tool’s weight do the work—pressing hard causes overheating, pad tilt, and uneven removal.
4. Move with Intention:
– Belt Sander: Long, fluid passes parallel to grain. Keep the pad flat.
– ROS: Slow, overlapping circles or figure-eights. Maintain consistent speed.
– Angle Grinder: Hold at 15–20 degrees; move steadily across the surface.
5. Verify Progress: Pause every 30 seconds. Wipe with a tack cloth or microfiber rag. View under a low-angle light—scratches cast shadows. Run a fingernail lightly across the surface; it should feel uniformly rough, not snag. Stop when major defects are gone. Over-sanding here creates unnecessary work later.
Common Challenges & Gentle Corrections:
– Skipping Grits Later: Deep scratches from coarse grits require intermediate steps to remove. Jumping straight to fine grits leaves visible patterns.
– Cross-Grain Sanding (Wood): Creates scratches difficult to erase. Always follow the material’s natural direction. On metal, follow existing machining lines.
– Dust Buildup: Clogged abrasives lose cutting ability instantly. Connect tools to vacuum systems where possible. Clean ROS pad holes periodically with a pick.
– Heat Sensitivity: If the surface feels warm, pause. Overheating can seal wood pores (hindering finish absorption) or alter metal properties.
Material-Aware Adjustments:
– Softwoods (Pine, Cedar): Start at 60–80 grit. Coarser grits may tear soft fibers. Reduce pressure over knots.
– Hardwoods (Oak, Maple): Tolerate 40–60 grit for deep defects. Dense grain requires patience—avoid forcing the tool.
– Plywood/Veneers: Begin no coarser than 100 grit. Sand lightly with ROS on low speed. Check frequently; veneers are thin. If breakthrough occurs, stop—repair may require filling.
– Drywall: Coarse grits (below 80) risk tearing paper facing. Reserve Phase 1 for heavily textured compound; standard prep often begins at 100–120 grit.
– Metal: Use abrasives rated for the specific metal (e.g., zirconia alumina for steel). Sand with existing grain lines. Wear heavy gloves—edges become sharp.
Phase 2: Refinement (Medium Grits) — Erasing Phase 1 Evidence
Purpose: Remove visible scratches left by coarse grits. This transitional phase is frequently overlooked but essential for a uniform surface. Without it, fine grits struggle to correct deep patterns, leading to frustration and uneven results.
Why This Phase Matters: Coarse grits leave pronounced scratches. Medium grits target these specifically, creating a consistent texture that fine grits can polish efficiently. Industry practice consistently shows that omitting this step often results in visible defects after finishing—especially under light-colored stains or clear coats.
Tool Selection Focus:
– Random Orbital Sander (ROS): The most versatile tool here. Its random motion prevents repeating scratch patterns. Hook-and-loop discs allow quick grit changes. Ensure dust ports are sealed for optimal extraction.
– Orbital (Finish) Sander: Suitable for small areas, edges, or delicate surfaces where ROS aggression is unnecessary. Best used at 120+ grit.
– Hand Sanding Block: Essential for edges, moldings, or contours. Use a firm block for flat areas; soft foam for gentle curves. Never sand bare-handed—finger pressure creates waves.
Grit Progression Logic:
– After 40 grit → 80 → 120
– After 60 grit → 100 → 150
– After 80 grit → 120 → 150
Guideline: Advance one or two grit levels at a time. Each step should visibly reduce scratch depth. Premium ceramic or stearated (anti-clog) papers maintain cutting efficiency longer through this phase.
Step-by-Step Refinement Process:
1. Clean Thoroughly: Remove all Phase 1 dust. Wipe wood with a rag lightly dampened with mineral spirits (test in hidden area first); metal with denatured alcohol. Dust particles act as abrasives, causing new scratches.
2. Calibrate Pressure: Apply light, even pressure—roughly the weight of your hand. Heavy pressure flexes pads, reduces abrasive contact, and creates uneven spots.
3. Work Systematically: Divide large surfaces into sections. Sand each thoroughly before moving on. For ROS: overlap passes by 50%. On flat wood surfaces, a light cross-grain pass (followed by with-grain) can help reveal missed scratches—but always finish with the grain.
4. Verify Scratch Removal:
– Pencil Test: Draw light lines across the surface before sanding. Sand until lines disappear uniformly.
– Mineral Spirits Reveal (Wood): Dampen a small area; scratches appear as dark lines against wet wood.
– Tactile Check: Close your eyes. Run fingertips across the grain. Feel for residual ridges or “tooth.”
5. Edge Awareness: Reduce pressure near edges. For crisp edges, stop power sanding 1/8 inch short and finish by hand with a block. For rounded profiles, follow the contour gently with the ROS tilted slightly.
Material-Specific Refinement Notes:
– Plywood/Veneers: Start at 120 grit. Sand only until surface flaws vanish—over-sanding exposes voids.
– Painted Surfaces (Repaint Prep): 120 grit “scuff-sands” to create adhesion without removing all paint. Wipe afterward with a TSP substitute.
– Drywall/Plaster: 120 grit smooths joint compound. Hold a work light at a sharp angle to reveal high spots (“holidays”). Feather edges gradually into the wall—avoid creating valleys.
– Aluminum: Use silicon carbide or aluminum-specific discs. Lightly wax the disc (“sanding wax”) to reduce loading. Sand with existing grain lines.
– Fiberglass: Progress from 80 to 120 grit. Wear full PPE—fiberglass dust is an irritant. Wet sanding (with waterproof paper) suppresses dust effectively.
Phase 3: Final Preparation (Fine Grits) — Optimizing for Finish
Purpose: Create a uniformly receptive surface tailored to your chosen finish. “Smooth” is contextual—match the final grit to the finish chemistry and desired aesthetic.
Final Grit Guidance by Finish Type:
– Penetrating Oils (Tung, Linseed): 180–220 grit. Too smooth hinders oil absorption.
– Water-Based Finishes: 220 grit minimum. Water raises grain; finer grits minimize this effect.
– Oil-Based Polyurethane/Varnish: 220 grit provides ideal adhesion “tooth.”
– Lacquer, Shellac, Automotive Paint: 320–400 grit (often wet-sanded between coats). High-gloss magnifies imperfections.
– Wax Finishes: 220–320 grit enhances luster.
– Stain Application: 180 grit for softwoods; 220 grit for hardwoods. Excessively fine grits can cause blotchiness on porous woods.
Tool Precision for Final Passes:
– ROS with Premium Discs: Use ceramic alumina or silicon carbide discs. Ensure the pad is clean—residual coarse grit contaminates fine work. For critical projects, dedicate a separate ROS pad for grits 180+.
– Detail Sander: For corners, carvings, or tight profiles. Fold fine-grit paper into the tool’s tip. Move slowly—fine grits remove material gradually.
– Hand Sanding—The Final Grain Pass (Wood): After power sanding to 220 grit, perform one light hand-sanding pass only in the direction of the wood grain using a soft foam block. This eliminates microscopic cross-grain patterns invisible to the eye but revealed under finish. For contours, wrap paper around a dowel or foam pipe insulation.
Wet Sanding Consideration (Advanced):
Appropriate for: Between finish coats on wood, final metal prep, smoothing cured epoxy. Never wet-sand raw wood—it permanently raises grain.
Method: Use waterproof silicon carbide paper (start at 400 grit). Lubricate with water, mineral spirits (oil-based finishes), or dedicated sanding fluid. Sand lightly in small circles. The slurry acts as a secondary abrasive—rinse periodically to check progress. Dry thoroughly before proceeding. Note: Add a drop of dish soap to water for better lubrication. For automotive clear coats, specialized lubricants and ultra-fine grits (1500+) are used by professionals.
Final Verification Protocol:
1. Sanitize the Area: Wipe surface, tools, and hands with a tack cloth. Work in a low-traffic space if possible.
2. Progress Gradually: Spend adequate time on each grit (e.g., 180 → 220 → optional 320). Rushing the final grit undermines prior work.
3. Multi-Sensory Inspection:
– Tactile: Close eyes. Run fingertips across the grain (wood) or in multiple directions (other materials). Feel for residual roughness.
– Visual: Shine a bright LED flashlight at a 10–15 degree angle. Rotate the piece—scratches cast shadows.
– Moisture Test (Wood): Lightly dampen a small area with distilled water. After drying (1–2 hours), if roughness returns, lightly re-sand with 220 grit to “pre-raise” the grain.
4. Know When to Stop: Over-sanding creates a burnished surface that repels finishes. Stop when:
– Surface feels uniformly smooth
– Reflects light evenly with no visible scratch patterns
– Grain texture is subtle but present (unless high-gloss demands glass-smooth)
– Minimal new dust is generated during the final pass
Material Nuances for Final Prep:
– End Grain (Wood): Sand to one grit finer than face grain (e.g., face at 180, end at 220). End grain absorbs finish faster; finer sanding reduces blotchiness. Consider pre-sealing with diluted finish.
– Metal: After final grit, wipe with wax-and-grease remover. For bare steel, apply rust inhibitor promptly if priming is delayed—humidity causes flash rust.
– Drywall: Use 180–220 grit on a pole sander for joints. Sand until completely flush—no ridges or depressions. Wipe with a damp sponge before priming.
– Between Finish Coats: Lightly sand cured coats with 320–400 grit (dry for oil-based; wet for water-based). Goal: create light “tooth” for adhesion, not remove material. Remove all dust with a tack cloth before recoating—this step is critical for layer adhesion.
Choosing Tools Thoughtfully: Matching Motion to Task
Selecting a sander isn’t about owning every type—it’s about aligning the tool’s action with your project’s geometry, material, and desired outcome. Understanding why each tool exists prevents misuse and protects your work.
Belt Sanders: For Efficient, Directional Removal
- How It Works: A continuous belt moves linearly. Aggressive but requires grain awareness.
- Best For: Large flat wood surfaces (decks, tabletops), heavy stock removal, leveling joints. Strictly a Phase 1 tool.
- Key Practice: Always sand with the wood grain. Start tool before contact; lift before stopping. Move steadily—lingering creates dips. Tilt slightly away from edges to preserve crispness. Connect to dust collection; empty bags frequently to maintain suction.
- Safety Note: Two-handed operation is essential. Inspect belts for tears before use. Wear safety glasses with side shields—debris ejects forward.
Random Orbital Sanders (ROS): The Everyday Workhorse
- How It Works: Pad rotates while oscillating in small ellipses. Creates a random scratch pattern that self-erases.
- Orbit Size Guidance:
- Small orbit (3/32″): Fine finishing
- Medium orbit (1/8″): Most versatile (80–220 grit)
- Large orbit (1/4″): Aggressive removal
- Best For: 80% of tasks—furniture, cabinets, doors, drywall, automotive bodywork. Handles flat surfaces and gentle curves.
- Pad Selection: Hard pads (red) for flat aggressive work; medium (blue) for general use; soft pads (yellow) for contours and final passes. Replace pads when worn or inflexible.
- Pro Tip: For edge work, tilt the ROS slightly. For airtight dust port seals, a thin bead of removable silicone sealant can boost vacuum efficiency. Clean pad holes weekly.
Orbital (Finish) Sanders: For Delicate Final Smoothing
- How It Works: Pad moves in small circles without rotation. Less aggressive than ROS but can leave visible swirls if misused.
- Best For: Final smoothing before finishing, delicate surfaces (veneers), sanding between paint coats, tight spaces.
- Critical Note: Avoid coarse grits (>120) and excessive pressure on large flat areas. Always follow power sanding with a light hand-sanding pass with the grain on visible wood surfaces to erase orbital patterns.
Detail Sanders: Solving Geometry Challenges
- How It Works: Triangular or pointed pad vibrates in place. Minimal removal, maximum access.
- Best For: Inside corners, moldings, window muntins, carvings, electrical boxes on drywall.
- Technique: Fold sandpaper to reach tight spots the tool can’t. For deep corners, attach paper to a tongue depressor with spray adhesive. Change grits frequently—detail sanders clog quickly. Start at 100 grit for defect removal in corners; progress to 150–180 for final prep.
Angle Grinders with Flap Discs: Metal and Curve Specialists
- Flap Discs vs. Grinding Wheels: Flap discs (layered abrasive cloth) conform to curves, provide smoother cuts, and last longer. Grinding wheels are rigid and leave deep scratches—reserve for heavy stock removal on thick steel.
- Grit Progression (Metal):
- Coarse (40–60): Heavy removal, weld leveling
- Medium (80–120): Smoothing contours
- Fine (150–180): Pre-paint preparation
- Safety Imperative: Always use the guard. Wear a full-face shield over safety glasses. Secure workpieces in a vise. Check disc expiration dates—fiberglass-backed discs degrade. For stainless steel, use discs labeled “stainless safe” to prevent iron contamination and rust spots.
Hand Sanding: The Irreplaceable Skill
No power tool replicates the control of hand sanding for edges, final passes, or delicate areas. Mastery develops with practice.
- Block Selection:
- Hard Blocks (Wood, Plastic): Maintain flatness on surfaces.
- Semi-Firm (Cork): Gentle contours.
- Soft (Foam, Felt): Complex curves (chair arms, sculpted edges).
- Folding Methods: Standard fold for general use; V-fold for inside corners; tube fold (around a dowel) for holes or recesses.
- Grain Direction (Wood): Final passes must follow the grain direction to avoid visible cross-grain scratches under finish. For end grain, sand perpendicular to the face grain.
- Pressure Awareness: Apply just enough pressure to maintain contact—approximately the weight of your hand. Heavy pressure creates waves and wears paper faster.
- When Hand Sanding Excels: Final pass on visible wood, crisp edges, veneers, small repairs, between finish coats on intricate moldings.
Understanding Abrasives: Grits, Minerals, and Backings
Sandpaper is engineered for specific tasks. Choosing wisely prevents frustration, wasted effort, and surface damage.
Grit Numbers: What They Mean Practically
Grit indicates average abrasive particle size. Lower numbers = coarser = faster removal. Higher numbers = finer = smoother finish. Progression should be gradual—each grit removes the scratches of the prior one.
Practical Grit Reference Guide
| Grit Range | Typical Use Case | Common Applications |
|————|——————|———————|
| 40–60 | Heavy removal | Deep saw marks, weld leveling, thick paint stripping |
| 80–100 | Smoothing | Removing Phase 1 scratches, drywall compound, initial metal smoothing |
| 120–150 | Refinement | Final prep before finishing wood, scuff-sanding for paint adhesion |
| 180–220 | Fine preparation | Final wood surface before stain/oil, drywall feathering, metal pre-prime |
| 320+ | Ultra-fine | Between finish coats, high-gloss prep, wet sanding |
Progression Principle: Advancing one or two grit levels at a time is generally efficient. Skipping multiple levels forces finer grits to remove deep scratches, causing rapid loading (clogging) and heat buildup. Consistent progression often proves more time-effective overall.
Abrasive Minerals: Matching Crystal to Material
- Aluminum Oxide (Brown/Red): Tough, self-sharpening. Excellent for wood, painted surfaces, general metal. Stearated (wax-coated) versions resist clogging on resinous woods like pine.
- Silicon Carbide (Black/Gray): Very sharp, brittle. Best for wet sanding, metal, glass, stone, and between finish coats. Must be used for wet applications—standard paper disintegrates when wet.
- Zirconia Alumina (Blue/Green): Extremely durable, heat-resistant. Ideal for heavy metal removal, hardwoods, belt sanders. Lasts significantly longer on steel than standard aluminum oxide.
- Ceramic Alumina (Often Red/Purple): Premium engineered grains. Cuts fast, stays sharp longest. Valuable for frequent users or critical finishes where paper changes slow workflow.
Backing and Attachment: Supporting the Abrasive
- Paper Backing (A–F Weight): Light (A–C) for hand sanding; medium (D–E) for ROS; heavy (F) for belt sanders. E-weight offers a good balance for power sanding.
- Cloth Backing (J–X Weight): More durable and heat-resistant than paper. Essential for metal grinding and aggressive applications. Less conformable to fine contours.
- Film Backing (Polyester): Waterproof, tear-proof, dimensionally stable. Preferred for wet sanding and automotive finishing.
- Attachment Systems:
- Hook-and-Loop (Velcro): Reusable, quick changes. Ideal for projects requiring multiple grits. Clean hooks periodically.
- PSA (Pressure-Sensitive Adhesive): Stronger hold, lower cost per disc. Best for single-grit tasks (large deck sanding). Apply evenly to avoid air bubbles.
- Pro Practice: For critical projects, dedicate separate ROS pads to coarse (≤100), medium (120–150), and fine (≥180) grit ranges to prevent cross-contamination.
Material-Specific Guidance: Adapting Technique Thoughtfully
Wood: Honoring Grain and Density
Wood varies significantly. Technique must adapt to species, cut, and moisture content.
- Softwoods (Pine, Cedar, Fir): Prone to tear-out and resin loading. Start Phase 1 at 60–80 grit. Use stearated paper. Reduce pressure over knots. Tip: For sticky resin, chilling sandpaper briefly in a freezer may reduce adhesion (test first; not always practical).
- Hardwoods (Oak, Maple, Walnut): Dense grain requires patience. Open-pored woods (oak) benefit from mineral spirits inspection after 150 grit—pores should feel smooth. For figured wood (bird’s eye, burl), use lighter pressure to avoid “fuzzing.”
- Plywood & Veneers: Extreme caution required. Begin no coarser than 100 grit; often start at 120. Sand lightly with ROS on low speed. Check every 15 seconds. If veneer is sanded through, stop—repair involves filling and accepting imperfection or refinishing.
- End Grain Consideration: Absorbs finish faster than face grain, risking dark blotches. Sand to one grit finer than face grain. For blotch-prone woods (cherry, maple), apply pre-stain conditioner after sanding.
- Raised Grain Awareness: Water-based finishes or damp wiping can swell wood fibers. Prevention: After initial sanding to 180 grit, lightly dampen the entire surface with distilled water. Let dry completely (1–2 hours), then lightly sand again with 220 grit. This “pre-raises” the grain so the finish won’t trigger roughness.
Metal: Managing Heat, Contamination, and Chemistry
- Steel & Iron: Start coarse (40–60 grit flap disc) for rust/welds; progress to 120 for smoothing; finish at 180–220 for paint prep. Sand with existing grain lines. Wipe with wax-and-grease remover after sanding. For bare steel not primed immediately, apply a rust inhibitor—humidity causes flash rust quickly.
- Aluminum: Soft metal loads paper rapidly. Use silicon carbide or aluminum-specific discs. Lightly wax the disc before use. Critical: Never use discs or wire brushes previously used on steel—they embed iron particles causing white corrosion spots. Use nylon abrasive pads for final polishing.
- Stainless Steel: Risk of iron contamination (“rouging”). Use discs explicitly labeled “stainless safe” or “non-ferrous.” Dedicate tools exclusively for stainless. Sand consistently in one direction for a uniform brushed appearance.
- Weld Smoothing Protocol:
- Grind weld bead flush with base metal (60-grit flap disc).
- Progress to 80 grit to remove grinding marks.
- Use 120 grit to blend into surrounding metal.
- Final pass at 180 grit for paint prep.
- Check: Run fingernail across weld—should feel smooth with no ridge. Clean thoroughly before priming.
Drywall and Plaster: Achieving Invisible Seams
Goal: Smooth joint compound without tearing paper facing or creating depressions.
- Grit Strategy: Heavy texture removal: 80 grit; Standard joint smoothing: 120 grit; Final feathering: 150–180 grit. Avoid grits below 80.
- Tools: Pole sander for ceilings/high walls; hand sander with replaceable screens for detail; ROS with soft pad for large areas.
- Technique: Sand joints first. Hold a work light at a sharp angle to reveal high spots. Sand in light, circular motions with minimal pressure—compound is softer than drywall. Feather edges gradually over 6–8 inches. For inside corners, use a corner tool; for outside corners, sand lightly to avoid damaging metal bead.
- Dust Management: Wear at least an N95 respirator (P100 recommended). Use HEPA vacuum attachment sealed tightly. Seal the room with plastic sheeting; place a box fan in a window blowing outward to create negative pressure. Damp mop after sanding—dry sweeping redistributes dust. Historic Plaster Note: Pre-1980 plaster may contain asbestos. If suspected, consult a professional for testing before sanding.
Automotive and Fiberglass: Precision for Curved Surfaces
- Body Filler (Bondo) Workflow:
- Shaping (80 grit): Use a long sanding block (12+ inches) on flat panels. Check flatness frequently with a straightedge.
- Smoothing (120 grit): Remove 80-grit scratches while maintaining contours.
- Final Prep (180 grit): Create uniform matte surface for primer.
- Check: Lightly spray with soapy water—water beads highlight imperfections (dry spots = low areas; pooling = high spots).
- Primer Surfacer: Sand cured primer with 320–400 grit wet/dry paper. Wet sanding prevents clogging. Use a sanding block—not hand sanding—to maintain flatness. Rinse frequently. Continue until water sheets evenly. Dry thoroughly; wipe with wax-and-grease remover before topcoat.
- Fiberglass Protocol:
- Phase 1 (60–80 grit): Remove mold lines. Wear full PPE—fiberglass dust is a skin/lung irritant.
- Phase 2 (100–120 grit): Smooth surface.
- Phase 3 (180–220 grit): Final prep.
- Safety: Wet sanding suppresses dust effectively. Use dedicated tools—fiberglass dust contaminates sanders used for other materials. Wipe with acetone before coating.
Safety: Protecting Yourself and Your Space
Sanding generates dust, noise, and debris. A thoughtful safety approach is inseparable from quality work.
Respiratory Protection: Match Filter to Hazard
- Wood Dust (General): N95 respirator for short tasks. For prolonged work or hardwoods (oak, walnut—known respiratory sensitizers), use a half-face respirator with P100 filters.
- Drywall Dust: N95 with exhalation valve (reduces heat). Contains gypsum and silica—irritating to lungs.
- Metal Dust: P100 filters. Aluminum dust is combustible in high concentrations—avoid confined, unventilated spaces.
- Fiberglass: P100 filters + sealed goggles. Fibers irritate skin and eyes.
- Lead Paint (Pre-1978 Homes): Strong Recommendation: Assume lead is present. Dry sanding creates hazardous dust. Hire a certified lead abatement professional. If minor repair is unavoidable: use wet methods, wear a P100 respirator with organic vapor cartridges, contain the area meticulously, and follow EPA RRP guidelines. Testing paint first is essential. Prioritize health—lead exposure risks are severe, especially for children and pregnant individuals.
- General Practice: Ensure respirator fits snugly (facial hair compromises seal). Replace filters when breathing resistance increases. Fit-test annually if used regularly.
Eye and Hearing Protection
- Eye Protection: ANSI Z87.1-rated safety glasses with side shields for general work. Sealed goggles for overhead sanding, metal work, or angle grinder use.
- Hearing Protection: Sanders often exceed 85 dB. Use earplugs (NRR 25–33 dB) or earmuffs (NRR 20–30 dB). For belt sanders or grinders (>100 dB), wear plugs under muffs. Keep protection accessible—attach to tool handles if helpful.
Dust Control Strategies
- Tool-Level: Connect sanders to shop vacuums with HEPA filters. Seal connections with tape to prevent leaks. A cyclone separator (e.g., Dust Deputy) extends vacuum life by capturing chips before the filter.
- Workspace Setup: Sand outdoors when weather and neighbors permit. Indoors: seal the room, use negative air pressure (box fan blowing out a window), and run an air scrubber with HEPA filtration during and after work.
- Cleanup: Damp mop floors and wipe surfaces—dry sweeping aerosolizes dust. Shower and change clothes after sanding to avoid carrying dust into living spaces. Wash work clothes separately.
Tool Safety Checklist (Pre-Use)
- [ ] Inspect power cord for damage
- [ ] Check sanding disc/pad for tears or wear
- [ ] Verify guards are secure (especially angle grinders)
- [ ] Test trigger operation
- [ ] Confirm dust port is clear and connected
- [ ] Ensure workpiece is clamped or stabilized
- [ ] Clear workspace of tripping hazards and flammables
Emergency Preparedness
- Keep a first-aid kit and eye wash station accessible.
- Know the location of emergency power cutoffs when using grinders.
- Have a Class ABC fire extinguisher nearby when sanding near flammables.
- Inform someone of your project location and timeline when working alone.
Troubleshooting Common Challenges: Practical Solutions
Even experienced crafters encounter issues. Calm diagnosis prevents frustration.
Swirl Marks
- Likely Causes: Dull/clogged paper, excessive pressure causing pad tilt, moving too quickly, sanding against grain, using an orbital (not ROS) sander with coarse grits.
- Diagnosis: Fine circular/elliptical scratches visible under low-angle light. Often appear after staining.
- Solution: Step back one grit (e.g., from 180 to 150). Sand with the grain using light, even pressure. Ensure ROS pad is flat. Check progress frequently with a mineral spirits wipe (wood). Once swirls disappear, progress back to final grit. Prevention: Change paper when cutting slows; maintain light pressure; for critical finishes, follow power sanding with a hand-sanding pass with the grain.
Uneven Surfaces (“Dishing”)
- Causes: Lingering in one spot, starting/stopping sander on workpiece, uneven pressure, sanding across joints of differing hardness.
- Diagnosis: Localized depression visible under raking light; feels like a shallow bowl.
- Solution: Minor: Sand surrounding area to feather the depression using a long straight block. Severe: May require filling (wood putty, body filler) and re-sanding. Prevention: Maintain steady motion; start sander before contact, lift after stopping; check flatness periodically with a straightedge; reduce pressure over hard spots like knots.
Burn Marks on Wood
- Causes: Dull paper generating friction heat, excessive pressure, moving too slowly, resinous wood clogging paper.
- Diagnosis: Dark discoloration, often with a “glazed” surface where pores are sealed.
- Solution: Sand affected area with coarse grit (60–80) to remove burned layer, then progress carefully through grits. Prevention: Use sharp abrasives; let the tool cut—avoid pressing hard; maintain steady movement; for resinous woods, use stearated paper and clean frequently.
Clogged Sandpaper (“Loading”)
- Causes: Resin (pine, cedar), paint residue, insufficient dust extraction, wrong abrasive type.
- Diagnosis: Paper feels slick; material removal slows dramatically.
- Solution: Replace paper immediately. A rubber sanding cleaning stick may restore light cutting ability temporarily for minor tasks. Prevention: Use stearated paper for resinous woods; ensure dust extraction is active; remove bulk paint chemically before sanding; select correct abrasive (aluminum oxide for wood; silicon carbide for metal/wet sanding).
Rounded Edges
- Causes: Sanding edges with power tool without caution, excessive pressure near edges, using large ROS on narrow stock.
- Diagnosis: Edges feel soft instead of crisp; visible under raking light.
- Solution: Minor: Use a sanding block with a straight edge guide; protect adjacent faces with masking tape. Prevention: Reduce pressure by 50% within 1/8 inch of edges; stop power sanding short of edges and finish by hand; apply masking tape to adjacent surfaces when sanding edges; for narrow stock (<3 inches), sand entirely by hand.
Persistent Roughness After Finishing
- Causes: Skipping grit levels, not sanding with the grain on final pass, unaddressed raised grain, dust contamination during finishing.
- Diagnosis: Surface feels rough after finish cures, especially with water-based products.
- Solution: Lightly sand entire surface with appropriate grit (220–320; dry for oil-based, wet for water-based). Remove all dust with tack cloth. Apply additional finish coat. Prevention: Follow grit progression; hand-sand final pass with the grain; pre-raise grain on wood before final sanding; maintain a clean environment during finishing.
Advanced Applications: Expanding Your Toolkit
Sanding Between Finish Coats
Critical for adhesion and eliminating texture between layers. Skipping this risks peeling or visible brush marks.
Reliable Process:
1. Confirm Cure: Wait until finish is fully cured per manufacturer instructions (not just dry to touch). Test: press thumbnail firmly—no mark should remain.
2. Select Grit: Oil-based finishes: 320–400 grit dry sanding. Water-based finishes: 400+ grit wet sanding (prevents clogging). Lacquer: 600+ grit wet sanding.
3. Technique: Use ROS on lowest speed or hand sand with soft block. Apply feather-light pressure—goal is to scuff, not remove material. Sand until surface changes from glossy to uniformly matte. For wet sanding, use lubricant (water with drop of dish soap); rinse frequently. Stop when slurry runs clear.
4. Dust Removal: Wipe thoroughly with tack cloth. Follow with lint-free rag dampened appropriately (mineral spirits for oil-based; water for water-based). Inspect under bright light—any dust particle will show through the next coat.
5. Timing: Apply next coat within a few hours for optimal adhesion, before the surface re-contaminates.
Intentional Texturing Techniques
Sanding isn’t always about smoothness—texture can enhance character.
- Wire Brushing (Grain Emphasis):
- Sand wood to 120 grit.
- Use a brass or stainless steel wire brush with the grain.
- Apply moderate pressure—soft springwood brushes away; hard summerwood remains.
- Wipe debris; lightly sand with 150 grit to soften sharp edges.
- Best Woods: Oak, ash, hickory (pronounced grain). Avoid subtle-grain woods like maple. Pairs well with oil or wax finishes for rustic pieces.
- Hand Distressing (Antique Effect):
- Complete all sanding to final grit (180–220).
- Before finishing: Create subtle dents with ball peen hammer, chains, or nails—focus on edges and high-wear areas.
- Lightly sand distressed areas with 220 grit to soften sharp edges (prevents splinters).
- Apply stain; distressed areas absorb more color, enhancing authenticity. Tip: Practice on scrap first. Less is often more—subtlety reads as intentional.
- Matte Finish via Skip-Grit:
- Complete Phases 1 and 2 normally.
- Stop Phase 3 at 150 grit (instead of progressing finer).
- Apply finish. The subtle texture holds wax well and reduces fingerprint visibility.
- Ideal For: Workshop tables, children’s furniture, industrial-style pieces. Not Suitable: High-gloss finishes or surfaces requiring smooth tactile feel.
Navigating Complex Shapes
Power tools struggle with non-flat surfaces. Hybrid approaches work best.
- Spindle Sander: For chair legs, table edges, rounded aprons. Use sleeves matching curve radius. Start coarse (80 grit), progress to 150. Rotate workpiece slowly against drum—don’t force. Safety: Keep hands clear; use push stick for small items.
- ROS with Drum Attachment: Flexible drum inserts into ROS pad. Ideal for inside curves (chair arms, guitar bodies). Use light pressure—the drum flexes to the contour.
- Hand Methods for Intricate Work:
- Dowel Wrap: Roll sandpaper around a wooden dowel matching the curve.
- Foam Pipe Insulation: Slide over PVC pipe; wrap paper around foam for gentle curves.
- Finger Sanding: For tight carvings, wrap fine grit (220+) around index finger (protect with tape). Sand following the carving’s grain direction.
- Custom Blocks: Carve scrap wood to match a contour; glue sandpaper to the surface.
- Deep Relief: Use dental picks wrapped with fine grit paper for inaccessible areas.
Final Readiness Checklist
Before applying any finish, conduct this multi-sensory review:
- Dry Visual Scan: Shine a bright LED flashlight at a 10-degree angle. Rotate the piece slowly. Look for shadow lines (scratches), glare spots (high areas), or dark patches (low areas).
- Wet Visual Scan (Wood/Metal): Wipe a small section with mineral spirits (wood) or water (metal). Defects become dramatically visible. Wood Specific: Pores should appear uniformly dark; scratches stand out as light lines.
- Tactile Scan: Close your eyes. Run fingertips across the grain (wood) or in multiple directions. Feel for residual roughness, waves, or ridges. Glide your palm flat over the surface—catches larger inconsistencies.
- Edge Verification: Run a fingernail lightly along edges. Should feel crisp (unless intentionally rounded). Check inside corners with a detail sander tip—should be clean, not fuzzy.
- Dust Audit: Wipe the entire surface with a white tack cloth. Inspect the cloth—any gray residue means more cleaning is needed. Gently blow air across the surface; watch for dust lifting.
- Final Decision: If any defect is found, address it now. Remember: finishes magnify flaws. What’s barely visible now will be obvious later. When in doubt, one additional light pass with the current grit is safer than proceeding. Perfection is achieved when nothing essential remains to remove—not when nothing remains to add.
Your Questions, Answered
Q: What’s the most frequent oversight beginners make when sanding?
A: Skipping intermediate grits. Jumping from 80 directly to 220 grit leaves deep scratches that become glaringly obvious after staining or finishing. Each grit’s role is to remove the scratches of the prior one. Patience in progression prevents hours of rework. Think of sanding as a conversation with the material—listen to what each stage reveals before moving on.
Q: How do I know precisely when to replace sandpaper?
A: Watch for three clear signals: 1) The paper feels slick or glossy under your fingers (glazing), 2) Material removal slows noticeably despite consistent motion, 3) You instinctively press harder to achieve the same result. Dull paper generates heat instead of cutting, risking surface damage. As a practical guide: coarse grits (40–80) may last 5–10 minutes of active use; medium grits (100–150) 10–15 minutes; fine grits (180+) 15–20 minutes. Resinous woods like pine require more frequent changes. A sanding cleaning stick offers a temporary fix for light tasks, but fresh paper is always best for critical stages.
Q: Is a hand-sanding pass truly necessary after using a random orbital sander?
A: For visible wood surfaces where finish quality matters—yes, a final light hand-sanding pass with the grain is widely recommended by experienced woodworkers. While ROS minimizes patterns, microscopic cross-grain scratches can remain, becoming visible under light stains or clear coats. Hand sanding with a soft block and 220+ grit in the direction of the grain erases these. Exception: Large, flat surfaces viewed from a distance (like tabletops) may not require this if using a high-quality ROS with fresh fine grits. When in doubt, test on a scrap or inconspicuous area first.
Q: Why does my wood feel rough again after applying a water-based finish?
A: Water causes wood fibers to swell—a natural reaction called “raised grain.” This is predictable, not a mistake. Solution: After your initial sanding to 180 grit, lightly dampen the entire surface with distilled water using a spray bottle or damp sponge. Let it dry completely (1–2 hours in typical conditions). Lightly sand again with 220 grit—this “pre-raises” the grain so the finish won’t trigger further roughness. Wipe thoroughly with a tack cloth before finishing. For very resinous or soft woods, repeating this process once may be beneficial. This extra step consistently prevents post-finish roughness.
Q: Can I sand pressure-treated lumber for a deck project?
A: Yes, with important considerations. First, ensure the wood is fully dry—this can take weeks to months after installation depending on climate and treatment. Sanding wet lumber clogs paper instantly and yields poor results. Second, start at 80 grit to remove mill glaze (the compressed surface layer from manufacturing), progressing to 100 or 120 grit. Avoid sanding finer than 120 grit—decks benefit from slight texture for slip resistance. Third, and critically: wear a P100 respirator. Pressure-treated wood contains preservatives; inhaling this dust poses health risks. Sand on a calm day, use dust collection if possible, and clean up thoroughly afterward. Always check the lumber’s end tag for specific safety guidance regarding its treatment type.
Q: What’s the appropriate final grit before applying wood stain?
A: It depends on wood species and stain type: Softwoods (pine, cedar): 150–180 grit. Hardwoods (oak, maple): 180–220 grit. For blotch-prone woods (cherry, birch, maple), sand to 220 grit and use a pre-stain conditioner. Avoid sanding finer than 220 grit before stain—too smooth a surface can hinder proper stain penetration, leading to uneven color. The goal is a uniformly smooth surface with enough “tooth” for the stain to absorb evenly. Always test your grit progression and stain on scrap wood from the same project before committing to the entire piece.
Q: How can I sand a small floor area without renting a drum sander?
A: For spot repairs or very small areas (under 50 sq ft): Use a belt sander with 40 grit for old finish removal, progressing through 60 → 80 → 100 → 120 grits. Work in small sections (2×2 ft), overlapping passes. For edges and corners, use a detail sander. Critical: Always sand with the floorboards’ grain direction. Check flatness frequently with a straightedge. However, be aware: DIY floor sanding is physically demanding. Inconsistent pressure easily creates waves visible after finishing. For areas larger than a small closet, the investment in professional rental (with instruction) or hiring a specialist often yields better results and reduces physical strain. If proceeding DIY, watch reputable tutorial videos focused specifically on floor sanding technique first.
Q: Is dry sanding lead-based paint ever safe for a DIYer?
A: Dry sanding lead-based paint is strongly discouraged for DIYers due to severe health risks from lead dust exposure. If your home was built before 1978 and paint is deteriorating: 1) Have the paint tested by a certified laboratory—do not assume. 2) If lead is confirmed, hire a certified lead abatement professional. For minor repairs where sanding is unavoidable under professional guidance: use wet sanding methods, wear a P100 respirator with organic vapor cartridges, contain the area meticulously with plastic sheeting, and follow all EPA Renovation, Repair, and Painting (RRP) rule protocols. However, given the complexity and irreversible health risks—especially to children and pregnant individuals—professional handling is the only recommended path. Safety must always come first.
Q: How do humidity and temperature affect sanding results?
A: Environmental conditions matter. High humidity can cause wood to swell slightly, making sanding less effective and increasing raised grain risk after finishing. Very dry air (<30% humidity) increases static electricity, causing dust to cling stubbornly to surfaces and tools—lightly misting the air (not the workpiece) or using an anti-static spray on sandpaper may help. Temperature extremes affect PSA (sticky-back) sandpaper: cold reduces adhesion; heat can cause premature release. For best results, allow wood, abrasives, and finishes to acclimate to your workspace for 24–48 hours before starting. When working outdoors, avoid windy days to minimize dust inhalation and contamination. Observing how your specific environment interacts with materials builds valuable intuition over time.
Conclusion and Next Step
Recap: Three Anchors for Confident Sanding
This guide centers on three adaptable principles: (1) Progress deliberately through grit stages—each exists to prepare for the next; (2) Match your tool, pressure, and technique to the material’s nature and your project’s purpose; (3) Integrate safety and inspection into every phase. These aren’t rigid rules but responsive practices. Whether sanding a child’s toy or restoring a heirloom, returning to these anchors builds consistency and reduces uncertainty.
The 24-Hour Readiness Pause
After completing sanding and before applying any finish, allow your project to rest in its intended environment for at least 24 hours. This pause lets materials stabilize—wood adjusts to ambient humidity, dust fully settles, and your perspective refreshes. During this time, conduct a final inspection under natural and artificial light from multiple angles. Subtle imperfections often reveal themselves only after this settling period. This small investment of patience prevents the disappointment of discovering flaws beneath a cured finish—a step many experienced crafters consider non-negotiable.
The Broader Perspective: Sanding Within the Craft
Sanding is never an isolated task. It exists within a thoughtful sequence: material selection, construction, surface preparation, finishing, and care. How you sand directly influences how stain penetrates, how paint adheres, and how a surface weathers use. Viewing sanding as an integrated step—not merely a chore—fosters deeper engagement with your work. With practice, the tactile feedback of a well-prepared surface becomes its own reward: a quiet confidence that the foundation is sound. This mindset transforms routine preparation into purposeful craft, where attention to detail honors both the material and the maker.
Explore Related Guidance:
Refinishing Wood Furniture Step-by-Step | Drywall Repair and Finishing Mastery | Metal Surface Prep for Painting | Workshop Dust Control Systems | Choosing Wood Finishes for Durability | Safe Chemical Stripping Methods | Building a Beginner’s Tool Kit